React Server Side Rendering

React has become one of the most popular libraries for building modern web applications, and its ecosystem continues to evolve with new features and patterns. Whether you’re a beginner or an experienced developer, understanding key React concepts such as React Server Side Rendering (SSR), Persisting Data to Local Storage, Connecting to Backend Services, and Higher Order Components (HOC) is essential. In this guide, we will dive deep into these important concepts with practical examples and best practices.

What is React Server Side Rendering (SSR)?

React Server Side Rendering (SSR) is a technique that renders a React application on the server instead of the client. This approach significantly improves initial load times and SEO, as the content is already rendered when the page is served to the browser. The React SSR process involves sending a fully rendered page from the server to the client, reducing the time it takes for users to see the content.

When building a React application, using server side rendering Next.js is one of the easiest ways to implement SSR. Next.js provides built-in support for React SSR out of the box, offering server-side rendering for your React components with minimal setup.

Setting Up SSR with React and Next.js

Here’s how you can set up a basic ReactJS server-side rendering with Next.js:

File Name: pages/index.js

import React from 'react';

const Home = () => {
  return (
    <div>
      <h1>Welcome to React Server Side Rendering with Next.js!</h1>
      <p>This content is rendered on the server.</p>
    </div>
  );
};

export default Home;

With Next.js, you don’t need to manually set up a server. The framework automatically handles SSR for your pages. This makes it one of the most efficient ways to implement React server side rendering.

Why Use SSR in React?

  • Improved SEO: Since the page content is rendered before being sent to the browser, search engines can crawl and index it much more effectively.
  • Faster Initial Load: Users receive fully rendered HTML, resulting in a quicker time to first paint.
  • Better User Experience: The app feels faster as the content is already available, even before React takes over on the client-side.

In addition to server-side rendering Next.js, SSRs React applications also allow you to build more SEO-friendly, fast-loading websites.


Persisting Data to Local Storage

Local Storage allows you to store data directly on the user’s browser, which can persist even after a page reload. This is especially useful for saving user preferences, authentication tokens, or any other data you want to keep available between sessions.

Example: Saving User Theme Preference to Local Storage

In this example, we’ll store the user’s theme preference (light/dark mode) in Local Storage so that it persists even after a page reload.

File Name: App.js

import React, { useEffect, useState } from 'react';

function App() {
  const [theme, setTheme] = useState('light');

  useEffect(() => {
    const savedTheme = localStorage.getItem('theme');
    if (savedTheme) {
      setTheme(savedTheme);
    }
  }, []);

  useEffect(() => {
    localStorage.setItem('theme', theme);
  }, [theme]);

  const toggleTheme = () => {
    setTheme(theme === 'light' ? 'dark' : 'light');
  };

  return (
    <div className={theme}>
      <h1>React Local Storage Example</h1>
      <button onClick={toggleTheme}>Toggle Theme</button>
    </div>
  );
}

export default App;

Best Practices for Local Storage:

  • Security Considerations: Do not store sensitive information like passwords or tokens in Local Storage, as it’s easily accessible from the client-side.
  • Handling Fallbacks: Check if Local Storage is supported before accessing it, as certain browser modes (e.g., Incognito) may disable it.
  • Data Size: Local Storage has a storage limit (typically around 5MB per domain). Be mindful of the size of data you’re storing.

Connecting React to Backend Services

Most React apps require interaction with a backend to fetch data, authenticate users, or perform other server-side tasks. You can connect to backend services using fetch or libraries like Axios. These tools help you interact with REST APIs, handle HTTP requests, and manage asynchronous data flow.

Example: Fetching Data from an API in React

Here’s an example of how to fetch and display data from an API in a React app:

File Name: App.js

import React, { useState, useEffect } from 'react';

function App() {
  const [data, setData] = useState(null);
  const [loading, setLoading] = useState(true);

  useEffect(() => {
    fetch('https://jsonplaceholder.typicode.com/posts')
      .then((response) => response.json())
      .then((data) => {
        setData(data);
        setLoading(false);
      })
      .catch((error) => {
        console.error('Error fetching data:', error);
        setLoading(false);
      });
  }, []);

  if (loading) {
    return <h1>Loading...</h1>;
  }

  return (
    <div>
      <h1>Posts</h1>
      <ul>
        {data.map((post) => (
          <li key={post.id}>{post.title}</li>
        ))}
      </ul>
    </div>
  );
}

export default App;

Best Practices for Backend Integration:

  • Error Handling: Always include proper error handling when interacting with backend services.
  • Loading States: Use loading indicators to let the user know that the app is fetching data.
  • Authentication: Secure API requests with tokens (e.g., JWT) or other authentication methods.
React Server Side Rendering

Understanding Higher-Order Components (HOC)

A Higher-Order Component (HOC) is a pattern in React that allows you to reuse logic across components. HOCs take a component and return a new one with additional props or functionality. This is a powerful tool for adding common features like authentication checks, data fetching, or other behaviors that can be reused in multiple components.

Example: Creating a Simple HOC

Here’s a simple example of how to create an HOC that adds a name prop to a component.

File Name: withName.js

import React from 'react';

const withName = (WrappedComponent) => {
  return (props) => {
    const name = 'John Doe';
    return <WrappedComponent {...props} name={name} />;
  };
};

export default withName;

File Name: App.js

import React from 'react';
import withName from './withName';

function App({ name }) {
  return <h1>Hello, {name}!</h1>;
}

export default withName(App);

When to Use HOCs:

  • Reusability: HOCs are perfect for encapsulating logic that is shared across multiple components.
  • Separation of Concerns: HOCs allow you to abstract complex logic away from UI components, keeping them simple and focused on rendering.
  • Code Composition: You can chain multiple HOCs together to compose different behaviors.

FAQs

1. What is the benefit of React server side rendering (SSR)?

Answer: React SSR improves SEO by pre-rendering the page on the server, so search engines can easily crawl and index the content. It also improves performance by reducing the initial load time for users.

2. How do I enable SSR React in a Next.js app?

Answer: Next.js automatically handles React SSR for all pages, so you don’t need to do anything extra. Just create React components, and Next.js will render them on the server.

3. What’s the difference between SSRs React and client-side rendering (CSR)?

Answer: In SSR React, the server pre-renders the HTML, which is sent to the client. In CSR, the client initially loads a minimal HTML file and then React takes over to render the page on the client-side.

4. Is there any performance overhead with React server side rendering?

Answer: While SSR React provides faster initial loading and better SEO, there can be some performance overhead on the server, especially for large-scale applications. However, tools like Next.js optimize SSR performance with features like static site generation (SSG) and caching.

Thank you for reading! If you found this guide helpful and want to stay updated on more React.js content, be sure to follow us for the latest tutorials and insights: JavaDZone React.js Tutorials. Happy coding! 

React Redux Essentials: A Comprehensive Guide

Redux is one of the most popular state management libraries in the JavaScript ecosystem. Whether you’re working on a large-scale React application or a small project, Redux can help you manage state in a predictable and scalable way. In this guide, we’ll break down Redux essentials, starting with setting up Redux, understanding Redux store and reducers, and diving into middleware with Redux Thunk. Along the way, we’ll provide practical examples, best practices, and step-by-step instructions to help you get started and take full advantage of Redux in your React applications.

What is Redux?

Redux is a predictable state container for JavaScript apps. It helps you manage the state of your application in a centralized store, making it easier to debug, test, and maintain. Redux enforces a strict unidirectional data flow, which means that all changes to the state happen in a predictable manner.

At its core, Redux is made up of three main principles:

  1. Single source of truth – The entire state of your application is stored in a single object (the store).
  2. State is read-only – You can only change the state by dispatching actions, which are plain JavaScript objects.
  3. Changes are made with pure functions – Reducers are pure functions that specify how the state changes in response to actions.

Setting Up Redux

Before you can use Redux in your project, you’ll need to install Redux and React-Redux. React-Redux is the official binding library that allows React components to interact with the Redux store.

Step 1: Install Redux and React-Redux

Run the following commands to install both Redux and React-Redux:

npm install redux react-redux

Step 2: Set Up the Redux Store

The store is where your application’s state lives. It holds the entire state tree, and you interact with it using actions and reducers.

Create a file called store.js to set up your Redux store:

store.js

import { createStore } from 'redux';
import rootReducer from './reducers'; // We'll create reducers later

// Creating the Redux store with the rootReducer
const store = createStore(rootReducer);

export default store;

Step 3: Provide the Store to Your React Application

In order for your React components to access the Redux store, you need to use the Provider component from React-Redux and pass the store as a prop.

Modify your index.js file to wrap the entire app with the Provider:

index.js

import React from 'react';
import ReactDOM from 'react-dom';
import { Provider } from 'react-redux';
import App from './App';
import store from './store';

ReactDOM.render(
  <Provider store={store}>
    <App />
  </Provider>,
  document.getElementById('root')
);

Now, your React app is connected to Redux, and any component can access the Redux store.

Redux Essentials and Reducers

What is a Reducer?

A reducer is a function that determines how the state changes in response to an action. It takes the current state and an action as arguments, and returns a new state object.

Reducers are pure functions, meaning they do not mutate the state but return a new state object based on the old one.

Creating a Simple Reducer

Let’s create a simple reducer to manage a list of users. The reducer will handle two actions: adding a user and removing a user.

Create a file called userReducer.js:

userReducer.js

const initialState = {
  users: []
};

const userReducer = (state = initialState, action) => {
  switch (action.type) {
    case 'ADD_USER':
      return {
        ...state,
        users: [...state.users, action.payload]
      };
    case 'REMOVE_USER':
      return {
        ...state,
        users: state.users.filter(user => user.id !== action.payload)
      };
    default:
      return state;
  }
};

export default userReducer;

Now, let’s combine this reducer with any other reducers you may have in your project (we’ll assume there is just this one for simplicity).

Create a rootReducer.js file to combine the reducers:

rootReducer.js

import { combineReducers } from 'redux';
import userReducer from './userReducer';

const rootReducer = combineReducers({
  user: userReducer
});

export default rootReducer;

Dispatching Actions

To trigger a state change, you need to dispatch actions. Actions are plain JavaScript objects with a type property that indicates what kind of action is being performed.

For example, to add a user, we can dispatch an action like this:

actions.js

export const addUser = (user) => ({
  type: 'ADD_USER',
  payload: user
});

export const removeUser = (userId) => ({
  type: 'REMOVE_USER',
  payload: userId
});

Connecting Redux to React Components

To use the Redux state and dispatch actions in your React components, you will need to connect them using the useSelector and useDispatch hooks from React-Redux.

Here’s an example of a UserList component that displays a list of users and allows you to add and remove users:

UserList.js

import React, { useState } from 'react';
import { useSelector, useDispatch } from 'react-redux';
import { addUser, removeUser } from './actions';

const UserList = () => {
  const [userName, setUserName] = useState('');
  const users = useSelector(state => state.user.users);
  const dispatch = useDispatch();

  const handleAddUser = () => {
    if (userName.trim()) {
      dispatch(addUser({ id: Date.now(), name: userName }));
      setUserName('');
    }
  };

  const handleRemoveUser = (userId) => {
    dispatch(removeUser(userId));
  };

  return (
    <div>
      <h2>User List</h2>
      <input
        type="text"
        value={userName}
        onChange={(e) => setUserName(e.target.value)}
        placeholder="Enter user name"
      />
      <button onClick={handleAddUser}>Add User</button>
      <ul>
        {users.map(user => (
          <li key={user.id}>
            {user.name}
            <button onClick={() => handleRemoveUser(user.id)}>Remove</button>
          </li>
        ))}
      </ul>
    </div>
  );
};

export default UserList;

In this example, we use the useSelector hook to access the list of users from the Redux store, and the useDispatch hook to dispatch actions for adding and removing users.

Middleware with Redux Thunk

What is Redux Thunk?

Redux Thunk is a middleware that allows you to write action creators that return a function instead of an action object. This function can dispatch other actions and perform asynchronous operations, such as fetching data from an API.

Setting Up Redux Thunk

To use Redux Thunk, you need to install the middleware:

npm install redux-thunk

Next, modify your store.js file to include Redux Thunk middleware:

store.js

import { createStore, applyMiddleware } from 'redux';
import thunk from 'redux-thunk';
import rootReducer from './reducers';

// Creating the Redux store with Redux Thunk middleware
const store = createStore(
  rootReducer,
  applyMiddleware(thunk)
);

export default store;

Example of an Asynchronous Action with Redux Thunk

Now, let’s write an asynchronous action to fetch user data from an API. We will dispatch actions to indicate the loading state, successfully fetching data, or handling errors.

actions.js

export const fetchUsers = () => {
  return async (dispatch) => {
    dispatch({ type: 'FETCH_USERS_REQUEST' });

    try {
      const response = await fetch('https://jsonplaceholder.typicode.com/users');
      const data = await response.json();
      dispatch({ type: 'FETCH_USERS_SUCCESS', payload: data });
    } catch (error) {
      dispatch({ type: 'FETCH_USERS_FAILURE', payload: error.message });
    }
  };
};

In this example, the fetchUsers action creator returns a function that performs an asynchronous fetch request. Based on the response, it dispatches actions to update the Redux state.

Handling Asynchronous Actions in Reducers

Finally, you need to handle the asynchronous actions in your reducer. Here’s an example of how you can modify the userReducer.js to handle loading, success, and failure states:

userReducer.js

const initialState = {
  users: [],
  loading: false,
  error: null
};

const userReducer = (state = initialState, action) => {
  switch (action.type) {
    case 'FETCH_USERS_REQUEST':
      return { ...state, loading: true };
    case 'FETCH_USERS_SUCCESS':
      return { ...state, loading: false, users: action.payload };
    case 'FETCH_USERS_FAILURE':
      return { ...state, loading: false, error: action.payload };
    default:
      return state;
  }
};

export default userReducer

;

Best Practices for Using Redux

  1. Keep State Normalized: Instead of nesting data, keep your state normalized. This means using an array of objects and referencing them by ID, rather than having deeply nested structures.
  2. Split Reducers: Break down your reducers into smaller, more manageable pieces based on different sections of state. Use combineReducers to combine them.
  3. Use Selectors: Rather than accessing the Redux state directly inside components, use selectors to encapsulate how you access the state. This makes your components cleaner and more reusable.
  4. Limit Side Effects: Keep side effects (e.g., data fetching) in action creators or middleware (like Redux Thunk). Avoid putting side effects directly inside reducers.
  5. Avoid Overusing Redux: If your app’s state management doesn’t need Redux, don’t force it. React’s built-in useState and useReducer hooks may be more suitable for simpler cases.

FAQ

1. Do I always need Redux in my React app?

No. Redux is useful when your app grows complex and managing state between multiple components becomes difficult. For small apps, React’s built-in state management may be sufficient.

2. What is the difference between Redux and React Context API?

Both Redux and the Context API are used for state management, but Redux is more powerful and has additional features such as middleware, devtools support, and more explicit control over state flow.

3. How do I test my Redux store and reducers?

Testing Redux involves writing unit tests for reducers, action creators, and components connected to Redux. You can use testing libraries like Jest to test your reducers’ logic and components.


Thank you for reading! If you found this guide helpful and want to stay updated on more React.js content, be sure to follow us for the latest tutorials and insights: JavaDZone React.js Tutorials. Happy coding!
Related Posts:

Authentication and Authorization in React

In today’s web development landscape, managing user authentication and authorization in React is crucial for building secure applications. When developing React apps, handling these processes effectively ensures that only authenticated users can access protected routes, and that users with different roles have access to the appropriate features. In this guide, we’ll explore the process of implementing login and signup forms, using Token-based Authentication (JWT), and setting up Role-based Authorization in a React application. We’ll walk through practical examples, best practices, and tips that will help both beginners and experienced developers build secure React apps.

Let’s dive in!

1. Setting Up Your React Project

Before diving into authentication and authorization, let’s set up a React project. If you haven’t done that already, follow these steps:

Step 1: Initialize a React App

npx create-react-app react-auth-example
cd react-auth-example
npm start

Step 2: Install Dependencies

For handling authentication and authorization, we will need some additional libraries like axios for making HTTP requests and react-router-dom for routing.

npm install axios react-router-dom

2. Implementing Login and Signup Forms

Let’s start by implementing simple login and signup forms in React. These forms will allow users to input their credentials, which will then be sent to the backend for validation.

File: LoginForm.js

import React, { useState } from 'react';
import axios from 'axios';

const LoginForm = () => {
    const [email, setEmail] = useState('');
    const [password, setPassword] = useState('');
    const [error, setError] = useState('');

    const handleLogin = async (e) => {
        e.preventDefault();
        try {
            const response = await axios.post('/api/login', { email, password });
            localStorage.setItem('token', response.data.token);  // Save JWT token to localStorage
            alert('Login successful');
        } catch (err) {
            setError('Invalid credentials');
        }
    };

    return (
        <form onSubmit={handleLogin}>
            <h2>Login</h2>
            <input
                type="email"
                placeholder="Email"
                value={email}
                onChange={(e) => setEmail(e.target.value)}
                required /> <br />
            <input
                type="password"
                placeholder="Password"
                value={password}
                onChange={(e) => setPassword(e.target.value)}
                required
            /> <br />
            <button type="submit">Login</button>
            {error && <p>{error}</p>}
        </form>
    );
};

export default LoginForm;

File: SignupForm.js

import React, { useState } from 'react';
import axios from 'axios';
 
const SignupForm = () => {
  const [email, setEmail] = useState('');
  const [password, setPassword] = useState('');
  const [error, setError] = useState('');
 
  const handleSignup = async (e) => {
    e.preventDefault();
    try {
      const response = await axios.post('/api/signup', { email, password });
      alert('Signup successful');
    } catch (err) {
      setError('Something went wrong');
    }
  };
 
  return (
    <form onSubmit={handleSignup}>
      <h2>Signup</h2>
      <input 
        type="email"
        placeholder="Email"
        value={email} 
        onChange={(e) => setEmail(e.target.value)} 
        required 
      /> <br />
      <input 
        type="password"
        placeholder="Password"
        value={password} 
        onChange={(e) => setPassword(e.target.value)} 
        required 
      /> <br />
      <button type="submit">Signup</button>
      {error && <p>{error}</p>}
    </form>
  );
};
 
export default SignupForm;

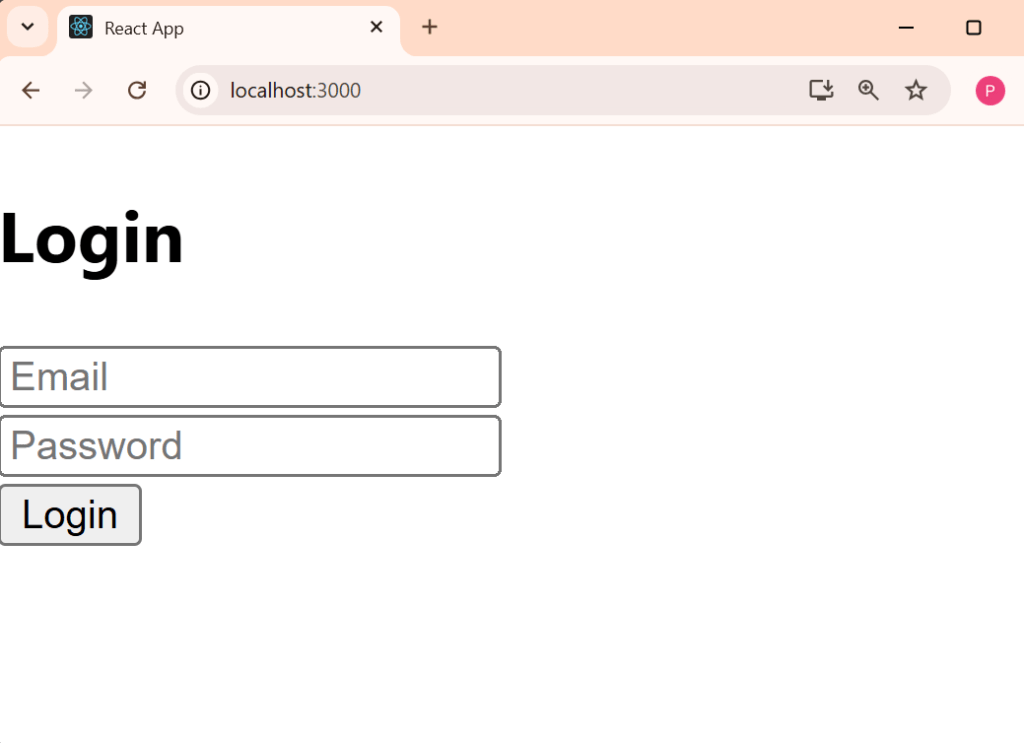
Expected Output for Login Page:

  • Form Fields: Email and Password fields.
  • Button: “Login” button to submit credentials.
  • Error Handling: If the credentials are incorrect, an error message is shown.

Screenshot of the Login Form:

Authentication and Authorization in React

Behavior:

  • After entering valid credentials and clicking the “Login” button, a token is stored in localStorage and the user is logged in.
  • If credentials are invalid, an error message will be displayed: “Invalid credentials”.

Expected Output for Signup Page:

  • Form Fields: Email and Password fields.
  • Button: “Signup” button to submit data.
  • Error Handling: If there’s an error, like the user already exists, an error message is shown.

Screenshot of the Signup Form:

Authentication and Authorization in React js

Behavior:

  • After a successful signup, the user is redirected to the login page or logged in automatically based on your app’s flow.
  • If there’s an error (e.g., user already exists), the form will display an error message: “Something went wrong”.

3. Token-Based Authentication with JWT

JWT (JSON Web Tokens) is widely used for securing APIs. After a user logs in, the server issues a token which can be stored on the client-side (usually in localStorage or sessionStorage). This token is then sent along with requests to protected routes.

Let’s simulate a login flow using JWT.

File: AuthService.js (Handles Authentication)

import axios from 'axios';

const API_URL = 'https://example.com/api';  // Replace with your API URL

export const login = async (email, password) => {
  try {
    const response = await axios.post(`${API_URL}/login`, { email, password });
    if (response.data.token) {
      localStorage.setItem('token', response.data.token);
    }
    return response.data;
  } catch (error) {
    console.error('Login failed:', error);
    throw error;
  }
};

export const signup = async (email, password) => {
  try {
    const response = await axios.post(`${API_URL}/signup`, { email, password });
    return response.data;
  } catch (error) {
    console.error('Signup failed:', error);
    throw error;
  }
};

export const getToken = () => localStorage.getItem('token');
export const logout = () => localStorage.removeItem('token');

Example API Response (Simulated):

{
  "status": "success",
  "token": "eyJhbGciOiJIUzI1NiIsInR5cCI6IkpXVCJ9.eyJ1c2VyX2lkIjoxMjM0NTY3ODkwLCJleHBpcmVkX3N0YXR1cyI6IlJlY3VzdGVyIn0._g1Jj9H9WzA5eKMR7MLD2oYq-sYcJtw3E4PEp4B4BGU"
}

Behavior:

  • The token is saved in localStorage:
localStorage.setItem('token', 'eyJhbGciOiJIUzI1NiIsInR5cCI6IkpXVCJ9.ey...');

Now, every time the user makes a request (like accessing a protected route), the token will be sent in the Authorization header.


4. Role-Based Authorization

Role-based authorization allows you to define access control by assigning roles to users (e.g., Admin, User, Manager). We can then restrict access to specific parts of the application based on these roles.

File: PrivateRoute.js (Role-based Authorization)

import React from 'react';
import { Redirect, Route } from 'react-router-dom';
import { getToken } from './AuthService';

const PrivateRoute = ({ component: Component, allowedRoles, ...rest }) => {
  const token = getToken();
  let role = 'user';  // Simulate role (in real applications, you'd fetch this from the server)

  if (!token) {
    return <Redirect to="/login" />;
  }

  if (allowedRoles && !allowedRoles.includes(role)) {
    return <Redirect to="/unauthorized" />;
  }

  return <Route {...rest} render={(props) => <Component {...props} />} />;
};

export default PrivateRoute;

In this example, the PrivateRoute component checks whether the user is logged in and whether they have the required role to access a particular route.

Example Usage of PrivateRoute

import React from 'react';
import { BrowserRouter as Router, Route, Switch } from 'react-router-dom';
import AdminPage from './

AdminPage';
import UserPage from './UserPage';
import LoginPage from './LoginPage';
import PrivateRoute from './PrivateRoute';

const App = () => (
  <Router>
    <Switch>
      <Route path="/login" component={LoginPage} />
      <PrivateRoute path="/admin" component={AdminPage} allowedRoles={['admin']} />
      <PrivateRoute path="/user" component={UserPage} allowedRoles={['user', 'admin']} />
      <Redirect from="/" to="/login" />
    </Switch>
  </Router>
);

export default App

5. Best Practices for Secure Authentication

Here are some best practices to follow when handling authentication and authorization in your React app:

  • Use HTTPS: Always use HTTPS to encrypt data transmission and protect sensitive information like passwords and tokens.
  • Secure Tokens: Store JWT tokens securely (prefer httpOnly cookies over localStorage for better security).
  • Token Expiry: Implement token expiry and refresh mechanisms to prevent unauthorized access.
  • Role Validation: Perform role validation both on the frontend and backend to ensure users only access routes and resources they’re authorized for.
  • Error Handling: Handle authentication errors gracefully by showing user-friendly messages, like “Invalid credentials” or “Session expired.”

6. FAQs

Q1: What is JWT and why is it used in authentication?

  • A1: JWT (JSON Web Token) is a compact, URL-safe token that contains JSON objects and is used for securely transmitting information between parties. It’s commonly used in authentication systems where the server issues a JWT token upon successful login, and the client sends this token with subsequent requests to validate the user’s identity.

Q2: How can I handle token expiration?

  • A2: You can handle token expiration by setting an expiration time for the token when it’s issued. On the client side, if the token is expired, you can redirect the user to the login page. Alternatively, you can implement token refresh mechanisms using refresh tokens.

Q3: Is role-based authorization necessary?

  • A3: Role-based authorization is highly recommended for applications where different users should have access to different levels of functionality. It ensures that sensitive resources are protected and that users only access the parts of the app they’re authorized to use.

7. Conclusion

Authentication and authorization are critical for ensuring your React app is secure and that users can only access the parts of your app they’re authorized to. By implementing login/signup forms, JWT authentication, and role-based authorization, you can create a robust security system that handles user identity and access control efficiently.

By following the best practices outlined in this guide, you can protect your app from unauthorized access while providing a smooth user experience. Happy coding!


Thank you for reading! If you found this guide helpful and want to stay updated on more React.js content, be sure to follow us for the latest tutorials and insights: JavaDZone React.js Tutorials.

Happy coding!

Related Posts:

CRUD Operations in React: First CRUD Application


CRUD operations in React —Create, Read, Update, and Delete—are the fundamental building blocks of any web application. In React, handling these operations is essential when working with data, whether it’s coming from a server or managed locally.

In this guide, we will walk you through building your very first CRUD application in React. You’ll learn how to:

  1. Set up your React application
  2. Perform Create, Read, Update, and Delete operations
  3. Manage state and handle user interactions
  4. Follow best practices for building React applications

This tutorial is suitable for beginners who are just starting with React, as well as experienced developers looking to reinforce their knowledge.

Setting Up Your React Application

To start with React, you need to set up your project environment. If you don’t have React installed yet, you can use Create React App, which sets up everything you need in one go.

Step 1: Create a New React App

npx create-react-app crud-app
cd crud-app
npm start

This will set up your React app in a folder named crud-app and start the development server.

Step 2: Creating the CRUD Components

Let’s break down the components we will create for our CRUD application:

  1. App.js: The main component to render the user interface.
  2. Form.js: A form to add and update data.
  3. List.js: A component to display the list of items.
  4. Item.js: A component to render each item in the list.

1. Creating the Form Component (Add & Update)

File: Form.js

In this component, users will be able to input new data or update existing data.

import React, { useState, useEffect } from 'react';

const Form = ({ currentItem, addItem, updateItem }) => {
  const [title, setTitle] = useState('');

  useEffect(() => {
    if (currentItem) {
      setTitle(currentItem.title);
    }
  }, [currentItem]);

  const handleSubmit = (e) => {
    e.preventDefault();
    if (currentItem) {
      updateItem({ ...currentItem, title });
    } else {
      addItem({ title });
    }
    setTitle('');
  };

  return (
    <form onSubmit={handleSubmit}>
      <input
        type="text"
        value={title}
        onChange={(e) => setTitle(e.target.value)}
        placeholder="Enter title"
        required
      />
      <button type="submit">{currentItem ? 'Update' : 'Add'} Item</button>
    </form>
  );
};

export default Form;

Explanation:

  • useState: This hook stores the title of the item.
  • useEffect: It updates the title when the currentItem changes (for updating an existing item).
  • handleSubmit: Handles form submission and either adds a new item or updates the existing one.

2. Creating the List Component (Display Items)

File: List.js

This component will display the list of items and handle the delete functionality.

import React from 'react';
import Item from './Item';

const List = ({ items, deleteItem, editItem }) => {
  return (
    <div>
      <h2>Item List</h2>
      <ul>
        {items.map((item) => (
          <Item key={item.id} item={item} deleteItem={deleteItem} editItem={editItem} />
        ))}
      </ul>
    </div>
  );
};

export default List;

3. Creating the Item Component (Individual Item)

File: Item.js

This component will render each individual item with the ability to edit and delete.

import React from 'react';

const Item = ({ item, deleteItem, editItem }) => {
  return (
    <li>
      {item.title}
      <button onClick={() => editItem(item)}>Edit</button>
      <button onClick={() => deleteItem(item.id)}>Delete</button>
    </li>
  );
};

export default Item;

4. Putting It All Together (App Component)

File: App.js

Now, let’s combine everything in the App.js file.

import React, { useState } from 'react';
import Form from './Form';
import List from './List';

const App = () => {
  const [items, setItems] = useState([]);
  const [currentItem, setCurrentItem] = useState(null);

  const addItem = (item) => {
    setItems([...items, { ...item, id: Date.now() }]);
  };

  const updateItem = (updatedItem) => {
    const updatedItems = items.map((item) =>
      item.id === updatedItem.id ? updatedItem : item
    );
    setItems(updatedItems);
    setCurrentItem(null); // Clear current item after update
  };

  const deleteItem = (id) => {
    setItems(items.filter((item) => item.id !== id));
  };

  const editItem = (item) => {
    setCurrentItem(item);
  };

  return (
    <div>
      <h1>CRUD Application</h1>
      <Form currentItem={currentItem} addItem={addItem} updateItem={updateItem} />
      <List items={items} deleteItem={deleteItem} editItem={editItem} />
    </div>
  );
};

export default App;

Output:

CRUD Operations in React

Explanation:

  • useState: Manages the list of items and the currently selected item for editing.
  • add Item: Adds a new item to the list.
  • update Item: Updates an existing item in the list.
  • delete Item: Deletes an item from the list.
  • edit Item: Sets the item for editing when the “Edit” button is clicked.

Best Practices for Building a CRUD Application in React

  1. State Management: Use hooks like useState to manage local component state, and useEffect for side effects like fetching data or updating the DOM.
  2. Component Modularity: Break down your application into reusable components like Form, List, and Item for better maintainability.
  3. Error Handling: Always handle possible errors, especially for operations like fetching data or interacting with APIs.
  4. Optimizing Performance: Consider using React.memo for memoizing components and useCallback for optimizing functions that are passed as props.
  5. User Experience: Add loading indicators when data is being fetched or processed, and provide feedback on successful or failed actions (e.g., item added, updated, or deleted).

FAQs

Q1. What are CRUD operations?

CRUD stands for Create, Read, Update, and Delete—the four basic operations for managing data in any web application.

Q2. How does React manage state for CRUD operations?

React uses the useState hook to manage local state. For CRUD operations, you can store the data in the state and update it based on user actions (like adding, updating, or deleting an item).

Q3. Can I use external APIs in this CRUD application?

Yes, you can integrate APIs to fetch or send data using methods like Axios or Fetch. Instead of managing data locally, you can make API calls to handle CRUD operations.

Q4. How do I handle validation in the form?

You can use the required attribute in form elements for basic validation or integrate libraries like Formik or React Hook Form for more advanced validation.

Q5. Can I add features like pagination or search to this CRUD app?

Yes, pagination and search are common features in CRUD applications. You can implement pagination by splitting the list into pages, and implement search by filtering the displayed list based on the search term.


Thank you for reading! If you found this guide helpful and want to stay updated on more React.js content, be sure to follow us for the latest tutorials and insights: JavaDZone React.js Tutorials. Happy coding!

API Calls in React with Axios and Fetch


When building modern web applications, making API calls is a common requirement. React offers two popular ways to handle HTTP requests: Axios and Fetch API. Both methods allow you to interact with RESTful APIs to perform CRUD operations like GET, POST, PUT, and DELETE.

API Calls in React with Axios and Fetch

In this guide, we will cover:

  1. Setting up Axios and Fetch
  2. Making GET, POST, PUT, DELETE requests
  3. Best practices for handling API calls
  4. Frequently Asked Questions (FAQs)

This tutorial is designed for both beginners and experienced developers to effectively make API calls in React using these two powerful tools.

Why Use Axios and Fetch for API Calls?

  • Axios is a promise-based HTTP client for the browser and Node.js. It simplifies HTTP requests and provides additional features like interceptors, request cancellation, and timeout handling.
  • Fetch API is a built-in JavaScript function for making network requests. It is lightweight and modern but may require more manual handling of errors compared to Axios.

Setting Up Axios

Install Axios in your React project using npm:

npm install axios

Import Axios in your component:

import axios from 'axios';

For Fetch API, no installation is required as it is built into JavaScript.

1. GET Request in React

Using Fetch API

File: App.js

import React, { useEffect, useState } from 'react';

const App = () => {
  const [data, setData] = useState([]);

  useEffect(() => {
    fetch('https://jsonplaceholder.typicode.com/posts')
      .then((response) => response.json())
      .then((data) => setData(data))
      .catch((error) => console.error('Error:', error));
  }, []);

  return (
    <div>
      <h1>Posts</h1>
      <ul>
        {data.map((post) => (
          <li key={post.id}>{post.title}</li>
        ))}
      </ul>
    </div>
  );
};

export default App;

Using Axios

File: App.js

import React, { useEffect, useState } from 'react';
import axios from 'axios';

const App = () => {
  const [data, setData] = useState([]);

  useEffect(() => {
    axios
      .get('https://jsonplaceholder.typicode.com/posts')
      .then((response) => setData(response.data))
      .catch((error) => console.error('Error:', error));
  }, []);

  return (
    <div>
      <h1>Posts</h1>
      <ul>
        {data.map((post) => (
          <li key={post.id}>{post.title}</li>
        ))}
      </ul>
    </div>
  );
};

export default App;

Explanation:

  • We use the useEffect hook to make the API call when the component mounts.
  • The useState hook is used to store the fetched data.
  • Error handling is done using .catch().

2. POST Request in React

Using Fetch API

File: CreatePost.js

import React, { useState } from 'react';

const CreatePost = () => {
  const [title, setTitle] = useState('');
  const [body, setBody] = useState('');

  const handleSubmit = () => {
    fetch('https://jsonplaceholder.typicode.com/posts', {
      method: 'POST',
      headers: {
        'Content-Type': 'application/json',
      },
      body: JSON.stringify({
        title,
        body,
      }),
    })
      .then((response) => response.json())
      .then((data) => console.log('Success:', data))
      .catch((error) => console.error('Error:', error));
  };

  return (
    <div>
      <h2>Create Post</h2>
      <input
        type="text"
        placeholder="Title"
        value={title}
        onChange={(e) => setTitle(e.target.value)}
      />
      <textarea
        placeholder="Body"
        value={body}
        onChange={(e) => setBody(e.target.value)}
      />
      <button onClick={handleSubmit}>Submit</button>
    </div>
  );
};

export default CreatePost;

Using Axios

File: CreatePost.js

import React, { useState } from 'react';
import axios from 'axios';

const CreatePost = () => {
  const [title, setTitle] = useState('');
  const [body, setBody] = useState('');

  const handleSubmit = () => {
    axios
      .post('https://jsonplaceholder.typicode.com/posts', {
        title,
        body,
      })
      .then((response) => console.log('Success:', response.data))
      .catch((error) => console.error('Error:', error));
  };

  return (
    <div>
      <h2>Create Post</h2>
      <input
        type="text"
        placeholder="Title"
        value={title}
        onChange={(e) => setTitle(e.target.value)}
      />
      <textarea
        placeholder="Body"
        value={body}
        onChange={(e) => setBody(e.target.value)}
      />
      <button onClick={handleSubmit}>Submit</button>
    </div>
  );
};

export default CreatePost;

3. PUT Request in React

Using Axios

File: UpdatePost.js

import React, { useState } from 'react';
import axios from 'axios';

const UpdatePost = () => {
  const [title, setTitle] = useState('');
  const [postId, setPostId] = useState('');

  const handleUpdate = () => {
    axios
      .put(`https://jsonplaceholder.typicode.com/posts/${postId}`, {
        title,
      })
      .then((response) => console.log('Updated:', response.data))
      .catch((error) => console.error('Error:', error));
  };

  return (
    <div>
      <h2>Update Post</h2>
      <input
        type="text"
        placeholder="Post ID"
        value={postId}
        onChange={(e) => setPostId(e.target.value)}
      />
      <input
        type="text"
        placeholder="New Title"
        value={title}
        onChange={(e) => setTitle(e.target.value)}
      />
      <button onClick={handleUpdate}>Update</button>
    </div>
  );
};

export default UpdatePost;

4. DELETE Request in React

Using Fetch API

File: DeletePost.js

import React, { useState } from 'react';

const DeletePost = () => {
  const [postId, setPostId] = useState('');

  const handleDelete = () => {
    fetch(`https://jsonplaceholder.typicode.com/posts/${postId}`, {
      method: 'DELETE',
    })
      .then(() => console.log(`Post ${postId} deleted`))
      .catch((error) => console.error('Error:', error));
  };

  return (
    <div>
      <h2>Delete Post</h2>
      <input
        type="text"
        placeholder="Post ID"
        value={postId}
        onChange={(e) => setPostId(e.target.value)}
      />
      <button onClick={handleDelete}>Delete</button>
    </div>
  );
};

export default DeletePost;

Axios vs Fetch : Which One Should You Use?

Both Axios and Fetch are popular choices for making HTTP requests in React, but they have some key differences. Understanding these differences can help you decide which one is best for your project.

1. Syntax and Ease of Use

  • Axios: Axios has a simpler and more intuitive syntax. It automatically parses JSON responses, making it easier to work with API data. Example:
  axios.get('https://jsonplaceholder.typicode.com/posts')
    .then(response => console.log(response.data))
    .catch(error => console.error(error));
  • Fetch: Fetch is a more raw API, and it requires additional steps for handling response data, especially for parsing JSON. Example:
  fetch('https://jsonplaceholder.typicode.com/posts')
    .then(response => response.json())
    .then(data => console.log(data))
    .catch(error => console.error(error));

2. Browser Support

  • Axios: Axios supports older browsers like Internet Explorer and also has built-in support for handling HTTP requests in Node.js, making it a good choice for server-side applications.
  • Fetch: Fetch is a newer API and may not be fully supported in older browsers like Internet Explorer. However, it’s widely supported in modern browsers.

3. Request and Response Interception

  • Axios: Axios provides powerful features like interceptors, which allow you to modify requests or responses before they are sent or received. This is useful for adding headers, handling authentication tokens, or logging. Example:
  axios.interceptors.request.use(
    config => {
      // Modify request
      config.headers.Authorization = 'Bearer token';
      return config;
    },
    error => {
      return Promise.reject(error);
    }
  );
  • Fetch: Fetch does not have built-in support for request or response interceptors. You would need to handle it manually, which can be more complex.

4. Handling Errors

  • Axios: Axios automatically throws an error if the HTTP status code is outside the 2xx range, making it easier to handle errors. Example:
  axios.get('https://jsonplaceholder.typicode.com/posts')
    .catch(error => {
      if (error.response) {
        console.log('Error:', error.response.status);
      } else {
        console.log('Network Error');
      }
    });
  • Fetch: Fetch only rejects the promise for network errors, so you have to manually check the response.ok property to handle non-2xx HTTP responses. Example:
  fetch('https://jsonplaceholder.typicode.com/posts')
    .then(response => {
      if (!response.ok) {
        throw new Error('Network response was not ok');
      }
      return response.json();
    })
    .catch(error => console.error('Error:', error));

5. Request Cancellation

  • Axios: Axios supports request cancellation using the CancelToken feature, which is useful if you need to cancel a request before it completes (e.g., in case of user navigation or page reloads). Example:
  const source = axios.CancelToken.source();

  axios.get('https://jsonplaceholder.typicode.com/posts', {
    cancelToken: source.token
  })
  .then(response => console.log(response.data))
  .catch(error => console.log(error));

  // To cancel the request
  source.cancel('Request canceled');
  • Fetch: Fetch does not support request cancellation natively, but you can use the AbortController API to achieve similar functionality. Example:
  const controller = new AbortController();
  const signal = controller.signal;

  fetch('https://jsonplaceholder.typicode.com/posts', { signal })
    .then(response => response.json())
    .then(data => console.log(data))
    .catch(error => console.error('Request canceled:', error));

  // To cancel the request
  controller.abort();

6. Performance

  • Axios: Axios is a bit heavier because of its additional features like interceptors, request/response transformations, and automatic JSON parsing. However, this overhead is usually minimal.
  • Fetch: Fetch is lightweight and built into the browser, so it doesn’t require any extra dependencies. This makes it a good choice for smaller projects where you want to avoid external libraries.

When to Use Axios:

  • If you need to support older browsers.
  • If you need advanced features like interceptors, request cancellation, or automatic JSON parsing.
  • If you prefer a simpler syntax and error handling.

When to Use Fetch:

  • If you want a lightweight solution with minimal dependencies.
  • If you’re working on a modern web app where browser support for Fetch is not an issue.
  • If you prefer using native browser APIs without relying on third-party libraries.

Best Practices

  1. Use Async/Await: For better readability and error handling.
  2. Error Handling: Implement robust error handling using try-catch blocks.
  3. Loading State: Show loading indicators during API calls.
  4. Environment Variables: Store API URLs in environment variables for flexibility.

FAQs

Q1. What is the difference between Axios and Fetch?

Axios provides more features like interceptors and automatic JSON parsing, while Fetch is a native API that requires manual handling of responses and errors.

Q2. Can I use both Axios and Fetch in one project?

Yes, but it’s better to choose one for consistency.

Q3. How do I handle errors in API calls?

Use .catch() for promises or try-catch blocks with async/await.

Q4. How do I make authenticated API calls in React?

Pass the authorization token in the request headers using Axios or Fetch.

Thank you for reading! If you found this guide helpful and want to stay updated on more React.js content, be sure to follow us for the latest tutorials and insights: JavaDZone React.js Tutorials. Happy coding!


How to Style React Components

Styling is a critical aspect of any web application, and React provides multiple ways to style components. Whether you are a beginner or an experienced developer, understanding how to effectively style React components can significantly enhance your application’s user experience. In this guide, we will cover three popular methods: CSS, Bootstrap, and Styled-Components.

How to Style React Components

React.js offers flexibility in how you style your components. The three most common methods are:

  • CSS: A traditional way of styling with .css files.
  • Bootstrap: A popular CSS framework for responsive design.
  • Styled-Components: A modern approach using CSS-in-JS.

Choosing the right method depends on your project requirements and personal preference.

Table of Contents

  1. Introduction to Styling in React
  2. Styling with CSS
  3. Styling with Bootstrap
  4. Styling with Styled-Components
  5. Best Practices
  6. FAQs

1. Introduction to Styling in React

React.js offers flexibility in how you style your components. The three most common methods are:

  • CSS: A traditional way of styling with .css files.
  • Bootstrap: A popular CSS framework for responsive design.
  • Styled-Components: A modern approach using CSS-in-JS.

Choosing the right method depends on your project requirements and personal preference.

2. Styling with CSS

a. Inline CSS

Using inline CSS is the quickest way to style components but is not recommended for complex applications as it can make your code harder to maintain.

Example:
File: App.js

import React from 'react';

const App = () => {
  const headerStyle = {
    color: 'blue',
    textAlign: 'center',
    padding: '10px',
  };

  return <h1 style={headerStyle}>Welcome to JavaDZone!</h1>;
};

export default App;

b. CSS Stylesheets

Using external CSS files is a widely used method, especially for larger projects.

Example:
File: App.js

import React from 'react';
import './App.css';

const App = () => {
  return <h1 className="header">Hello, World!</h1>;
};

export default App;

File: App.css

.header {
  color: green;
  font-size: 24px;
  text-align: center;
}

Pros of Using CSS

  • Easy to use and understand.
  • Separation of concerns (HTML and styling are separate).

Cons

  • Global styles can lead to conflicts in large projects.

3. Styling with Bootstrap

Bootstrap is a popular CSS framework that helps in building responsive, mobile-first websites.

a. Setting Up Bootstrap

You can install Bootstrap via npm:

npm install bootstrap

Import Bootstrap in your main file (index.js or App.js):

import 'bootstrap/dist/css/bootstrap.min.css';

b. Using Bootstrap Classes

Example:
File: App.js

import React from 'react';

const App = () => {
  return (
    <div className="container">
      <button className="btn btn-primary">Click Me</button>
    </div>
  );
};

export default App;

Pros of Using Bootstrap

  • Quick and easy to set up.
  • Predefined classes for responsive design.
  • Great for rapid prototyping.

Cons

  • Limited customization without additional CSS.
  • Can bloat your project if not used carefully.

4. Styling with Styled-Components

Styled-Components is a popular library for React that uses tagged template literals to style components. It provides a unique way of styling by using the component itself as a styled element.

a. Setting Up Styled-Components

Install Styled-Components:

npm install styled-components

b. Creating a Styled Component

Example:
File: App.js

import React from 'react';
import styled from 'styled-components';

const StyledButton = styled.button`
  background-color: #007bff;
  color: white;
  padding: 10px 20px;
  border: none;
  border-radius: 5px;
  cursor: pointer;

  &:hover {
    background-color: #0056b3;
  }
`;

const App = () => {
  return <StyledButton>Styled Button</StyledButton>;
};

export default App;

Pros of Using Styled-Components

  • Scoped styling avoids conflicts.
  • Dynamic styling based on props.
  • Cleaner and more maintainable code.

Cons

  • Requires a learning curve for beginners.
  • Can increase the bundle size if overused.

5. Best Practices for Styling in React

  1. Modularize Your Styles: Use CSS modules or Styled-Components to avoid global conflicts.
  2. Use Variables: Define CSS variables or use JavaScript variables in Styled-Components for consistent theming.
  3. Leverage Responsive Design: Use media queries or frameworks like Bootstrap for mobile-friendly designs.
  4. Optimize Performance: Avoid heavy animations or unnecessary re-renders caused by styling updates.

6. FAQs

Q1. Which method is best for styling React components?

It depends on your project requirements. For small projects, using traditional CSS is sufficient. For responsive designs, Bootstrap is helpful. For larger projects requiring scoped styles, Styled-Components is a great choice.

Q2. Can I use multiple styling methods in one project?

Yes, you can mix different styling methods like CSS for basic styles and Styled-Components for dynamic styles. However, it’s recommended to stick to one method for consistency.

Q3. How do I make my React app responsive?

Using frameworks like Bootstrap or leveraging CSS media queries can make your React app responsive. Styled-Components also support media queries for responsive design.

Q4. Are Styled-Components better than traditional CSS?

Styled-Components offer several advantages like scoped styles and dynamic styling, making them better for large projects. However, traditional CSS is simpler and easier for beginners or smaller projects.

Q5. Can I use SCSS or SASS in React?

Yes, React supports SCSS/SASS. You need to install the node-sass package to use SCSS/SASS in your React project.

npm install node-sass

You can then import .scss files in your components.

Conclusion

Styling is an essential part of React development, and choosing the right approach can make your project more efficient and maintainable. Whether you opt for traditional CSS, Bootstrap, or Styled-Components, understanding their strengths and best use cases is key.

Thank you for reading! If you found this guide helpful and want to stay updated on more React.js content, be sure to follow us for the latest tutorials and insights: JavaDZone React.js Tutorials. Happy coding!
React Reducers and Context API : When to Use Reducers

Introduction

React is a powerful JavaScript library for building user interfaces, especially single-page applications where data changes over time. As your application grows, managing state effectively becomes crucial. Two of the most essential tools for handling complex state in React Reducers and Context API.

In this blog, we will dive into what Reducers and Context API are, how they work together, and when to use Reducers effectively. This guide is designed to help both beginners and experienced developers with practical examples and best practices.

Table of Contents

  1. What is Context API?
  2. What is a Reducer?
  3. Context API vs. Props
  4. When to Use Reducers in React
  5. Setting Up a Project
  6. Example: Using Context API with Reducers
  7. Best Practices for Using Reducers
  8. FAQs
React Reducers and Context API
1. What is Context API?

The Context API is a React feature introduced in version 16.3, designed to help with prop drilling issues. When you need to pass data through multiple nested components, the Context API allows you to share data without explicitly passing props through each component level.

Use Case: For themes, user authentication, and language preferences, Context API can manage global state effectively.

Creating a Context:

File: src/context/ThemeContext.js

import React, { createContext, useState } from "react";

export const ThemeContext = createContext();

export const ThemeProvider = ({ children }) => {
  const [theme, setTheme] = useState("light");

  const toggleTheme = () => {
    setTheme(theme === "light" ? "dark" : "light");
  };

  return (
    <ThemeContext.Provider value={{ theme, toggleTheme }}>
      {children}
    </ThemeContext.Provider>
  );
};

2. What is a Reducer?

A Reducer is a function that determines changes to an application’s state. It uses a concept from functional programming and is central to Redux, but can also be used directly in React applications via the useReducer hook.

Syntax of a Reducer:

(state, action) => newState

A reducer takes the current state and an action as arguments, then returns a new state.

3. Context API vs. Props

  • Props are great for passing data from parent to child components. However, when data needs to be accessed by many nested components, prop drilling becomes an issue.
  • Context API eliminates the need for prop drilling by providing a way to share data globally across the component tree.

4. When to Use Reducers in React

Use reducers when:

  1. Complex State Logic: If the state logic is complex and involves multiple sub-values or deep updates, reducers are a good choice.
  2. State Based on Previous State: When the next state depends on the previous state, reducers help manage state transitions clearly.
  3. Centralized State Management: For managing centralized state across multiple components, reducers work well in combination with the Context API.

5. Setting Up a Project

Project Structure:

my-react-app/
├── src/
│   ├── components/
│   │   └── Counter.js
│   ├── context/
│   │   └── CounterContext.js
│   ├── reducers/
│   │   └── counterReducer.js
│   └── App.js

6. Example: Using Context API with Reducers

Step 1: Define the Reducer

File: src/reducers/counterReducer.js

export const counterReducer = (state, action) => {
  switch (action.type) {
    case "INCREMENT":
      return { count: state.count + 1 };
    case "DECREMENT":
      return { count: state.count - 1 };
    default:
      throw new Error(`Unknown action type: ${action.type}`);
  }
};

Step 2: Create Context with Reducer

File: src/context/CounterContext.js

import React, { createContext, useReducer } from "react";
import { counterReducer } from "../reducers/counterReducer";

export const CounterContext = createContext();

const initialState = { count: 0 };

export const CounterProvider = ({ children }) => {
  const [state, dispatch] = useReducer(counterReducer, initialState);

  return (
    <CounterContext.Provider value={{ state, dispatch }}>
      {children}
    </CounterContext.Provider>
  );
};

Step 3: Create a Counter Component

File: src/components/Counter.js

import React, { useContext } from "react";
import { CounterContext } from "../context/CounterContext";

const Counter = () => {
  const { state, dispatch } = useContext(CounterContext);

  return (
    <div>
      <h1>Count: {state.count}</h1>
      <button onClick={() => dispatch({ type: "INCREMENT" })}>Increment</button>
      <button onClick={() => dispatch({ type: "DECREMENT" })}>Decrement</button>
    </div>
  );
};

export default Counter;

Step 4: Integrate in App Component

File: src/App.js

import React from "react";
import { CounterProvider } from "./context/CounterContext";
import Counter from "./components/Counter";

const App = () => {
  return (
    <div style={{ textAlign: "center" }}>
      <CounterProvider>
        <h1>Welcome to Javadzone.com</h1>
        <Counter />
        <footer style={{ marginTop: "20px", color: "gray" }}>
          © 2024 Javadzone.com - All rights reserved
        </footer>
      </CounterProvider>
    </div>
  );
};

export default App;

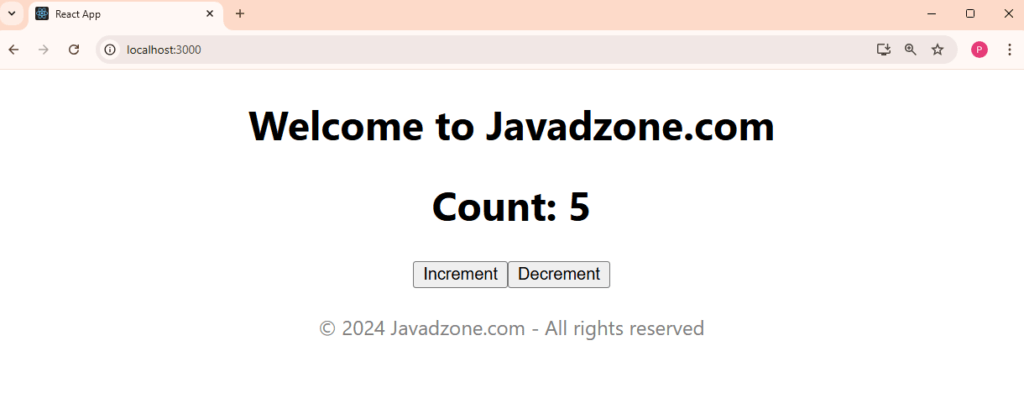
Start the application by running the command npm start.

Output:

React Reducers and Context API

7. Best Practices for Using Reducers

  1. Keep Reducer Functions Pure: Reducers should be pure functions with no side effects. This makes them predictable and testable.
  2. Define Action Types: Use constants for action types to avoid typos and make the code more maintainable.
   const INCREMENT = "INCREMENT";
   const DECREMENT = "DECREMENT";
  1. Organize Files: Separate reducers and context into dedicated folders to keep your project structure clean.
  2. Use useReducer for Complex State: Prefer useReducer over useState when state logic becomes complex.

8. FAQs

Q1. When should I use useReducer over useState?
A1: Use useReducer when state logic is complex or when the next state depends on the previous state. For simple state management, useState is sufficient.

Q2. Can I use multiple contexts in a single application?
A2: Yes, you can create multiple contexts to manage different pieces of global state, but be cautious about performance and complexity.

Q3. What are the performance implications of using Context API?
A3: Using Context API with large state objects can cause unnecessary re-renders. Optimize performance by splitting contexts or using React.memo and useCallback.

Q4. Is Context API a replacement for Redux?
A4: Not necessarily. Context API is great for small to medium applications. For large apps with more complex state logic, Redux may still be a better option.

Q5. Can I use useReducer without Context API?
A5: Yes, useReducer can be used independently in a single component for managing complex state logic.


Thank you for reading! If you found this guide helpful and want to stay updated on more React.js content, be sure to follow us for the latest tutorials and insights: JavaDZone React.js Tutorials. Happy coding!

Global State in React with Context API

Managing state in a React application can quickly become complex, especially as your app grows. To tackle this issue, React provides the Context API, a powerful feature that allows you to share state across components without the need to pass props down manually at every level. In this blog post, “Global State in React with Context API,” we will explore how to implement global state management using the Context API, along with practical examples and best practices.

What is the Context API?

The Context API is a built-in feature of React that allows you to create global state that can be accessed by any component in your application. This is particularly useful for managing user authentication, theme settings, or any data that needs to be accessed by many components.

Setting Up the Context API

To get started, you need to create a Context. Here’s how you can do that:

File: UserContext.js

import React, { createContext, useState } from 'react';

// Create the Context
const UserContext = createContext();

// Create a Provider Component
const UserProvider = ({ children }) => {
  const [user, setUser] = useState(null);

  return (
    <UserContext.Provider value={{ user, setUser }}>
      {children}
    </UserContext.Provider>
  );
};

export { UserContext, UserProvider };

Using the Context in Your Components

Now that you have a Context and a Provider, you can wrap your application with the UserProvider to make the user state available to all components.

File: App.js

import React from 'react';
import { UserProvider } from './UserContext';
import UserProfile from './UserProfile';

const App = () => {
  return (
    <UserProvider>
      <UserProfile />
    </UserContext>
  );
};

export default App;

Accessing the Context

You can now access the user state in any component that is a descendant of the UserProvider.

File: UserProfile.js

import React, { useContext } from 'react';
import { UserContext } from './UserContext';

const UserProfile = () => {
  const { user, setUser } = useContext(UserContext);

  const handleLogin = () => {
    setUser({ name: 'Pavan Kumar' });
  };

  return (
    <div>
      <h1>User Profile</h1>
      {user ? <p>Welcome, {user.name}</p> : <button onClick={handleLogin}>Login</button>}
    </div>
  );
};

export default UserProfile;

When you click on Login button:

Global State in React with Context API

Best Practices for Using Global State in React with Context API

  1. Limit Context Use: Use Context for data that is truly global. For more localized state, consider using component state or other state management libraries.
  2. Performance Optimization: Avoid updating context state too frequently. This can cause unnecessary re-renders of all consuming components. Instead, try to batch updates.
  3. Split Contexts: If you have multiple pieces of state that need to be shared, consider creating separate contexts for each. This keeps your code organized and prevents components from re-rendering unnecessarily.

Advanced State Management with Reducers

For more complex state management, you might want to integrate the useReducer hook with the Context API. This is especially useful when you need to manage multiple state variables or complex state logic.

Setting Up a Reducer

File: UserReducer.js

const initialState = { user: null };

const userReducer = (state, action) => {
  switch (action.type) {
    case 'LOGIN':
      return { ...state, user: action.payload };
    case 'LOGOUT':
      return { ...state, user: null };
    default:
      return state;
  }
};

export { initialState, userReducer };

Combining with Context

Now, you can use this reducer in your context.

File: UserContext.js (Updated)

import React, { createContext, useReducer } from 'react';
import { userReducer, initialState } from './UserReducer';

const UserContext = createContext();

const UserProvider = ({ children }) => {
  const [state, dispatch] = useReducer(userReducer, initialState);

  return (
    <UserContext.Provider value={{ state, dispatch }}>
      {children}
    </UserContext.Provider>
  );
};

export { UserContext, UserProvider };

Dispatching Actions

You can dispatch actions from your components to update the state.

File: UserProfile.js (Updated)

import React, { useContext } from 'react';
import { UserContext } from './UserContext';

const UserProfile = () => {
  const { state, dispatch } = useContext(UserContext);

  const handleLogin = () => {
    dispatch({ type: 'LOGIN', payload: { name: 'John Doe' } });
  };

  const handleLogout = () => {
    dispatch({ type: 'LOGOUT' });
  };

  return (
    <div>
      <h1>User Profile</h1>
      {state.user ? (
        <>
          <p>Welcome, {state.user.name}</p>
          <button onClick={handleLogout}>Logout</button>
        </>
      ) : (
        <button onClick={handleLogin}>Login</button>
      )}
    </div>
  );
};

export default UserProfile;

FAQs

Q1: When should I use Context API instead of Redux?
A: Use Context API for simpler applications where state management doesn’t get too complicated. For larger applications with complex state logic, Redux might be a better choice.

Q2: Can I combine Context API with Redux?
A: Yes, you can use both together. You might use Context API for certain parts of your application while managing more complex states with Redux.

Q3: Is Context API suitable for every component?
A: No, use it for data that needs to be accessed globally. For local component state, prefer using useState.

Q4: How do I optimize performance when using Context?
A: Minimize updates to context state and consider splitting your context into smaller, more focused contexts to reduce unnecessary re-renders.

Thank you for reading! If you found this guide helpful and want to stay updated on more React.js content, be sure to follow us for the latest tutorials and insights: JavaDZone React.js Tutorials. Happy coding!

Latest Posts:

Controlled and Uncontrolled Components in React JS

React.js has revolutionized the way we build user interfaces, and understanding its core concepts is crucial for developers of all levels. One such concept is the difference between controlled and uncontrolled components in react js. In this post, we’ll dive deep into these two types of components, their use cases, and best practices. By the end, you’ll have a solid grasp of how to implement them effectively in your projects.

Controlled and Uncontrolled Components in React JS

What Are Controlled Components

Controlled components are those where the form data is handled by the state of the component. In simpler terms, the React component maintains the current state of the input fields, and any changes to these fields are managed via React’s state management.

How Controlled Components Work

In a controlled component, the input’s value is determined by the state of the component. This means that every time the user types in an input field, the component’s state is updated, and the rendered input value reflects that state.

Example of a Controlled Component

Create ControlledComponent.js

import React, { useState } from 'react';

function ControlledComponent() {
    const [inputValue, setInputValue] = useState('');

    const handleChange = (event) => {
        setInputValue(event.target.value);
    };

    return (
        <div>
            <input 
                type="text" 
                value={inputValue} 
                onChange={handleChange} 
            />
            <p>You typed: {inputValue}</p>
        </div>
    );
}

export default ControlledComponent;
Controlled and Uncontrolled Components in React JS

Best Practices for Controlled Components

  1. Always use state: Keep your input values in the component state to make them easily accessible and modifiable.
  2. Validate Input: Implement validation logic in the handleChange function to ensure that the input meets your requirements.
  3. Form Submission: When using controlled components in forms, prevent the default form submission to handle the input data in a React-friendly way.

What Are Uncontrolled Components?

Uncontrolled components, on the other hand, are components that store their form data in the DOM instead of the component’s state. This means that when you want to access the input values, you use refs to get the current values directly from the DOM.

How Uncontrolled Components Work

With uncontrolled components, you don’t need to update the state on every input change. Instead, you can access the current value when needed, such as during form submission.

Example of an Uncontrolled Component

Create UncontrolledComponent.js

import React, { useRef } from 'react';

function UncontrolledComponent() {
    const inputRef = useRef(null);

    const handleSubmit = (event) => {
        event.preventDefault();
        alert('You typed: ' + inputRef.current.value);
    };

    return (
        <form onSubmit={handleSubmit}>
            <input type="text" ref={inputRef} />
            <button type="submit">Submit</button>
        </form>
    );
}

export default UncontrolledComponent;
Uncontrolled Components

Best Practices for Uncontrolled Components

  1. Use refs sparingly: Uncontrolled components can lead to less predictable behavior, so use them only when necessary.
  2. Access DOM elements directly: Use refs to get the current values at specific moments (like form submission), rather than keeping them in state.
  3. Combine with controlled components when needed: For complex forms, a mix of both approaches can be beneficial.

When to Use Controlled vs. Uncontrolled Components

  • Controlled Components: Ideal for scenarios where you need to validate inputs, manage form state, or react to user input dynamically.
  • Uncontrolled Components: Suitable for simple forms where performance is a concern, or you want to integrate with non-React codebases.

Conclusion

Understanding controlled and uncontrolled components is fundamental for any React developer. Controlled components provide more control over the input data, making them a great choice for complex forms, while uncontrolled components offer a simpler and more performant option for straightforward use cases.

FAQ

1. Can I convert a controlled component to an uncontrolled one?
Yes, you can convert by removing state management and using refs for input value retrieval.

2. Are uncontrolled components less efficient?
Not necessarily, but they can make your component’s behavior less predictable since they rely on the DOM.

3. Can I mix controlled and uncontrolled components?
Yes, it’s common to use both within a single form, depending on the requirements.

4. What are some libraries that work well with controlled components?
Libraries like Formik and React Hook Form are designed to work with controlled components and can simplify form management.


Thank you for reading! If you found this guide helpful and want to stay updated on more React.js content, be sure to follow us for the latest tutorials and insights: JavaDZone React.js Tutorials. Happy coding!

Recent Posts:

Event Handling in React JS

Handling events in React JS is a fundamental skill for any developer, whether you’re just starting or you’ve been working with React JS for years. Mastering event handling in React JS not only makes your applications more dynamic and interactive but also lays a strong foundation for creating more complex features.

In this article, we’ll cover everything you need to know about event handling in React, including practical examples, best practices, and FAQs. This guide is designed to be beginner-friendly but also provides advanced insights for experienced developers.

1. Introduction to Event Handling in React JS

In React, event handling is similar to handling events in plain HTML and JavaScript, but with some unique differences. React uses what is called a synthetic event system, which helps maintain cross-browser compatibility. Events are a core part of React applications, enabling interactivity by responding to user actions like clicks, keypresses, form submissions, and more.

2. Understanding Event Basics in React

In HTML, you’d typically write event listeners directly within the element:

<button onclick="handleClick()">Click Me</button>

However, in React, events are handled a bit differently, using camelCase for naming and attaching functions directly:

<button onClick={handleClick}>Click Me</button>

Example: App.js

// Import React
import React from 'react';

// Define the functional component
function App() {
    const handleClick = () => {
        alert("Button clicked!");
    };

    return (
        <div>
            <button onClick={handleClick}>Click Me</button>
        </div>
    );
}

export default App;
Event Handling in React JS

3. Event Binding in React

In React class components, you may encounter event binding issues due to JavaScript’s this keyword. There are several ways to bind events in React, especially when working with class components.

Binding in the Constructor

Example: App.js

class App extends React.Component {
    constructor(props) {
        super(props);
        this.state = { message: "Hello!" };
        this.handleClick = this.handleClick.bind(this);
    }

    handleClick() {
        this.setState({ message: "Button clicked!" });
    }

    render() {
        return (
            <div>
                <button onClick={this.handleClick}>Click Me</button>
                <p>{this.state.message}</p>
            </div>
        );
    }
}

Using Arrow Functions

Arrow functions automatically bind the this context.

handleClick = () => {
    this.setState({ message: "Button clicked!" });
}

4. Passing Arguments to Event Handlers

Sometimes, you may need to pass parameters to event handlers. You can do this by wrapping the handler in an inline arrow function.

Example: App.js

function App() {
    const handleClick = (message) => {
        alert(message);
    };

    return (
        <div>
            <button onClick={() => handleClick("Button clicked!")}>Click Me</button>
        </div>
    );
}

5. Synthetic Events in React

React provides a cross-browser wrapper called SyntheticEvent for native events. This wrapper offers consistent behavior across different browsers. Synthetic events work the same as native events but come with additional benefits, such as performance optimizations by React.

6. Practical Examples of Common Events

Here are some frequently used events in React and how to implement them:

1. onChange Event

Commonly used with input elements to handle form data.

function App() {
    const handleChange = (event) => {
        console.log("Input value:", event.target.value);
    };

    return (
        <input type="text" onChange={handleChange} placeholder="Type here..." />
    );
}

2. onSubmit Event

Typically used with forms.

function App() {
    const handleSubmit = (event) => {
        event.preventDefault();
        alert("Form submitted!");
    };

    return (
        <form onSubmit={handleSubmit}>
            <button type="submit">Submit</button>
        </form>
    );
}

3. onMouseEnter and onMouseLeave Events

Used to detect when a user hovers over an element.

function App() {
    const handleMouseEnter = () => console.log("Mouse entered");
    const handleMouseLeave = () => console.log("Mouse left");

    return (
        <div
            onMouseEnter={handleMouseEnter}
            onMouseLeave={handleMouseLeave}
            style={{ padding: "20px", border: "1px solid #ddd" }}
        >
            Hover over me
        </div>
    );
}

7. Best Practices for Event Handling

  1. Use Arrow Functions Carefully: Avoid using arrow functions directly in JSX to prevent unnecessary re-renders.
  2. Optimize for Performance: For performance-sensitive code, use React.memo to prevent re-renders and event handling issues.
  3. Event Delegation: In lists or dynamic content, consider using event delegation to manage events more efficiently.
  4. Avoid Inline Functions: Avoid inline functions when possible, as they can lead to unnecessary re-renders and reduced performance.

8. FAQs

Q1: What are synthetic events in React?
A: Synthetic events in React are wrappers around native events, providing consistent behavior across browsers. They ensure better performance and cross-browser compatibility.

Q2: How do I prevent the default behavior of an event in React?
A: Use event.preventDefault() in the event handler function to prevent the default behavior. For example:

function handleSubmit(event) {
    event.preventDefault();
    // custom code here
}

Q3: How do I pass arguments to an event handler in React?
A: Wrap the handler in an arrow function and pass the arguments as needed:

<button onClick={() => handleClick("argument")}>Click Me</button>

Thank you for reading! If you found this guide helpful and want to stay updated on more React.js content, be sure to follow us for the latest tutorials and insights: JavaDZone React.js Tutorials. Happy coding!
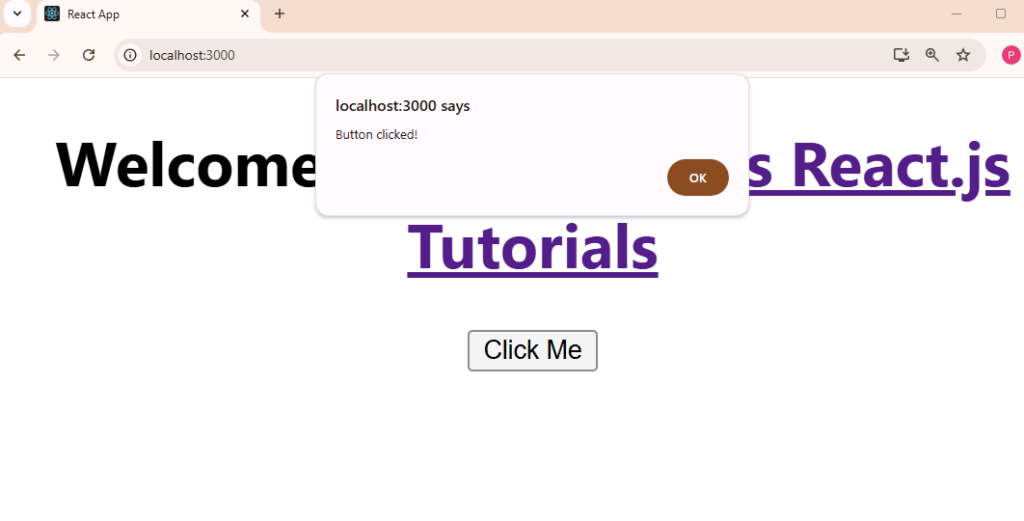
React JS Lifecycle Methods and Hooks

React has revolutionized how we build user interfaces, and understanding its lifecycle methods and hooks is essential for both beginners and experienced developers. In this post, titled React JS Lifecycle Methods and Hooks, we’ll explore the lifecycle of React components, delve into the popular hooks useEffect and useState, and provide practical examples to illustrate their use. This guide aims to be both beginner-friendly and insightful for seasoned developers.

What Are Lifecycle Methods?

Lifecycle methods are special functions that allow you to run code at specific points in a component’s life. These methods are particularly useful in class components, enabling you to manage tasks such as data fetching, subscriptions, and cleanup.

Lifecycle Methods in Class Components

In class components, React provides several lifecycle methods:

  1. Mounting: The component is being created and inserted into the DOM.
  • componentDidMount(): Invoked immediately after a component is mounted.
  1. Updating: The component is being re-rendered due to changes in props or state.
  • componentDidUpdate(prevProps, prevState): Invoked immediately after updating occurs.
  1. Unmounting: The component is being removed from the DOM.
  • componentWillUnmount(): Invoked immediately before a component is unmounted and destroyed.

Example

File Name: LifecycleMethods.js

Create a file named LifecycleMethods.js and add the following code:

import React from 'react';

class Timer extends React.Component {
  constructor(props) {
    super(props);
    this.state = { seconds: 0 };
  }

  componentDidMount() {
    this.interval = setInterval(() => this.setState({ seconds: this.state.seconds + 1 }), 1000);
  }

  componentWillUnmount() {
    clearInterval(this.interval);
  }

  render() {
    return <div>Seconds: {this.state.seconds}</div>;
  }
}

export default Timer;

Output

When you run the above code, you’ll see a timer incrementing every second:

Seconds: 0
Seconds: 1
Seconds: 2
...
React JS Lifecycle Methods and Hooks

Introduction to React Hooks

React Hooks were introduced in React 16.8 to allow functional components to manage state and side effects without using classes. This makes components simpler and easier to read.

Understanding useState

The useState hook allows you to add state to functional components.

Example

File Name: Counter.js

Create a file named Counter.js and add the following code:

import React, { useState } from 'react';

function Counter() {
  const [count, setCount] = useState(0);

  return (
    <div>
      <p>You clicked {count} times</p>
      <button onClick={() => setCount(count + 1)}>Click me</button>
    </div>
  );
}

export default Counter;

Output

When you run the above code, you will see a button that updates the count every time it is clicked:

You clicked 0 times
[Click me button]

Clicking the button will update the count, e.g., You clicked 1 times, You clicked 2 times, etc.

What Are Lifecycle Methods?

Understanding useEffect

The useEffect hook manages side effects in functional components, such as data fetching, subscriptions, or manually changing the DOM.

Example

File Name: FetchData.js

Create a file named FetchData.js and add the following code:

import React, { useState, useEffect } from 'react';

function FetchData() {
  const [data, setData] = useState(null);

  useEffect(() => {
    fetch('https://api.example.com/data')
      .then(response => response.json())
      .then(data => setData(data));
  }, []); // The empty array ensures this runs only once (like componentDidMount)

  return <div>{data ? JSON.stringify(data) : 'Loading...'}</div>;
}

export default FetchData;

Output

When you run this component, you’ll initially see “Loading…”. Once the data is fetched from the API, it will display the fetched data in JSON format.

React Hooks

Best Practices for Lifecycle Methods and Hooks

  1. Keep Side Effects in useEffect: Always use useEffect for side effects in functional components to maintain a clean separation of concerns.
  2. Cleanup Functions: If your effect creates a subscription or some resource, ensure you return a cleanup function to prevent memory leaks.
  3. Dependency Arrays: Always specify dependencies in the useEffect hook to avoid unexpected behavior. If your effect relies on specific props or state, list them in the array.
  4. Functional Updates with useState: When updating state based on the previous state, use the functional form to ensure you have the most current state.

Example of Best Practices

File Name: BestPractices.js

Create a file named BestPractices.js and add the following code:

import React, { useEffect } from 'react';

function WindowSize() {
  useEffect(() => {
    const handleResize = () => {
      console.log(window.innerWidth);
    };

    window.addEventListener('resize', handleResize);

    // Cleanup
    return () => window.removeEventListener('resize', handleResize);
  }, []);

  return <div>Resize the window to see console logs</div>;
}

export default WindowSize;

Output

When you run this component, it will log the window width to the console every time you resize the window.

Resize the window to see console logs

FAQs

1. What is the difference between class components and functional components with hooks?

Class components use lifecycle methods to manage state and side effects, while functional components with hooks use hooks like useState and useEffect for the same purposes, leading to cleaner and more concise code.

2. Can I use hooks in class components?

No, hooks are designed for functional components only. If you need state or lifecycle methods in a class component, you must use lifecycle methods.

3. How do I handle multiple state variables?

You can call useState multiple times to manage different state variables. For example:

const [count, setCount] = useState(0);
const [name, setName] = useState('');

4. What happens if I don’t provide a dependency array in useEffect?

If you don’t provide a dependency array, the effect will run after every render, which can lead to performance issues and infinite loops if not handled properly.

5. Can I use useEffect for data fetching?

Yes, useEffect is perfect for data fetching and can be used to manage the loading state as well.

Conclusion

Mastering lifecycle methods and React hooks is vital for creating efficient and maintainable React applications. By following best practices and utilizing these features effectively, you can enhance your development workflow and improve your application’s performance.

Thank you for reading! If you found this guide helpful and want to stay updated on more React.js content, be sure to follow us for the latest tutorials and insights: JavaDZone React.js Tutorials. Happy coding!
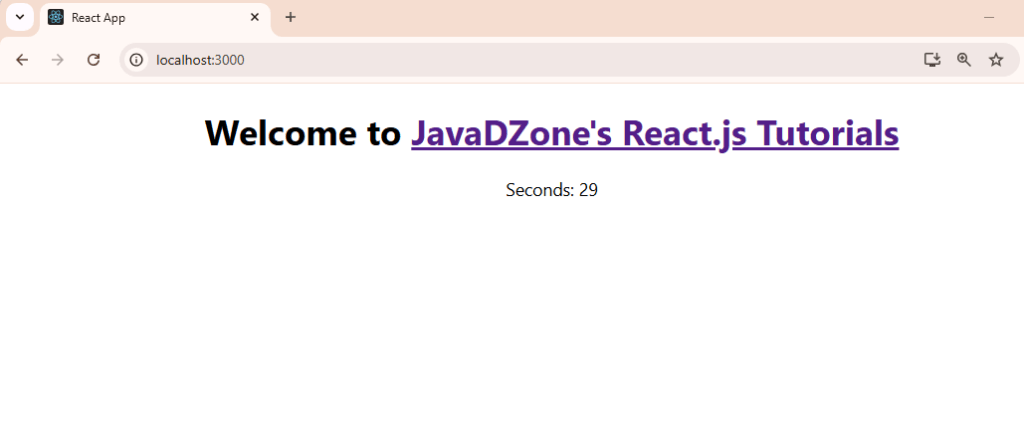
React State and Context API Explained

React State and Context API Explained: Managing State Efficiently – Managing state effectively in a React application ensures better user experience and efficient performance. This post will guide you through React’s state management, from basic component state with useState to global state with Context API. By the end, you’ll have practical insights into state management and best practices.

React State and Context API :

What is State in React?

State in React represents data that may change over time. Each component can maintain its own state using the useState hook, allowing React to re-render the component when the state changes.

File: Counter.js

import React, { useState } from 'react';

function Counter() {
  const [count, setCount] = useState(0);

  return (
    <div>
      <p>Current Count: {count}</p>
      <button onClick={() => setCount(count + 1)}>Increment</button>
    </div>
  );
}

export default Counter;

In this example, the Counter component has its own state, count, that updates every time the button is clicked.

React State and Context API

Lifting State Up: Sharing State Across Components

When multiple components need access to the same data, lifting state up to a common parent component is useful. This way, the state is managed in one place and passed down as props.

Files: ParentComponent.js, ChildComponent1.js, ChildComponent2.js

// ParentComponent.js
import React, { useState } from 'react';
import ChildComponent1 from './ChildComponent1';
import ChildComponent2 from './ChildComponent2';

function ParentComponent() {
  const [sharedState, setSharedState] = useState(0);

  return (
    <div>
      <ChildComponent1 sharedState={sharedState} />
      <ChildComponent2 setSharedState={setSharedState} />
    </div>
  );
}

export default ParentComponent;

// ChildComponent1.js
import React from 'react';

function ChildComponent1({ sharedState }) {
  return <p>Shared State: {sharedState}</p>;
}

export default ChildComponent1;

// ChildComponent2.js
import React from 'react';

function ChildComponent2({ setSharedState }) {
  return <button onClick={() => setSharedState(prev => prev + 1)}>Increment</button>;
}

export default ChildComponent2;

In this setup, ParentComponent holds the state, which is passed to both ChildComponent1 and ChildComponent2, allowing both components to access or update the same state.


Context API : Managing Global State

For larger applications where multiple components require the same state, React’s Context API provides an effective solution by creating a global state. This eliminates the need for prop drilling.

Setting Up a Theme Context with Context API

  1. Create a Context for Theme File: ThemeContext.js
   import React, { createContext, useState, useContext } from 'react';

   // Create a Context
   const ThemeContext = createContext();

   // Theme Provider Component
   export function ThemeProvider({ children }) {
     const [isDark, setIsDark] = useState(false);

     return (
       <ThemeContext.Provider value={{ isDark, setIsDark }}>
         {children}
       </ThemeContext.Provider>
     );
   }

   // Custom hook for convenience
   export function useTheme() {
     return useContext(ThemeContext);
   }

Here, we create a ThemeContext and export ThemeProvider to manage theme state. The custom useTheme hook simplifies accessing theme data in components.

  1. Provide the Theme Context to the Application File: Root.js
   // Root.js
   import React from 'react';
   import { ThemeProvider } from './ThemeContext';
   import App from './App';

   function Root() {
     return (
       <ThemeProvider>
         <App />
       </ThemeProvider>
     );
   }

   export default Root;

In this file, ThemeProvider wraps the App, making the theme data accessible throughout the component tree.

  1. Consume the Theme Context in a Component File: ThemeSwitcher.js
   // ThemeSwitcher.js
   import React from 'react';
   import { useTheme } from './ThemeContext';

   function ThemeSwitcher() {
     const { isDark, setIsDark } = useTheme();

     return (
       <div>
         <p>Current Theme: {isDark ? 'Dark' : 'Light'}</p>
         <button onClick={() => setIsDark(prev => !prev)}>Toggle Theme</button>
       </div>
     );
   }

   export default ThemeSwitcher;

The ThemeSwitcher component uses the useTheme hook to access and toggle the theme state.


Best Practices for Using State and Context API

  1. Limit Context Usage for Performance: Overusing Context for frequently-changing data may cause excessive re-renders. Limit Context usage for data that doesn’t change often (e.g., theme, user settings).
  2. Use Custom Hooks for Reusability: Wrapping Context logic in a custom hook (like useTheme) makes your code cleaner and easier to maintain.
  3. Avoid Context for Local State: Use Context only for global or shared state. Local state that concerns a single component should remain in that component.
  4. Combine Context with Reducer for Complex State: If you need to manage more complex state, consider combining Context API with useReducer. This pattern is useful in applications with actions that require different state transitions.

FAQs

1. When should I use Context API over Redux?
Context API is great for small to medium applications where global state isn’t very complex. For larger apps with complex state, Redux or another state management library is more efficient.

2. Can I use multiple Contexts?
Yes, you can create multiple Contexts and use them together. However, avoid excessive nesting, as it can make your component structure harder to manage.

3. Is Context API suitable for frequently-updated data?
For frequently-changing data, Context API may cause performance issues due to re-renders. For such cases, Redux or custom hooks are often better.

4. How do I avoid prop drilling without using Context API?
While Context API is the primary solution for avoiding prop drilling, organizing components effectively and using custom hooks can also help reduce the need for deep prop passing.

5. Can I use the Context API with class components?
Yes, the Context API can be used with class components through the contextType property or the Consumer component, though it’s more commonly used with functional components.


Conclusion

React’s useState and Context API are essential tools for managing state efficiently in React applications. Understanding how and when to use each is key to building scalable, maintainable apps. Following best practices, such as using custom hooks and avoiding overuse of Context, will ensure your app’s performance and readability. By incorporating these state management strategies, you’ll be well-prepared to handle any React project, from simple to complex.

Thank you for reading! If you found this guide helpful and want to stay updated on more React.js content, be sure to follow us for the latest tutorials and insights: JavaDZone React.js Tutorials. Happy coding!

JSX in React Syntax, Expressions, and Examples

The Basics of JSX in React: Syntax, Expressions, and Examples

Introduction

In React, JSX (JavaScript XML) is a syntax extension that allows you to write HTML-like code directly in JavaScript files. JSX makes it easy to structure components in React, ensuring cleaner code and faster development. In this guide, we’ll explore JSX syntax, expressions, and examples, so you can effectively utilize JSX in your React applications.


1. What is JSX?

JSX is a syntax extension to JavaScript that resembles HTML and allows us to write React elements directly. It’s transpiled by tools like Babel into standard JavaScript, which browsers understand.

JSX simplifies the way we write UI components by blending HTML with JavaScript logic, allowing developers to create dynamic, interactive web pages with less code.


2. Advantages of Using JSX in React

  • Easier to Read and Write: JSX resembles HTML, making it more readable, especially for those familiar with web development.
  • Powerful Integration with JavaScript: It enables the use of JavaScript within your UI components, making it easy to display dynamic content.
  • Improves Performance: JSX helps React’s virtual DOM perform updates more efficiently.

3. JSX Syntax Basics

JSX syntax closely mirrors HTML with some essential differences and rules.

Basic Syntax

In JSX, elements are written similarly to HTML:

const element = <h1>Hello, JSX!</h1>;

Parent Elements

Every JSX expression must have a single parent element. If you want multiple sibling elements, wrap them in a <div> or React Fragment (<> </>).

const element = (
  <div>
    <h1>Hello, World!</h1>
    <p>This is a paragraph in JSX.</p>
  </div>
);

Self-Closing Tags

In JSX, elements without children must be self-closed (e.g., <img />, <br />).

const element = <img src="logo.png" alt="Logo" />;

4. Embedding Expressions in JSX

JSX allows you to embed any JavaScript expression by using curly braces {}.

Example

const name = "React Developer";
const greeting = <h1>Hello, {name}!</h1>;

Conditional Rendering

JavaScript expressions also allow conditional rendering in JSX:

const isLoggedIn = true;
const userGreeting = (
  <div>
    <h1>Welcome {isLoggedIn ? "back" : "guest"}!</h1>
  </div>
);

5. Practical Example

Example 1: Displaying an Array of Data in JSX

Let’s render a list of items dynamically:

const fruits = ["Apple", "Banana", "Cherry"];

const fruitList = (
  <ul>
    {fruits.map(fruit => (
      <li key={fruit}>{fruit}</li>
    ))}
  </ul>
);

Explanation: This code maps over an array, creating an <li> element for each item in the fruits array. Each item requires a unique key attribute for optimal rendering.

Example 2: Handling Events in JSX

JSX allows attaching event listeners directly:

function handleClick() {
  alert("Button clicked!");
}

const button = <button onClick={handleClick}>Click Me!</button>;

Explanation: Here, onClick is bound to the handleClick function, which triggers an alert when the button is clicked.

6. Best Practices for Writing JSX

  1. Use Descriptive Variable Names: When naming JSX elements, ensure variables are descriptive and contextually relevant. It enhances readability.
  2. Break Down Complex Components: Large JSX blocks should be split into smaller components for easier testing and reuse.
  3. Use Keys When Rendering Lists: Always use unique keys when iterating over arrays to ensure React efficiently manages DOM updates.
  4. Avoid Inline Functions in JSX: Using inline functions can create performance issues as a new function is created every render. Define functions separately when possible.
   // Less Optimal
   const button = <button onClick={() => console.log("Clicked")}>Click Me!</button>;

   // Optimal
   function handleClick() {
     console.log("Clicked");
   }
   const button = <button onClick={handleClick}>Click Me!</button>;
  1. Use Fragments Instead of Extra <div> Elements: React Fragments (<> </>) avoid unnecessary HTML elements when returning multiple elements in JSX.

Example 3: Building a Dynamic To-Do List with JSX

In this example, we’ll use JSX to create a to-do list where users can add items dynamically. This will demonstrate how JSX handles user interactions, state, and renders lists in a React component.

Step 1: Setting Up the Component

First, create a new React component called TodoList. We’ll use React’s useState hook to manage our list of to-do items and the input text for new items.

import React, { useState } from 'react';

function TodoList() {
  const [items, setItems] = useState([]);       // State for the list of items
  const [newItem, setNewItem] = useState('');    // State for the input text

  const handleAddItem = () => {
    if (newItem.trim() !== '') {
      setItems([...items, newItem]);  // Adds new item to the list
      setNewItem('');                 // Resets the input field
    }
  };

  return (
    <div>
      <h2>My To-Do List</h2>
      <input 
        type="text" 
        placeholder="Add new item" 
        value={newItem}
        onChange={(e) => setNewItem(e.target.value)} // Updates input state on change
      />
      <button onClick={handleAddItem}>Add Item</button>

      <ul>
        {items.map((item, index) => (
          <li key={index}>{item}</li>   // Renders each item with a unique key
        ))}
      </ul>
    </div>
  );
}

export default TodoList;

Explanation of the Code

  1. State Management: We use useState to create two pieces of state:
    • items for the to-do list items.
    • newItem for the text currently in the input field.
  2. Event Handling:
    • handleAddItem function adds the item to the items array and clears the input after adding.
    • The input field uses onChange to update the newItem state whenever the user types something.
  3. Rendering the List:
    • The items array is mapped to an unordered list (<ul>), where each item appears as a list item (<li>). We use the key attribute to uniquely identify each item.

Final Output

This component will display an input field, a button to add items, and a list of items below. Users can type an item, click “Add Item,” and see their items appended to the list in real-time.

JSX in React Syntax, Expressions, and Examples

FAQs

1. What is the main purpose of JSX in React?
JSX allows developers to write HTML-like syntax directly in JavaScript, simplifying component structure and improving code readability.

2. Can we use JavaScript functions inside JSX?
Yes! You can use JavaScript functions and expressions within JSX by enclosing them in curly braces {}.

3. Why do we need to wrap multiple JSX elements in a single parent element?
React components return a single element. Wrapping multiple elements ensures the component structure is cohesive and prevents rendering errors.

4. Is JSX required to write React applications?
While JSX is not mandatory, it’s highly recommended as it simplifies the code and enhances readability.

5. How does React handle JSX under the hood?
JSX is transpiled into React’s React.createElement() function, which constructs JavaScript objects representing UI elements.

Thank you for reading! If you found this guide helpful and want to stay updated on more React.js content, be sure to follow us for the latest tutorials and insights: JavaDZone React.js Tutorials. Happy coding!

React Components Functional vs Class Components

Introduction

React, a popular JavaScript library for building user interfaces, has evolved significantly since its introduction. One of the key elements in any React application is the component. Components are the building blocks that help developers organize and manage the UI effectively. In this blog post, “React Components Functional vs Class Components,” we’ll dive into two types of React components: Functional Components and Class Components. We’ll explore their differences, use cases, and best practices to give you a thorough understanding of each type. Whether you’re a beginner or an experienced developer, this guide will help you choose the right component type for your projects.


React Components Functional vs Class Components

1. What are React Components?

In React, components are reusable pieces of code that represent parts of a UI. Each component is a JavaScript function or class that renders a section of the UI based on the properties (props) it receives. Components make the code modular, maintainable, and easier to debug.

  • Functional Components: A simple function that returns JSX (JavaScript XML).
  • Class Components: A JavaScript ES6 class that extends React.Component and returns JSX in its render() method.

2. Functional Components

Functional components are plain JavaScript functions that return JSX. They are simpler to write and understand, making them a popular choice among developers, especially after the introduction of React Hooks, which allow state and lifecycle features in functional components.

Syntax and Structure

import React from 'react';

const Greeting = (props) => {
  return <h1>Hello, {props.name}!</h1>;
};

export default Greeting;

In the example above:

  • Greeting is a functional component.
  • It accepts props (properties) as an argument.
  • It returns a simple h1 element displaying “Hello” along with the name prop.

Advantages of Functional Components

  1. Simplicity: Functional components are shorter and more concise.
  2. Performance: Functional components are generally faster since they lack lifecycle methods and state handling complexity.
  3. Ease of Testing: Functions are easier to test, which makes testing functional components straightforward.
  4. React Hooks Support: With Hooks, functional components can manage state and lifecycle methods, bridging the gap between functional and class components.

Using Hooks in Functional Components

Hooks like useState and useEffect give functional components the power of state management and lifecycle methods.

import React, { useState, useEffect } from 'react';

const Counter = () => {
  const [count, setCount] = useState(0);

  useEffect(() => {
    console.log(`You clicked ${count} times`);
  }, [count]); // Runs only when `count` changes

  return (
    <div>
      <p>Count: {count}</p>
      <button onClick={() => setCount(count + 1)}>Increment</button>
    </div>
  );
};

export default Counter;

In this example:

  • useState manages the count variable.
  • useEffect acts as a lifecycle method, logging the count each time it changes.

3. Class Components

Before the introduction of Hooks, class components were the primary way to manage state and lifecycle in React. Class components are JavaScript ES6 classes that extend from React.Component and use the render() method to return JSX.

Syntax and Structure

import React, { Component } from 'react';

class Greeting extends Component {
  render() {
    return <h1>Hello, {this.props.name}!</h1>;
  }
}

export default Greeting;

In this example:

  • Greeting is a class component.
  • It accesses props using this.props.
  • The component renders JSX within the render() method.

Advantages of Class Components

  1. Lifecycle Methods: Class components have access to a wide range of lifecycle methods like componentDidMount, componentDidUpdate, and componentWillUnmount.
  2. Readability for Complex Logic: For some, class components are easier to organize and read when dealing with more complex logic, as everything is inside a single class structure.

Example with State and Lifecycle Methods

import React, { Component } from 'react';

class Counter extends Component {
  constructor(props) {
    super(props);
    this.state = { count: 0 };
  }

  componentDidMount() {
    console.log("Component Mounted");
  }

  incrementCount = () => {
    this.setState((prevState) => ({ count: prevState.count + 1 }));
  };

  render() {
    return (
      <div>
        <p>Count: {this.state.count}</p>
        <button onClick={this.incrementCount}>Increment</button>
      </div>
    );
  }
}

export default Counter;

In this example:

  • Constructor initializes the state.
  • componentDidMount is a lifecycle method that logs when the component mounts.
  • incrementCount updates the state using this.setState.

4. Difference between Functional and Class Components

FeatureFunctional ComponentsClass Components
SyntaxSimple functionsES6 class
State ManagementHooks (useState, useEffect)this.state, setState()
Lifecycle MethodsuseEffect, etc.componentDidMount, etc.
PerformanceFasterSlightly slower
ComplexitySimple to write and maintainCan become verbose with logic
TestingEasier to testCan be tested but slightly complex
Functional vs Class Components

5. Best Practices for Using Functional and Class Components

  1. Use Functional Components: Whenever possible, prefer functional components with Hooks. They are lightweight and better aligned with React’s modern API.
  2. Organize State and Logic: Use custom Hooks to manage and share reusable logic in functional components, avoiding redundant code.
  3. Avoid Unnecessary Re-renders: Use React.memo to optimize functional components and shouldComponentUpdate in class components to prevent re-renders.
  4. Handle Side Effects Carefully: When using useEffect, ensure dependencies are correctly specified to avoid unnecessary or missing updates.

6. Practical Example: Building a Simple To-do App

To-do App with Functional Components

import React, { useState } from 'react';

const TodoApp = () => {
  const [tasks, setTasks] = useState([]);
  const [task, setTask] = useState("");

  const addTask = () => {
    setTasks([...tasks, task]);
    setTask("");
  };

  return (
    <div>
      <h2>To-do List</h2>
      <input
        type="text"
        value={task}
        onChange={(e) => setTask(e.target.value)}
      />
      <button onClick={addTask}>Add Task</button>
      <ul>
        {tasks.map((item, index) => (
          <li key={index}>{item}</li>
        ))}
      </ul>
    </div>
  );
};

export default TodoApp;

FAQs

Q1: Which component type is better for performance?

Functional components generally perform better due to their simpler structure and lack of lifecycle methods. With the React.memo function, they can be further optimized to prevent unnecessary re-renders.

Q2: Can I use state in functional components?

Yes! With Hooks, functional components can now use state and lifecycle features, making them as powerful as class components.

Q3: Are class components deprecated?

No, class components are still fully supported in React, though most new development favors functional components for their simplicity and modern features.

Q4: When should I use a class component?

Consider class components when working on a legacy codebase that already uses them or if you’re more comfortable with the traditional class syntax for structuring complex logic.

Q5: Can I mix functional and class components in a single project?

Absolutely! You can use both types of components in the same React project. However, it’s often best to stick with functional components if you’re building new features to keep the codebase consistent.


Conclusion

React’s flexibility with component types allows developers to choose the structure that best fits their needs. While class components have been around longer, functional components have become more popular due to their simplicity and the powerful capabilities offered by Hooks. By understanding both types, you’ll be better equipped to build optimized and maintainable React applications.


Thank you for reading! If you found this guide helpful and want to stay updated on more React.js content, be sure to follow us for the latest tutorials and insights: JavaDZone React.js Tutorials. Happy coding!

How to Set Up a React Development Environment

How to set up a React development environment correctly is essential for a smooth and productive development experience. In this guide, we’ll explore the steps for setting up Node.js, NPM, and creating a new React app. We’ll cover the best practices, explain why each step matters, and share practical examples to help both beginners and experienced developers.

1. What is React?

React is a popular JavaScript library for building user interfaces, created and maintained by Facebook. Its component-based structure allows developers to build efficient, reusable, and maintainable UIs. React is commonly used for developing single-page applications (SPAs) where the user experience is fluid, responsive, and interactive.

2. Why Node.js and NPM?

Node.js and NPM are essential tools for working with React:

  • Node.js is a JavaScript runtime that allows you to run JavaScript on your server or local machine, enabling the use of tools like React.
  • NPM (Node Package Manager) helps you manage JavaScript packages and dependencies, making it easy to install libraries and keep your project up-to-date.

By using Node.js and NPM, you can streamline the setup and maintenance of a React environment.

3. System Requirements

To start, make sure your computer meets the following requirements:

  • Operating System: Windows, macOS, or Linux
  • RAM: 4GB or more recommended
  • Disk Space: 500MB free for Node.js and NPM installation
  • Text Editor: Visual Studio Code, Atom, or any other preferred editor
How to Set Up a React Development Environment

4. Step-by-Step Setup of Node.js and NPM

Step 1: Download Node.js

  1. Visit Node.js’s official website.
  2. Download the LTS (Long Term Support) version for stability and compatibility.
  3. Run the installer and follow the instructions. Check the box to install NPM along with Node.js.

Step 2: Verify Installation

To ensure Node.js and NPM are installed correctly:

  1. Open your command prompt or terminal.
  2. Type the following commands:
node -v

This should return the version of Node.js you installed.

How to Set Up a React Development Environment

Step 3: Update NPM (Optional)

Occasionally, the version of NPM installed with Node.js might not be the latest. To update:

npm install -g npm@latest

This command will update NPM to its latest version globally on your system.

5. Creating Your First React App

The easiest way to set up a new React project is by using Create React App. This command-line tool provides an optimized and ready-to-go setup for React projects.

Step 1: Install Create React App Globally

If it’s your first time setting up a React environment, install create-react-app globally:

npm install -g create-react-app

Step 2: Create a New React App

Once installed, you can create a new React project:

npx create-react-app my-first-react-app

Replace my-first-react-app with your preferred project name. The npx command runs the create-react-app without needing to install it globally each time.

Step 3: Start Your React Application

To run the app:

  1. Navigate to your project directory:
cd my-first-react-app

2. Start the development server:

npm start

3. Open your browser and go to http://localhost:3000 to see your new React app.


6. Exploring the Folder Structure of a React App

Here’s a quick breakdown of the main folders in your React app:

  • node_modules: Contains all the dependencies your project needs. Managed by NPM.
  • public: Stores static files (e.g., index.html, images) and can be directly accessed.
  • src: Contains your JavaScript, CSS, and other files where you’ll build your app.
    • App.js: The main React component where your application starts.
    • index.js: Entry point of your app where App.js is rendered.

Note: Avoid modifying files in node_modules. Instead, make all changes in the src folder.

7. Best Practices for a React Environment

To set up an optimal React development environment, here are some best practices to follow:

1. Use Environment Variables

Manage sensitive data (like API keys) using environment variables. Create a .env file in your root directory and store variables like this:

REACT_APP_API_URL=https://api.example.com

Important: Prefix React environment variables with REACT_APP_.

2. Organize Components

Create folders for different types of components (e.g., components, pages) to maintain a clean structure. Group similar files together.

3. Use ESLint and Prettier

Install ESLint for linting (checking for errors) and Prettier for code formatting:

npm install eslint prettier --save-dev

They help maintain clean and readable code.

4. Use Version Control

Track code changes using Git and repositories like GitHub or GitLab. This is especially useful for collaborative projects.

5. Regularly Update Dependencies

Check for dependency updates to ensure security and compatibility:

npm outdated
npm update

Pro Tip: Use tools like npm-check for a more interactive update experience.

FAQs

1. What is the role of Node.js in React?

Node.js provides a runtime environment for JavaScript, allowing you to install NPM packages and use tools like Create React App, which simplifies project setup.

2. Why use Create React App?

Create React App configures an optimized environment automatically, helping beginners avoid setup complexities while offering a ready-to-use structure for experienced developers.

3. Can I use React without NPM?

Yes, it’s possible to add React via CDN links directly in HTML files, but this approach lacks package management benefits and is less practical for large applications.

4. How often should I update dependencies?

Regular updates are recommended, especially for security patches. Use tools like Dependabot (GitHub) to automate dependency checks.

5. How can I deploy my React app?

After developing, you can deploy using services like Vercel, Netlify, or GitHub Pages. Run npm run build to create an optimized production build.


Setting up a React development environment may seem challenging, but with Node.js and NPM, it’s straightforward. By following these steps and best practices, you can streamline your React setup and focus on building high-quality applications!

Thank you for reading! If you found this guide helpful and want to stay updated on more React.js content, be sure to follow us for the latest tutorials and insights: JavaDZone React.js Tutorials. Happy coding!
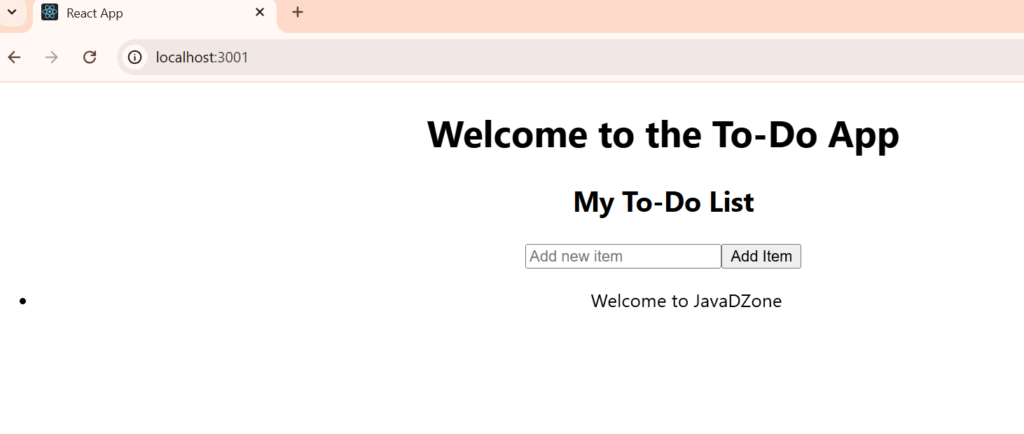
What is React JS

What is React? A Beginner’s Guide to React.js Framework

React.js, commonly referred to as React, is an open-source JavaScript library created by Facebook in 2013. What is React JS? A Beginner’s Guide to React.js Framework Designed for building interactive, dynamic user interfaces (UI), React has since become one of the most popular choices for web development. React enables developers to build scalable, fast, and efficient applications by breaking down complex UIs into reusable components, which can dramatically simplify both the development and maintenance of applications.

Why Choose React?

React is favored by many developers due to its flexibility, speed, and efficiency. Here are a few reasons why React is widely adopted:

  1. Reusable Components: React allows developers to create independent, reusable components that can be used throughout the application. This leads to faster development and consistent user experiences.
  2. Virtual DOM: Unlike traditional DOM manipulation, React uses a virtual DOM that improves performance by minimizing real DOM changes. This optimizes rendering and enhances the speed of the application.
  3. Declarative Syntax: React’s declarative syntax makes code more readable and easier to debug. Developers can describe what the UI should look like, and React efficiently manages the underlying updates.
  4. Large Community and Ecosystem: React has a vibrant community, a vast library of third-party tools, and extensive documentation, making it beginner-friendly while also catering to complex projects.

Setting Up a React Environment

To get started with React, you need Node.js and npm (Node Package Manager) installed on your machine.

  1. Install Node.js:
    • Download and install Node.js from the official website. This will automatically install npm as well.
  2. Create a New React Application:
    • Open your terminal and run the following command:
npx create-react-app my-app
  • Replace my-app with your project name. This command sets up a new React project with all the necessary files and dependencies.

3. Start the Development Server:

Navigate into the project folder:

cd my-app

Run the following command to start the application:

npm start

Your React app will be running locally at http://localhost:3000.


Understanding React Components and What is React JS

React applications are built with components. Components are small, reusable pieces of code that describe part of the UI.

Example: A Simple Functional Component

// Greeting.js
import React from 'react';

function Greeting() {
  return <h1>Hello, Welcome to React!</h1>;
}

export default Greeting;

This Greeting component returns a simple heading. To use it in your main app, you can import and render it as follows:

// App.js
import React from 'react';
import Greeting from './Greeting';

function App() {
  return (
    <div>
      <Greeting />
    </div>
  );
}

export default App;

Functional vs Class Components

  • Functional Components: These are simpler and are written as JavaScript functions. They became widely used after React introduced Hooks, allowing for state and lifecycle features.
  • Class Components: Written as ES6 classes, they were originally the only way to handle component state and lifecycle methods before Hooks.

State and Props in React

  1. State: A component’s state is an object that holds dynamic data. When state changes, React re-renders the component to reflect the new state.
import React, { useState } from 'react';

function Counter() {
  const [count, setCount] = useState(0);

  return (
    <div>
      <p>Current Count: {count}</p>
      <button onClick={() => setCount(count + 1)}>Increment</button>
    </div>
  );
}

export default Counter;

2. Props: Props (short for “properties”) allow data to be passed from a parent component to a child component.

function Greeting(props) {
  return <h1>Hello, {props.name}!</h1>;
}

function App() {
  return (
    <div>
      <Greeting name="Alice" />
      <Greeting name="Bob" />
    </div>
  );
}

export default App;

Best Practices in React

  1. Keep Components Small and Focused: Each component should have a single purpose to make code more readable and reusable.
  2. Use Descriptive Names: Name components based on what they represent.
  3. Avoid Direct DOM Manipulation: Use state and props for any updates instead of directly manipulating the DOM.
  4. Utilize Hooks: Make use of React’s built-in Hooks, like useState, useEffect, and useContext, to manage state and lifecycle events in functional components.
  5. Use Key Props in Lists: If rendering lists, always include a unique key prop for each element to enhance performance.
{items.map(item => (
  <li key={item.id}>{item.name}</li>
))}

Practical Example: Building a Simple Todo List in React

In this example, we’ll build a simple Todo List application to demonstrate how to use state and events in React. Follow these steps to set up and understand the project structure. This guide will help you know exactly which files to create and where to paste the code.

Step 1: Set Up Your React Project

  1. Create a New React App:
    Open your terminal and run:
npx create-react-app my-todo-app

Replace my-todo-app with any name for your project. This command will create a new React project folder with the necessary files.

2. Open the Project: Navigate to the project folder:

cd my-todo-app

Start the development server by running:

npm start

This will open the React app at http://localhost:3000

Step 2: Create a New Component for Todo List

  1. Inside the src folder, create a new file called Todo.js. This component will handle the core functionality of our Todo List.
  2. Add the Following Code in Todo.js: This code creates a simple form where users can add new todo items and displays them in a list.
// src/Todo.js
import React, { useState } from 'react';

function Todo() {
  // State to hold the list of todos
  const [todos, setTodos] = useState([]);
  // State to hold the new todo input
  const [newTodo, setNewTodo] = useState('');

  // Function to add a new todo
  const addTodo = () => {
    if (newTodo.trim() !== '') {
      setTodos([...todos, newTodo]);
      setNewTodo(''); // Clear the input after adding
    }
  };

  return (
    <div>
      <h2>Todo List</h2>
      <input
        type="text"
        value={newTodo}
        onChange={(e) => setNewTodo(e.target.value)}
        placeholder="Enter a new task"
      />
      <button onClick={addTodo}>Add</button>
      <ul>
        {todos.map((todo, index) => (
          <li key={index}>{todo}</li>
        ))}
      </ul>
    </div>
  );
}

export default Todo;
  1. Explanation:
    • State Management: We use useState to store the list of todos and the current input for a new todo.
    • Event Handling: The addTodo function adds a new todo to the list when the “Add” button is clicked, and it also clears the input field.

Step 3: Use the Todo Component in App.js

  1. Open App.js in the src folder. By default, App.js is the main file that renders components on the page.
  2. Import and Use the Todo Component: Add the following code in App.js to include the Todo component we created.
// src/App.js
import React from 'react';
import Todo from './Todo'; // Import the Todo component

function App() {
  return (
    <div className="App">
      <h1>My React Todo App</h1>
      <Todo /> {/* Render the Todo component here */}
    </div>
  );
}

export default App;

3. Save and View:
Save the file, and if your development server is still running, your Todo List app should now appear at http://localhost:3000.

You should see a heading “My React Todo App,” an input field, an “Add” button, and an area where todos will be listed.

What is React JS

FAQs

1. What is React used for?
React is used to build interactive, dynamic, and responsive web applications by simplifying UI development with reusable components.

2. Do I need to know JavaScript before learning React?
Yes, a basic understanding of JavaScript is essential, as React relies heavily on JavaScript concepts.

3. What are React Hooks?
Hooks, introduced in React 16.8, are functions like useState and useEffect that let you use state and other React features in functional components.

4. How is React different from Angular?
While both are used for front-end development, React is a library focused solely on the UI, while Angular is a full-fledged framework offering more structure and tools for building applications.

5. Can I use React with backend frameworks like Node.js?
Yes, React works well with backend frameworks like Node.js to handle the server-side logic and API endpoints.

Thank you for reading! If you found this guide helpful and want to stay updated on more React.js content, be sure to follow us for the latest tutorials and insights: JavaDZone React.js Tutorials. Happy coding!