1. Overview
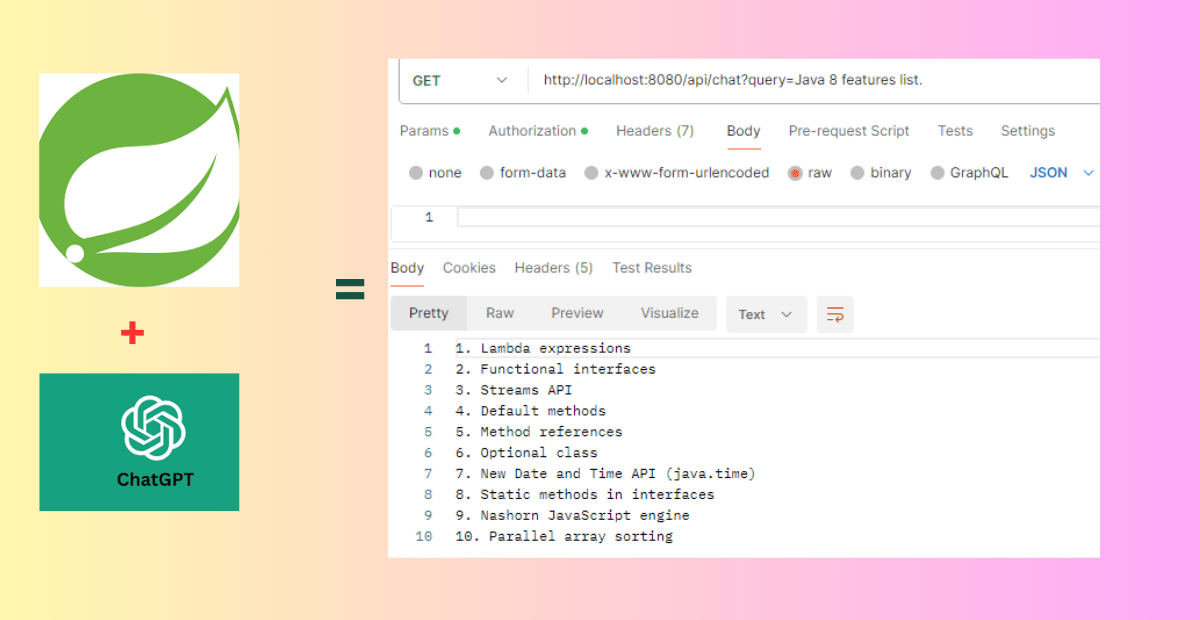
This guide will walk you through the process of integrating ChatGPT with Spring Boot. In many companies, ChatGPT is restricted, making it challenging to use. However, this tutorial provides a solution to seamlessly integrate ChatGPT with Spring Boot, ensuring smooth implementation without encountering any restrictions. Let’s get started with ChatGPT Integration with Spring Boot!
Table of Contents
2. What is Spring Boot
Spring Boot is a framework used to build web applications. It’s kind of particular about how things are set up, offering default configurations that you can tweak to fit your needs. If you want to dive deeper into what Spring Boot is all about and its features, you can check out this detailed guide: https://javadzone.com/exploring-what-is-spring-boot-features/
3. Create OpenAI API Key
Sign up and create your own OpenAI API key here
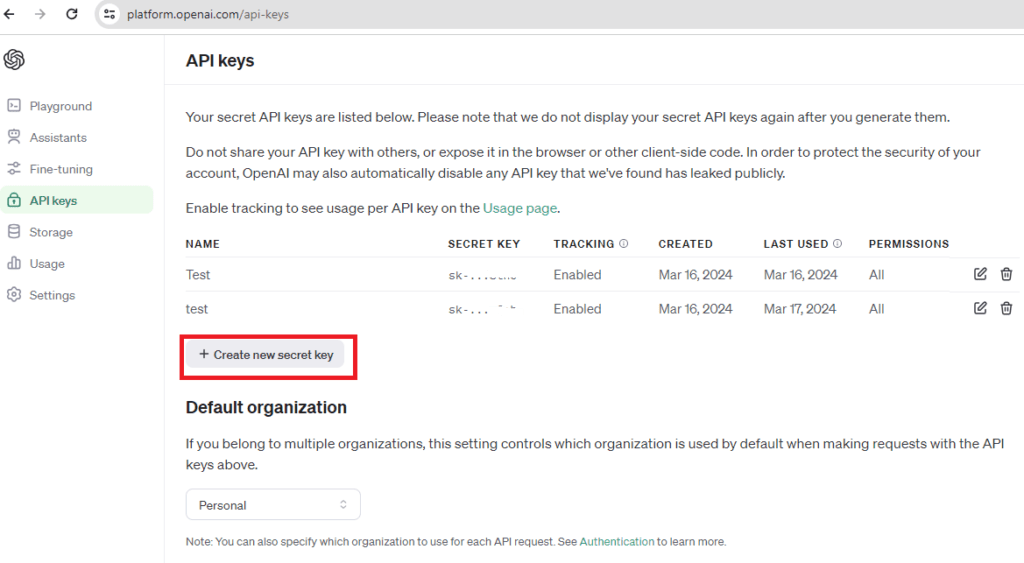
Click on “Create new secret key” and optionally give it a name. Then click on “Create secret key”. It will generate a secret key; copy it and save it somewhere safe.
4. ChatGPT Integration with Spring Boot: Code Example
Create a Spring Boot project using your IDE or spring initializr, and add the following dependencies:
If you are using Maven, add the following dependencies:
<dependency>
    <groupId>org.springframework.boot</groupId>
    <artifactId>spring-boot-starter-web</artifactId>
</dependency>
<dependency>
    <groupId>org.projectlombok</groupId>
    <artifactId>lombok</artifactId>
</dependency>
If you are using Gradle, add the following dependencies:
implementation 'org.springframework.boot:spring-boot-starter-web'
compileOnly 'org.projectlombok:lombok'
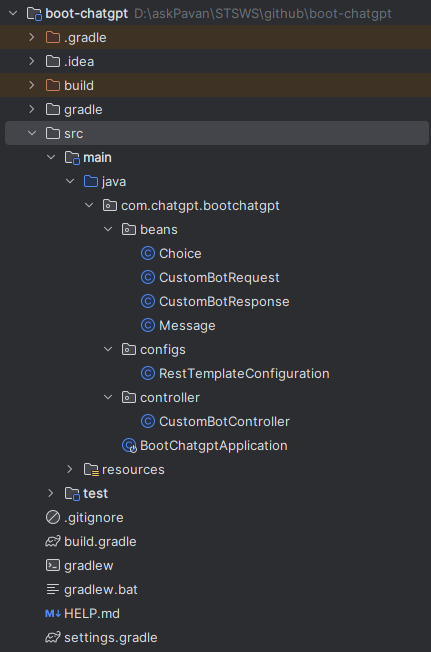
annotationProcessor 'org.projectlombok:lombok'The project structure looks like this:
4.1 Create the CustomBotRequest POJO Class
package com.chatgpt.bootchatgpt.beans;


import lombok.AllArgsConstructor;
import lombok.Data;

import java.util.List;

@Data
@AllArgsConstructor
public class CustomBotRequest {
    private String model;
    private List<Message> messages;
}
4.2 Create the Message POJO Class
package com.chatgpt.bootchatgpt.beans;
import lombok.AllArgsConstructor;
import lombok.Data;

@Data
@AllArgsConstructor
public class Message {
    private String role;
    private String content;
}
4.3 Create the CustomBotResponse POJO Class
package com.chatgpt.bootchatgpt.beans;

import lombok.Data;

import java.util.List;

@Data
public class CustomBotResponse {
    private List<Choice> choices;
}
4.4 Create the Choice POJO class
package com.chatgpt.bootchatgpt.beans;

import lombok.Data;

@Data
public class Choice {
    private String index;
    private Message message;
}
4.5 Create the RestTemplateConfiguration class
package com.chatgpt.bootchatgpt.configs;

import org.springframework.beans.factory.annotation.Value;
import org.springframework.context.annotation.Bean;
import org.springframework.context.annotation.Configuration;
import org.springframework.web.client.RestTemplate;

@Configuration
public class RestTemplateConfiguration {

    @Value("${openai.api.key}")
    private String openApiKey;

    @Bean
    public RestTemplate restTemplate(){
        RestTemplate restTemplate = new RestTemplate();
        restTemplate.getInterceptors().add((request, body, execution) -> {
            request.getHeaders().add("Authorization", "Bearer "+openApiKey);
            return execution.execute(request,body);
        });
        return restTemplate;
    }
}
4.6 Create the CustomBotController class
package com.chatgpt.bootchatgpt.controller;

import com.chatgpt.bootchatgpt.beans.CustomBotRequest;
import com.chatgpt.bootchatgpt.beans.CustomBotResponse;
import com.chatgpt.bootchatgpt.beans.Message;
import org.springframework.beans.factory.annotation.Autowired;
import org.springframework.beans.factory.annotation.Value;
import org.springframework.http.HttpStatus;
import org.springframework.http.ResponseEntity;
import org.springframework.web.bind.annotation.GetMapping;
import org.springframework.web.bind.annotation.RequestMapping;
import org.springframework.web.bind.annotation.RequestParam;
import org.springframework.web.bind.annotation.RestController;
import org.springframework.web.client.RestTemplate;

import java.util.Collections;

@RestController
@RequestMapping("/api")
public class CustomBotController {

    @Value("${openai.model}")
    private String model;

    @Value("${openai.api.url}")
    private String url;

    @Autowired
    private RestTemplate restTemplate;

    @GetMapping("/chat")
    public ResponseEntity<String> getResponse(@RequestParam("query") String query) {
        Message message = new Message("user", query);
        CustomBotRequest customBotRequest = new CustomBotRequest(model, Collections.singletonList(message));
        CustomBotResponse customBotResponse = restTemplate.postForObject(url, customBotRequest, CustomBotResponse.class);

        if(customBotResponse == null || customBotResponse.getChoices() == null || customBotResponse.getChoices().isEmpty()){
            return ResponseEntity.status(HttpStatus.NO_CONTENT).body("No response from ChatGPT");
        }

        String botResponse = customBotResponse.getChoices().get(0).getMessage().getContent();
        return ResponseEntity.ok(botResponse);
    }
}
4.7 Add the following properties. Include your secret key generated from OpenAI API in step 3
openai.model=gpt-3.5-turbo
openai.api.key=sk56RkTP5gF9a4L9bcBya34477W2dgdf7cvsdf6d0s9dfgkk
openai.api.url=https://api.openai.com/v1/chat/completions
5. Run The Application
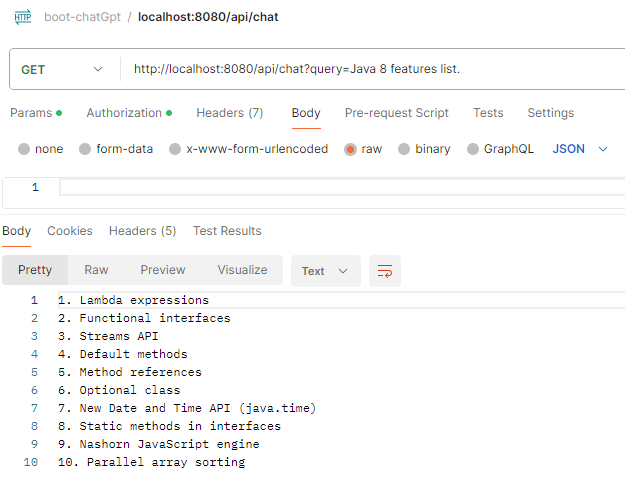
Access this endpoint via Postman or your browser: http://localhost:8080/api/chat?query=Java 8 features list. The provided query is “Java 8 features list,” but feel free to modify it as needed. You will see the result like below.
Conclusion
In summary, this guide has shown you how to bring ChatGPT and Spring Boot together, opening up exciting possibilities for your web applications. By following these steps, you can seamlessly integrate ChatGPT into your Spring Boot projects, enhancing user interactions and making your applications smarter. So, why wait? Dive in and discover the power of ChatGPT integration with Spring Boot today!