
Table of Contents
Spring Boot MongoDB CRUD Application Example: A Step-by-Step Guide
Step 1: Setting Up the Project
Start by creating a new Spring Boot project using Spring Initializr. Add the spring-boot-starter-data-mongodb dependency to enable MongoDB integration, laying the groundwork for our focused exploration of a Spring Boot MongoDB CRUD application example.
<dependency>
    <groupId>org.springframework.boot</groupId>
    <artifactId>spring-boot-starter-data-mongodb</artifactId>
</dependency>
Step 2: Define the Employee Model
Create an Employee class to represent the data model. Annotate it with @Document to map it to a MongoDB collection.
package com.crud.beans;

import org.springframework.data.annotation.Id;
import org.springframework.data.mongodb.core.mapping.Document;

@Document(collection = "employees")
public class Employee {

    @Id
    private String id;
    private String name;
    private int age;

    // Getters and setters
}
Step 3: Implement the Repository
Create an EmployeeRepository interface that extends MongoRepository. This interface provides CRUD operations for the Employee entity.
package com.crud.repo;

import org.springframework.data.mongodb.repository.MongoRepository;
import com.crud.beans.Employee;

public interface EmployeeRepository extends MongoRepository<Employee, String> {

}
Step 4: Develop the Service Layer
Create an EmployeeService class to encapsulate the business logic. Autowire the EmployeeRepository and implement methods for CRUD operations.
package com.crud.service;

import java.util.List;
import java.util.Optional;
import org.springframework.beans.factory.annotation.Autowired;
import org.springframework.stereotype.Service;
import com.crud.beans.Employee;
import com.crud.repo.EmployeeRepository;

@Service
public class EmployeeService {

    @Autowired
    private EmployeeRepository employeeRepository;

    public List<Employee> getEmployees() {
        return employeeRepository.findAll();
    }

    public Employee create(Employee employee) {
        return employeeRepository.save(employee);
    }

    public Optional<Employee> updateEmployee(String id, Employee employee) {
        if(!employeeRepository.existsById(id)) {
            return Optional.empty();
        }

        employee.setId(id);
        return Optional.of(employeeRepository.save(employee));
    }

    public void deleteEmployee(String id) {
        employeeRepository.deleteById(id);
    }
}
Step 5: Implement the Controller
Create an EmployeeController class to define the RESTful API endpoints for CRUD operations.
package com.crud.controller;

import java.util.List;
import java.util.Optional;
import org.springframework.beans.factory.annotation.Autowired;
import org.springframework.http.HttpStatus;
import org.springframework.http.ResponseEntity;
import org.springframework.web.bind.annotation.*;
import com.crud.beans.DeleteResponse;
import com.crud.beans.Employee;
import com.crud.service.EmployeeService;

@RestController
@RequestMapping("/api/employees")
public class EmployeeController {

    @Autowired
    private EmployeeService employeeService;

    @GetMapping
    public List<Employee> getEmployees() {
        return employeeService.getEmployees();
    }

    @PostMapping
    public ResponseEntity<Employee> createEmployee(@RequestBody Employee employee) {
        Employee createdEmployee = employeeService.create(employee);
        return ResponseEntity.status(HttpStatus.CREATED).body(createdEmployee);
    }

    @PutMapping("/{id}")
    public ResponseEntity<Employee> updateEmployee(@PathVariable String id, @RequestBody Employee employee) {
        return employeeService.updateEmployee(id, employee)
                .map(ResponseEntity::ok)
                .orElse(ResponseEntity.ok().build());
    }

    @DeleteMapping("/{id}")
    public ResponseEntity<DeleteResponse> deleteEmployee(@PathVariable String id) {
        employeeService.deleteEmployee(id);
        return ResponseEntity.status(HttpStatus.OK)
                .body(new DeleteResponse("Employee Deleted Successfully", id, "Deleted Employee Name"));
    }
}
Step 6: Configure MongoDB Connection
Set up the MongoDB connection properties in the application.properties file.
spring.data.mongodb.host=localhost
spring.data.mongodb.port=27017
spring.data.mongodb.database=boot-crud
Step 7: Test the Application
Start the MongoDB server and run your Spring Boot application. Utilize tools like Postman or curl to send HTTP requests to the defined endpoints. Verify that the CRUD operations are functioning as expected by checking if you can retrieve, create, update, and delete employees.
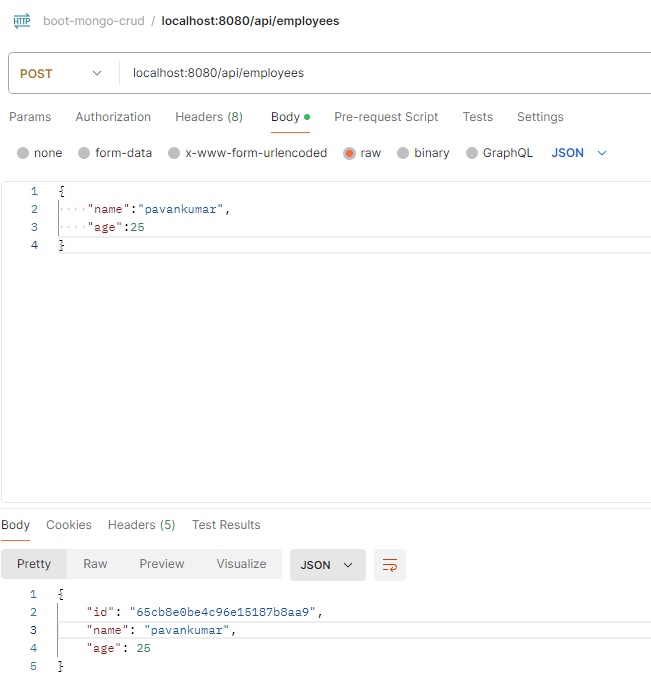
Creating a New Employee (POST)
Endpoint: POST /api/employees
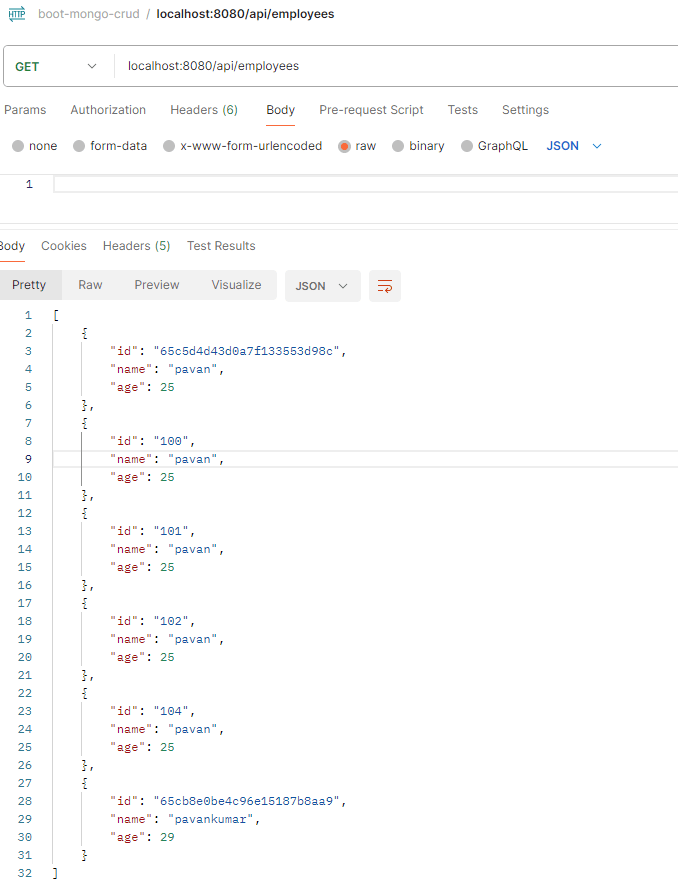
Retrieving All Employees (GET)
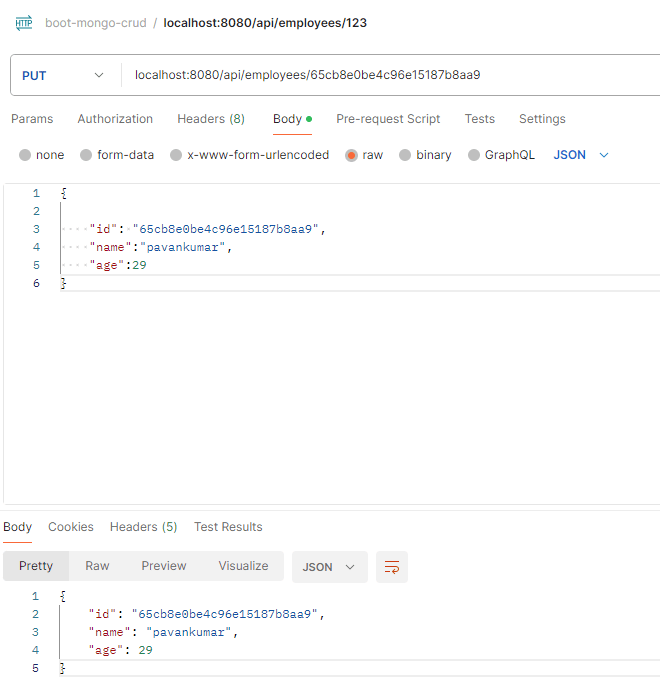
Updating an Employee (PUT)
Endpoint:PUT /api/employees/{id}
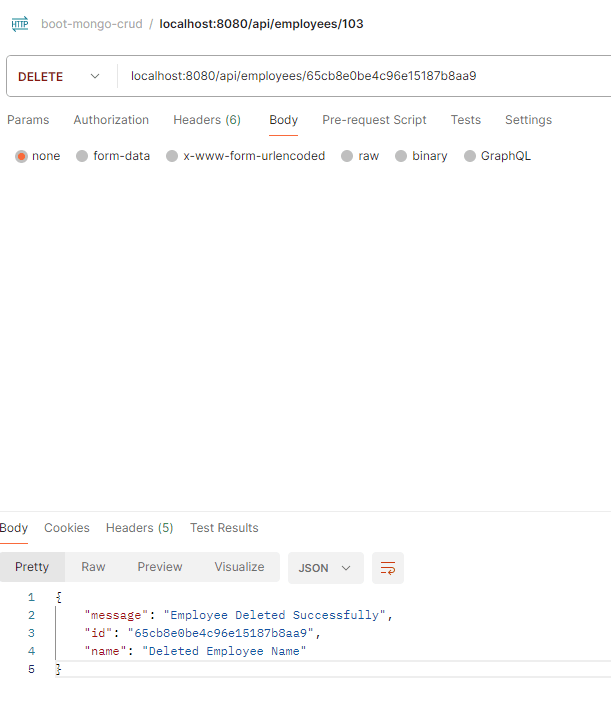
Deleting an Employee (DELETE)
Endpoint:DELETE /api/employees/{id}
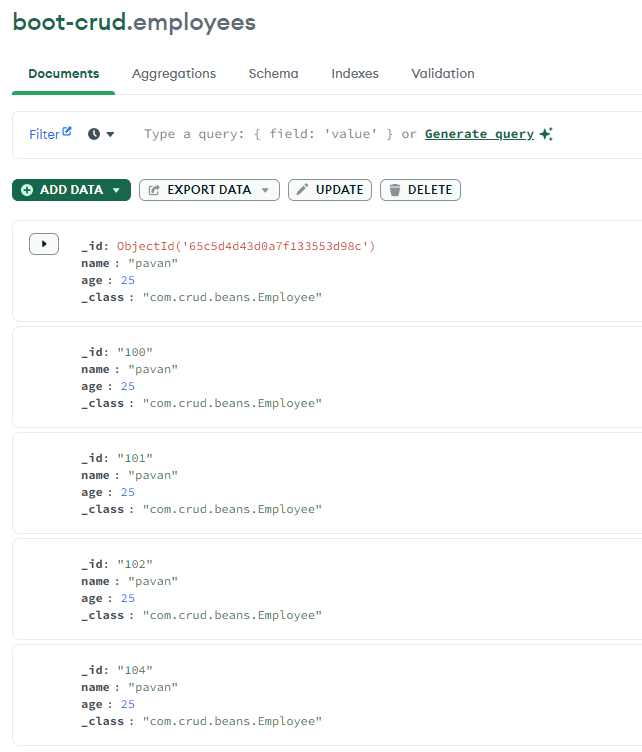
Below is the snapshot of the employee collection. Please review:
Conclusion:
By following these steps and using Postman to interact with the Spring Boot and MongoDB applications, you can easily perform CRUD operations on employee records. This example demonstrates how to retrieve, create, update, and delete employee data in a straightforward manner.
Feel free to customize the input data and explore additional features of the application to suit your requirements. Happy coding!