Effective exception handling is crucial for building robust applications in Spring Boot. By implementing Spring Boot exception handling best practices, developers can ensure that errors are managed gracefully, providing users with clear feedback while maintaining application stability. In this guide, we will explore common pitfalls to avoid and essential strategies to enhance your error management, ultimately leading to a more resilient and user-friendly application.
Bad Practices
Generic Exception Handling
Description: Catching all exceptions with a single handler.
Example:
@ControllerAdvice
public class GlobalExceptionHandler {
@ExceptionHandler(Exception.class)
public ResponseEntity<String> handleAllExceptions(Exception ex) {
return new ResponseEntity<>("An error occurred", HttpStatus.INTERNAL_SERVER_ERROR);
}
}
Impact: This obscures the root cause of errors, making debugging difficult.
Not Logging Exceptions
Description: Failing to log exception details.
Example:
@ExceptionHandler(RuntimeException.class)
public ResponseEntity<String> handleRuntimeException(RuntimeException ex) {
return new ResponseEntity<>("A runtime error occurred", HttpStatus.INTERNAL_SERVER_ERROR);
}
Impact: Without logging, you lose visibility into application issues, complicating troubleshooting.
Exposing Stack Traces to Clients
Description: Sending detailed stack traces in error responses.
Example:
@ExceptionHandler(Exception.class)
public ResponseEntity<String> handleException(Exception ex) {
return new ResponseEntity<>(ex.getMessage(), HttpStatus.INTERNAL_SERVER_ERROR);
}
Impact: This can leak sensitive information about the application and confuse users.
Ignoring HTTP Status Codes
Description: Returning a generic HTTP status (like 200 OK) for errors.
Example:
@ExceptionHandler(Exception.class)
public ResponseEntity<String> handleException(Exception ex) {
return new ResponseEntity<>("Error occurred", HttpStatus.OK); // Incorrect status
}
Impact: Misleading clients about the success of requests, causing confusion.
Hardcoding Error Messages
Description: Using static, non-informative error messages.
Example:
@ExceptionHandler(NullPointerException.class)
public ResponseEntity<String> handleNullPointer(NullPointerException ex) {
return new ResponseEntity<>("An error occurred", HttpStatus.INTERNAL_SERVER_ERROR); // Vague message
}
Spring Boot Exception Handling Best Practices
Specific Exception Handlers
Description: Create dedicated handlers for different exceptions.
Example:
@ExceptionHandler(ResourceNotFoundException.class)
public ResponseEntity<String> handleResourceNotFound(ResourceNotFoundException ex) {
return new ResponseEntity<>(ex.getMessage(), HttpStatus.NOT_FOUND);
}
Benefit: Provides clear and actionable feedback tailored to the specific error.
Centralized Exception Handling with @ControllerAdvice
Description: Use @ControllerAdvice to manage exceptions globally.
Example:
@ControllerAdvice
public class GlobalExceptionHandler {
@ExceptionHandler(MethodArgumentNotValidException.class)
public ResponseEntity<String> handleValidationExceptions(MethodArgumentNotValidException ex) {
return new ResponseEntity<>("Validation failed: " + ex.getBindingResult().getFieldError().getDefaultMessage(), HttpStatus.BAD_REQUEST);
}
}
Benefit: Keeps controllers clean and separates error handling logic.
Log Exceptions Appropriately
Description: Implement logging for all exceptions with relevant details.
Example:
private static final Logger logger = LoggerFactory.getLogger(GlobalExceptionHandler.class);
@ExceptionHandler(Exception.class)
public ResponseEntity<String> handleAllExceptions(Exception ex) {
logger.error("An error occurred: {}", ex.getMessage(), ex);
return new ResponseEntity<>("An unexpected error occurred", HttpStatus.INTERNAL_SERVER_ERROR);
}
Benefit: Enhances visibility into issues, aiding in faster resolution.
Meaningful Error Responses
Description: Structure error responses with status code, message, and timestamp.
Example:
public class ErrorResponse {
private LocalDateTime timestamp;
private String message;
private int status;
public ErrorResponse(LocalDateTime timestamp, String message, int status) {
this.timestamp = timestamp;
this.message = message;
this.status = status;
}
// Getters and setters
}
@ExceptionHandler(ResourceNotFoundException.class)
public ResponseEntity<ErrorResponse> handleResourceNotFound(ResourceNotFoundException ex) {
ErrorResponse errorResponse = new ErrorResponse(LocalDateTime.now(), ex.getMessage(), HttpStatus.NOT_FOUND.value());
return new ResponseEntity<>(errorResponse, HttpStatus.NOT_FOUND);
}
Benefit: Provides clients with clear, consistent error information.
Custom HTTP Status Codes
Description: Return appropriate HTTP status codes based on the error type.
Example:
@ExceptionHandler(DataIntegrityViolationException.class)
public ResponseEntity<String> handleDataIntegrityViolation(DataIntegrityViolationException ex) {
return new ResponseEntity<>("Data integrity violation", HttpStatus.CONFLICT);
}
Benefit: Clearly communicates the outcome of requests, improving client understanding.
Graceful Degradation
Description: Implement fallback mechanisms or user-friendly messages.
Example:
@GetMapping("/resource/{id}")
public ResponseEntity<Resource> getResource(@PathVariable String id) {
Resource resource = resourceService.findById(id);
if (resource == null) {
throw new ResourceNotFoundException("Resource not found for ID: " + id);
}
return ResponseEntity.ok(resource);
}
Benefit: Enhances user experience during errors and maintains application usability.
Conclusion
By distinguishing between bad and best practices in exception handling, you can create more robust and user-friendly Spring Boot applications. Implementing these best practices not only improves error management but also enhances the overall reliability and user experience of your application.
Spring Boot is a popular framework for building Java applications quickly and efficiently. Whether you’re just starting or have been working with it for a while, you might have some questions. This blog post covers the top 50 Spring Boot Interview questions and answers to help you understand Spring Boot better.
1. What is Spring Boot, and why should I use it?
Spring Boot is a framework built on top of the Spring Framework. It simplifies the setup and development of new Spring applications by providing default configurations and embedded servers, reducing the need for boilerplate code.
2. How do I create a Spring Boot application?
You can create a Spring Boot application using Spring Initializr (start.spring.io), an IDE like IntelliJ IDEA, or by using Spring Boot CLI:
Select your project settings (e.g., Maven, Java, Spring Boot version).
Add necessary dependencies.
Generate the project and unzip it.
Open the project in your IDE and start coding.
3. What is the main class in a Spring Boot application?
The main class in a Spring Boot application is the entry point and is annotated with @SpringBootApplication. It includes the main method which launches the application using SpringApplication.run().
@SpringBootApplication
public class MyApplication {
public static void main(String[] args) {
SpringApplication.run(MyApplication.class, args);
}
}
4. What does the @SpringBootApplication annotation do?
@SpringBootApplication is a convenience annotation that combines three annotations: @Configuration (marks the class as a source of bean definitions), @EnableAutoConfiguration (enables Spring Boot’s auto-configuration mechanism), and @ComponentScan (scans the package of the annotated class for Spring components).
5. How can you configure properties in a Spring Boot application?
You can configure properties in a Spring Boot application using application.properties or application.yml files located in the src/main/resources directory.
You can handle exceptions in Spring Boot using @ControllerAdvice and @ExceptionHandler annotations to create a global exception handler.
@ControllerAdvice
public class GlobalExceptionHandler {
@ExceptionHandler(ResourceNotFoundException.class)
public ResponseEntity<ErrorResponse> handleResourceNotFoundException(ResourceNotFoundException ex) {
ErrorResponse errorResponse = new ErrorResponse("NOT_FOUND", ex.getMessage());
return new ResponseEntity<>(errorResponse, HttpStatus.NOT_FOUND);
}
}
7. What is Spring Boot Actuator and what are its benefits?
Spring Boot Actuator provides production-ready features such as health checks, metrics, and monitoring for your Spring Boot application. It includes various endpoints that give insights into the application’s health and environment.
8. How can you enable and use Actuator endpoints in a Spring Boot application?
Add the Actuator dependency in your pom.xml or build.gradle file:
9. What are Spring Profiles and how do you use them?
Spring Profiles allow you to segregate parts of your application configuration and make it only available in certain environments. You can activate profiles using the spring.profiles.active property.
Spring Boot supports testing with various tools and annotations like @SpringBootTest, @WebMvcTest, and @DataJpaTest. Use MockMvc to test MVC controllers without starting a full HTTP server.
@SpringBootTest
public class MyApplicationTests {
@Test
void contextLoads() {
}
}
11. How can you secure a Spring Boot application?
You can secure a Spring Boot application using Spring Security. Add the dependency and configure security settings:
12. What is a Spring Boot Starter and why is it useful?
Spring Boot Starters are a set of convenient dependency descriptors you can include in your application. They provide a one-stop-shop for all the dependencies you need for a particular feature.
14. What is Spring Boot DevTools and how does it enhance development?
Spring Boot DevTools provides features to enhance the development experience, such as automatic restarts, live reload, and configurations for faster feedback loops. Add the dependency to your project:
15. How can you handle different environments in a Spring Boot application?
You can handle different environments using Spring Profiles. Define environment-specific properties files like application-dev.properties, application-prod.properties, and activate a profile using spring.profiles.active.
16. What are the differences between @Component, @Service, @Repository, and @Controller annotations?
These annotations are specializations of @Component:
@Component: Generic stereotype for any Spring-managed component.
@Service: Specialization for service layer classes.
@Repository: Specialization for persistence layer classes.
@Controller: Specialization for presentation layer (MVC controllers).
17. How can you create a RESTful web service using Spring Boot?
Use @RestController and @RequestMapping annotations to create REST endpoints.
@RestController
@RequestMapping("/api")
public class MyController {
@GetMapping("/greeting")
public String greeting() {
return "Hello, World!";
}
}
18. What is Spring Boot CLI and how is it used?
Spring Boot CLI is a command-line tool that allows you to quickly prototype with Spring. It supports Groovy scripts to write Spring applications.
$ spring init --dependencies=web my-app
$ cd my-app
$ spring run MyApp.groovy
19. How can you connect to a database using Spring Data JPA?
Add the necessary dependencies and create a repository interface extending JpaRepository.
@Autowired is used to inject beans (dependencies) automatically by Spring’s dependency injection mechanism. It can be used on constructors, fields, or setter methods.
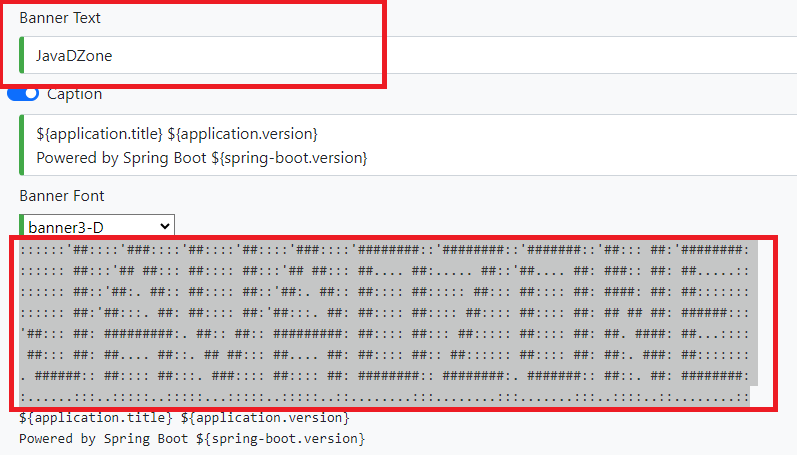
22. How can you customize the Spring Boot banner?
You can customize the Spring Boot startup banner by placing a banner.txt file in the src/main/resources directory. You can also disable it entirely using spring.main.banner-mode=off in the application.properties file.
23. How can you create a custom starter in Spring Boot?
To create a custom starter, you need to create a new project with the necessary dependencies and configuration, then package it as a JAR. Include this JAR as a dependency in your Spring Boot application.
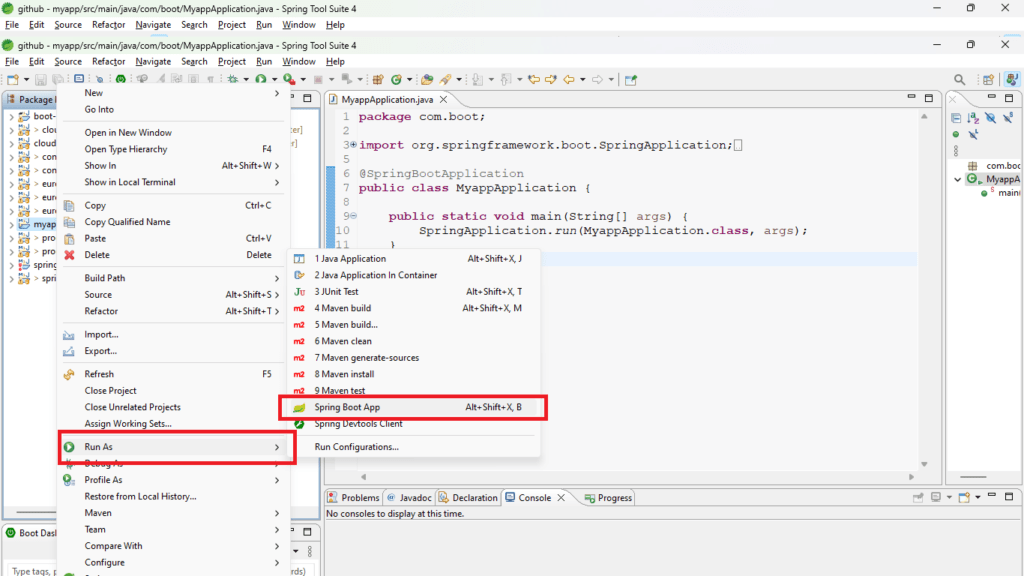
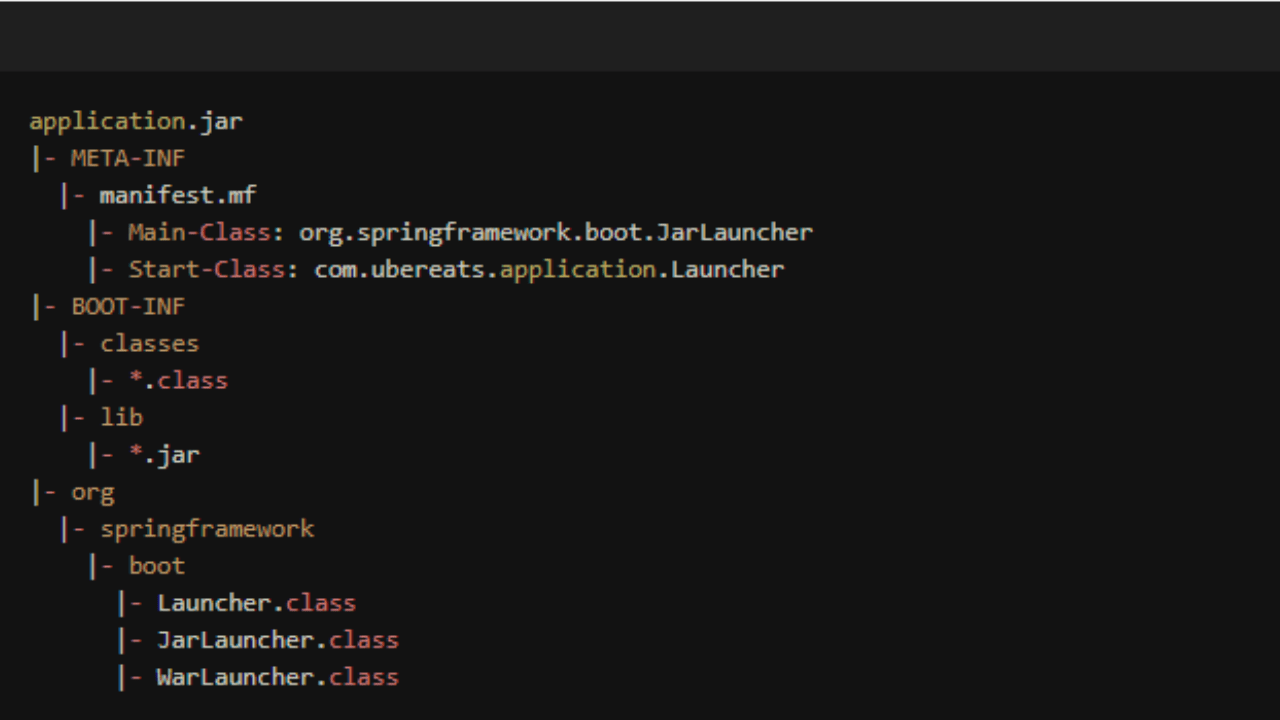
24. How do you run a Spring Boot application as a standalone jar?
Spring Boot applications can be packaged as executable JAR files with an embedded server. You can run the JAR using the command java -jar myapp.jar.
25. What are the best practices for logging in Spring Boot?
Use SLF4J with Logback as the default logging framework. Configure logging levels in application.properties and use appropriate logging levels (DEBUG, INFO, WARN, ERROR) in your code.
26. How do you externalize configuration in Spring Boot?
Externalize configuration using application.properties or application.yml files, environment variables, or command-line arguments. This allows you to manage application settings without changing the code.
27. How can you monitor Spring Boot applications?
Use Spring Boot Actuator to monitor applications. It provides endpoints for health checks, metrics, and more. Integrate with monitoring tools like Prometheus, Grafana, or ELK stack for enhanced monitoring.
28. How do you handle file uploads in Spring Boot?
Handle file uploads using MultipartFile in a controller method. Ensure you configure the spring.servlet.multipart properties in application.properties.
@PostMapping("/upload")
public String handleFileUpload(@RequestParam("file") MultipartFile file) {
// handle the file
return "File uploaded successfully!";
}
29. What is the purpose of @ConfigurationProperties?
@ConfigurationProperties is used to bind external configuration properties to a Java object. It’s useful for type-safe configuration.
@ConfigurationProperties(prefix = "app")
public class AppProperties {
private String name;
private String description;
// getters and setters
}
30. How do you schedule tasks in Spring Boot?
Schedule tasks using @EnableScheduling and @Scheduled annotations. Define a method with the @Scheduled annotation to run tasks at specified intervals.
@EnableScheduling
public class SchedulingConfig {
}
@Component
public class ScheduledTasks {
@Scheduled(fixedRate = 5000)
public void reportCurrentTime() {
System.out.println("Current time is " + new Date());
}
}
31. How can you use Spring Boot with Kotlin?
Spring Boot supports Kotlin. Create a Spring Boot application using Kotlin by adding the necessary dependencies and configuring the project. Kotlin’s concise syntax can make the code more readable and maintainable.
32. What is Spring WebFlux?
Spring WebFlux is a reactive web framework in the Spring ecosystem, designed for building reactive and non-blocking web applications. It uses the Reactor project for its reactive support.
33. How do you enable CORS in Spring Boot?
Enable CORS (Cross-Origin Resource Sharing) using the @CrossOrigin annotation on controller methods or globally using a CorsConfiguration bean.
@RestController
@CrossOrigin(origins = "http://example.com")
public class MyController {
@GetMapping("/greeting")
public String greeting() {
return "Hello, World!";
}
}
34. How do you use Redis with Spring Boot?
Use Redis with Spring Boot by adding the spring-boot-starter-data-redis dependency and configuring Redis properties in application.properties.
35. What is Spring Cloud and how is it related to Spring Boot?
Spring Cloud provides tools for building microservices and distributed systems on top of Spring Boot. It offers features like configuration management, service discovery, and circuit breakers.
36. How do you implement caching in Spring Boot?
Implement caching using the @EnableCaching annotation and a caching library like EhCache, Hazelcast, or Redis. Annotate methods with @Cacheable, @CachePut, and @CacheEvict for caching behavior.
@EnableCaching
public class CacheConfig {
}
@Service
public class UserService {
@Cacheable("users")
public User getUserById(Long id) {
return userRepository.findById(id).orElse(null);
}
}
37. How can you send emails with Spring Boot?
Send emails using Spring Boot by adding the spring-boot-starter-mail dependency and configuring email properties in application.properties. Use JavaMailSender to send emails.
@Service
public class EmailService {
@Autowired
private JavaMailSender mailSender;
public void sendSimpleMessage(String to, String subject, String text) {
SimpleMailMessage message = new SimpleMailMessage();
message.setTo(to);
message.setSubject(subject);
message.setText(text);
mailSender.send(message);
}
}
38. What is @SpringBootTest?
@SpringBootTest is an annotation that loads the full application context for integration tests. It is used to write tests that require Spring Boot’s features, like dependency injection and embedded servers.
39. How do you integrate Spring Boot with a front-end framework like Angular or React?
Integrate Spring Boot with front-end frameworks by building the front-end project and placing the static files in the src/main/resources/static directory of your Spring Boot project. Configure Spring Boot to serve these files.
40. How do you configure Thymeleaf in Spring Boot?
Thymeleaf is a templating engine supported by Spring Boot. Add the spring-boot-starter-thymeleaf dependency and place your templates in the src/main/resources/templates directory.
41. What is the purpose of @SpringBootApplication?
@SpringBootApplication is a convenience annotation that combines @Configuration, @EnableAutoConfiguration, and @ComponentScan. It marks the main class of a Spring Boot application.
42. How do you use CommandLineRunner in Spring Boot?
CommandLineRunner is an interface used to execute code after the Spring Boot application starts. Implement the run method to perform actions on startup.
@Component
public class MyCommandLineRunner implements CommandLineRunner {
@Override
public void run(String... args) throws Exception {
System.out.println("Hello, World!");
}
}
43. How do you connect to an external REST API using Spring Boot?
Connect to an external REST API using RestTemplate or WebClient. RestTemplate is synchronous, while WebClient is asynchronous and non-blocking.
@RestController
@RequestMapping("/api")
public class ApiController {
@Autowired
private RestTemplate restTemplate;
@GetMapping("/data")
public String getData() {
return restTemplate.getForObject("https://api.example.com/data", String.class);
}
}
44. How do you implement pagination in Spring Boot?
Implement pagination using Spring Data JPA’s Pageable interface. Define repository methods that accept Pageable parameters.
Handle validation using the javax.validation package. Use annotations like @NotNull, @Size, and @Email in your model classes, and @Valid in your controller methods.
public class User {
@NotNull
private String name;
@Email
private String email;
}
47. How do you set up Spring Boot with Docker?
Set up Spring Boot with Docker by creating a Dockerfile that specifies the base image and instructions to build and run the application.
FROM openjdk:11-jre-slim
COPY target/myapp.jar myapp.jar
ENTRYPOINT ["java", "-jar", "/myapp.jar"]
48. How do you deploy a Spring Boot application to AWS?
Deploy a Spring Boot application to AWS by using services like Elastic Beanstalk, ECS, or Lambda. Package your application as a JAR or Docker image and upload it to the chosen service.
49. What is the difference between Spring Boot and Spring MVC?
Spring Boot is a framework for quickly building Spring-based applications with minimal configuration. Spring MVC is a framework for building web applications using the Model-View-Controller design pattern. Spring Boot often uses Spring MVC as part of its web starter.
50. How do you migrate a legacy application to Spring Boot?
Migrate a legacy application to Spring Boot by incrementally introducing Spring Boot dependencies and configurations. Replace legacy configurations with Spring Boot’s auto-configuration and starters, and gradually refactor the application to use Spring Boot features.
Spring Boot Interview Questions: Conclusion
Spring Boot is widely liked by developers because it’s easy to use and powerful. Learning from these top 50 questions and answers helps you understand Spring Boot better. You can solve many problems like setting up applications, connecting to databases, adding security, and putting your app on the cloud. Spring Boot makes these tasks simpler, helping you build better applications faster. Keep learning and enjoy coding with Spring Boot!
Getting ready for a job interview that’s all about microservices? Well, you’re in the right place. We’ve gathered the top 20 microservices interview questions and paired them with detailed answers to help you shine in that interview room. Whether you’re a seasoned pro in the world of microservices or just starting out, these questions and answers are here to boost your confidence and knowledge. Let’s dive in and get you all set to impress your potential employers with your microservices expertise.
Top 20 Microservices Interview Questions
Q1) What are Microservices?
Microservices, also known as Microservices Architecture, is a software development approach that involves constructing complex applications by assembling smaller, independent functional modules. Think of it as building a large, intricate system from smaller, self-contained building blocks.
For instance, imagine a modern e-commerce platform. Instead of creating one monolithic application to handle everything from product listings to payments, you can use microservices. Each function, like product catalog, shopping cart, user authentication, and payment processing, becomes a separate microservice. They work together as a cohesive unit, with each microservice responsible for its specific task.
This approach offers benefits such as flexibility, scalability, and ease of maintenance. If one microservice needs an update or experiences issues, it can be modified or fixed without affecting the entire system. It’s like having a toolkit of specialized tools that can be swapped in or out as needed, making software development more efficient and adaptable.
Q2) What are the main features of Microservices?
Decoupling: Modules are independent and do not rely on each other.
Componentization: Applications are divided into small, manageable components.
Business Capabilities: Modules correspond to specific business functions.
Autonomy: Each module can function independently.
Continuous Delivery(CI/CD): Frequent updates and releases are possible.
Responsibility: Each module is responsible for its functionality.
Decentralized Governance: Decision-making is distributed across modules.
Agility: Adaptability and responsiveness to changes are key attributes.
Q3) What are the key parts of Microservices?
Microservices rely on various elements to work effectively. Some of the main components include:
• Containers, Clustering, and Orchestration: These tools help manage and organize microservices within a software environment.
• Infrastructure as Code (IaC): IaC involves using code to automate and control infrastructure setup and configuration.
• Cloud Infrastructure: Many microservices are hosted on cloud platforms, which provide the necessary computing resources.
• API Gateway: An API Gateway acts as a central entry point for various microservices, making it easier for them to communicate with each other.
• Enterprise Service Bus: This component facilitates efficient communication and integration between different microservices and applications.
• Service Delivery: Ensuring that microservices are delivered effectively to end-users and seamlessly integrated into the software system.
These components work together to support the operation of microservices and enhance the scalability and flexibility of a software system.
Q4) Explain the working of microservices?
Microservices Architecture:
Client Request: The process begins when a client, such as a web browser or mobile app, sends a request to the application. This request could be anything from fetching data to performing specific tasks.
API Gateway: The client’s request is initially intercepted by the API Gateway, acting as the application’s point of entry. Think of it as the first stop for incoming requests.
Service Discovery (Eureka Server): To find the right microservice to fulfill the request, the API Gateway checks in with the Eureka Server. This server plays a crucial role by maintaining a directory of where different microservices are located.
Routing: With information from the Eureka Server in hand, the API Gateway directs the request to the specific microservice that’s best suited to handle it. This ensures that each request goes to the right place.
Circuit Breaker: Inside the microservice, a Circuit Breaker is at work, keeping an eye on the request and the microservice’s performance. If the microservice faces issues or becomes unresponsive, the Circuit Breaker can temporarily halt additional requests to prevent further problems.
Microservice Handling: The designated microservice takes the reins, processing the client’s request, and interacting with databases or other services as needed.
Response Generation: After processing the request, the microservice generates a response. This response might include requested data, an acknowledgment, or the results of the task requested by the client.
Ribbon Load Balancing: On the client’s side, Ribbon comes into play. It’s responsible for balancing the load when multiple instances of the microservice are available. Ribbon ensures that the client connects to the most responsive instance, enhancing performance and providing redundancy.
API Gateway Response: The response generated by the microservice is sent back to the API Gateway.
Client Response: Finally, the API Gateway returns the response to the client. The client then receives and displays this response. It could be the requested information or the outcome of a task, allowing the user to interact with the application seamlessly.
Q5) What are the differences between Monolithic, SOA and Microservices Architecture?
Architecture Type
Description
Monolithic Architecture
A massive container where all software components are tightly bundled, creating one large system with a single code base.
Service-Oriented Architecture (SOA)
A group of services that interact and communicate with each other. Communication can range from simple data exchange to multiple services coordinating activities.
Microservices Architecture
An application structured as a cluster of small, autonomous services focused on specific business domains. These services can be deployed independently, are scalable, and communicate using standard protocols.
Comparison of Architectural Approaches
Q6: What is Service Orchestration and Service Choreography in Microservices?
Service orchestration and service choreography are two different approaches for managing the dance of microservices. Here’s how they groove:
Service Orchestration: This is like having a conductor in an orchestra. There’s a central component that’s the boss, controlling and coordinating the movements of all microservices. It’s a tightly organized performance with everything in sync.
Service Choreography: Think of this as a group of dancers who know the steps and dance together without a choreographer. In service choreography, microservices collaborate directly with each other, no central controller in sight. It’s a bit more like a jam session, where each service has its own rhythm.
Comparison: Service orchestration offers a more controlled and well-coordinated dance, where every step is planned. Service choreography, on the other hand, is like a dance-off where individual services have the freedom to show their moves. It’s more flexible, but it can get a bit wild.
Q7) What is the role of an actuator in Spring Boot?
In Spring Boot, an actuator is a project that offers RESTful web services to access the real-time status and information about an application running in a production environment. It allows you to monitor and manage the usage of the application without the need for extensive coding or manual configuration. Actuators provide valuable insights into the application’s health, metrics, and various operational aspects, making it easier to maintain and troubleshoot applications in a production environment.
Q8) How to Customize Default Properties in Spring Boot Projects?
Customizing default properties in a Spring Boot project, including database properties, is achieved by specifying these settings in the application.properties file. Here’s an example that explains this concept without plagiarism:
Example: Database Configuration
Imagine you have a Spring Boot application that connects to a database. To tailor the database connection to your needs, you can define the following properties in the application.properties file:
By setting these properties in the application.properties file, you can easily adjust the database configuration of your Spring Boot application. This flexibility allows you to adapt your project to different database environments or specific requirements without the need for extensive code modifications
Q9) What is Cohesion and Coupling in Software Design?
Cohesion refers to the relationship between the parts or elements within a module. It measures how well these elements work together to serve a common purpose. When a module exhibits high cohesion, its elements collaborate efficiently to perform a specific function, and they do so without requiring constant communication with other modules. In essence, high cohesion signifies that a module is finely tuned for a specific task, which, in turn, enhances the overall functionality of that module.
For example, consider a module in a word-processing application that handles text formatting. It exhibits high cohesion by focusing solely on tasks like font styling, paragraph alignment, and spacing adjustments without being entangled in unrelated tasks.
Coupling signifies the relationship between different software modules, like Modules A and B. It assesses how much one module relies on or interacts with another. Coupling can be categorized into three main types: highly coupled (high dependency), loosely coupled, and uncoupled. The most favorable form of coupling is loose coupling, which is often achieved through well-defined interfaces. In a loosely coupled system, modules maintain a degree of independence and can be modified or replaced with minimal disruption to other modules.
For instance, think of an e-commerce application where the product catalog module and the shopping cart module are loosely coupled. They communicate through a clear interface, allowing each to function independently. This facilitates future changes or upgrades to either module without causing significant disturbances in the overall system.
In summary, cohesion and coupling are fundamental principles in software design that influence how modules are organized and interact within a software system. High cohesion and loose coupling are typically sought after because they lead to more efficient, maintainable, and adaptable software systems.
Q10) What Defines Microservice Design?
Microservice design is guided by a set of core principles that distinguish it from traditional monolithic architectures:
Business-Centric Approach: Microservices are organized around specific business capabilities or functions. Each microservice is responsible for a well-defined task, ensuring alignment with the organization’s core business objectives.
Product-Oriented Perspective: Unlike traditional projects, microservices are treated as ongoing products. They undergo continuous development, maintenance, and improvement to remain adaptable to evolving business needs.
Effective Messaging Frameworks: Microservices rely on robust messaging frameworks to facilitate seamless communication. These frameworks enable microservices to exchange data and coordinate tasks efficiently.
Decentralized Governance: Microservices advocate decentralized governance, granting autonomy to each microservice team. This decentralization accelerates development and decision-making processes.
Distributed Data Management: Data management in microservices is typically decentralized, with each microservice managing its data store. This approach fosters data isolation, scalability, and independence.
Automation-Driven Infrastructure: Automation plays a pivotal role in microservices. Infrastructure provisioning, scaling, and maintenance are automated, reducing manual effort and minimizing downtime.
Resilience as a Design Principle: Microservices are designed with the expectation of failures. Consequently, they prioritize resilience. When one microservice encounters issues, it should not disrupt the entire system, ensuring uninterrupted service availability.
These principles collectively contribute to the agility, scalability, and fault tolerance that make microservices a popular choice in modern software development. They reflect a strategic shift towards building software systems that are more responsive to the dynamic demands of today’s businesses.
Q11: What’s the Purpose of Spring Cloud Config and How Does It Work?
let’s simplify this for a clear understanding:
Purpose: Spring Cloud Config is like the command center for configuration properties in microservices. Its main job is to make sure all the configurations are well-organized, consistent, and easy to access.
How It Works:
Version-Controlled Repository: All your configuration info is stored in a special place that keeps a history of changes. Think of it as a well-organized filing cabinet for configurations.
Configuration Server: Inside Spring Cloud Config, there’s a designated server that takes care of your configuration data. It’s like the trustworthy guard of your valuable information.
Dynamic and Centralized: The cool part is that microservices can request their configuration details from this server on the spot, while they’re running. This means any changes or updates to the configurations are instantly shared with all the microservices. It’s like having a super-efficient communication channel for all your configurations.
Q12) How Do Independent Microservices Communicate?
Picture a world of microservices, each minding its own business. Yet, they need to talk to each other, and they do it quite ingeniously:
HTTP/REST with JSON or Binary Protocols: It’s like sending letters or emails. Microservices make requests to others, and they respond. They speak a common language, often in formats like JSON or more compact binary codes. This works well when one service needs specific information or tasks from another.
Websockets for Streaming: For those real-time conversations, microservices use Websockets. Think of it as talking on the phone, but not just in words – they can share data continuously. It’s ideal for things like live chats, streaming updates, or interactive applications.
Message Brokers: These are like message relay stations. Services send messages to a central point (the broker), and it ensures messages get to the right recipients. There are different types of brokers, each specialized for specific communication scenarios. Apache Kafka, for instance, is like the express courier for high-throughput data.
Backend as a Service (BaaS): This is the “hands-free” option. Microservices can use platforms like Space Cloud, which handle a bunch of behind-the-scenes tasks. It’s like hiring someone to take care of your chores. BaaS platforms can manage databases, handle authentication, and even run serverless functions.
In this interconnected world, microservices pick the best way to chat based on what they need to say. It’s all about keeping them independent yet harmoniously communicating in the vast landscape of microservices.
Q13) What is Domain-Driven Design (DDD)?
Domain-Driven Design, often abbreviated as DDD, is an approach to software development that centers on a few key principles:
Focus on the Core Domain and Domain Logic: DDD places a strong emphasis on understanding and honing in on the most critical and valuable aspects of a project, which is often referred to as the “core domain.” This is where the primary business or problem-solving logic resides. DDD aims to ensure that the software accurately represents and serves this core domain.
Analyze Domain Models for Complex Designs: DDD involves in-depth analysis of the domain models. By doing so, it seeks to uncover intricate designs and structures within the domain that may not be immediately apparent. This analysis helps in creating a software design that faithfully mirrors the complexity and nuances of the real-world domain.
Continuous Collaboration with Domain Experts: DDD encourages regular and close collaboration between software development teams and domain experts. These domain experts are individuals who possess in-depth knowledge of the problem domain (the industry or field in which the software will be used). By working together, they refine the application model, ensuring it effectively addresses emerging issues and aligns with the evolving domain requirements.
In essence, Domain-Driven Design is a holistic approach that promotes a deep understanding of the problem domain, leading to software solutions that are more accurate, relevant, and adaptable to the ever-changing needs of the domain they serve.
Q14). What is OAuth?
Think of OAuth as the key to the world of one-click logins. It’s what allows you to use your Facebook or Google account to access various websites and apps without creating new usernames and passwords.
Here’s the magic:
No More New Accounts: Imagine you stumble upon a cool new app, and it asks you to sign up. With OAuth, you can skip that part. Instead, you click “Log in with Facebook” or another platform you trust.
Sharing Just What’s Needed: You don’t have to share your Facebook password with the app. Instead, the app asks Facebook, “Is this person who they claim to be?” Facebook says, “Yep, it’s them!” and you’re in.
Secure and Convenient: OAuth makes logging in more secure because you’re not giving out your password to every app you use. It’s like showing your ID card to get into a party without revealing all your personal info.
So, next time you see the option to log in with Google or some other platform, you’ll know that OAuth is working behind the scenes to make your life simpler and safer on the internet.
Q15) Why Reports and Dashboards Matter in Microservices?
Reports and dashboards play a pivotal role in the world of microservices for several key reasons:
Resource Roadmap: Imagine reports and dashboards as your detailed map of the microservices landscape. They show you which microservices handle specific tasks and resources. It’s like having a GPS for your system’s functionality.
Change Confidence: When changes happen (and they do in software), reports and dashboards step in as your security net. They tell you exactly which services might be impacted. Think of it as a warning system that prevents surprises.
Instant Documentation: Forget digging through files or searching for the latest documents. Reports and dashboards are your instant, always-up-to-date documentation. Need info on a specific service? It’s just a click away.
Version Control: In the microservices world, keeping tabs on different component versions is a bit like tracking your app updates. Reports and dashboards help you stay on top of what’s running where and if any part needs an upgrade.
Quality Check: They’re your quality control inspectors. They help you assess how mature and compliant your services are. It’s like checking the quality of ingredients before cooking a meal – you want everything to be up to the mark.
So, reports and dashboards are your trustworthy companions, helping you navigate the intricacies of microservices, ensuring you’re in control and making informed decisions in this dynamic software world.
Q16) What are Reactive Extensions in Microservices?
Reactive Extensions, or Rx, is a design approach within microservices that coordinates multiple service calls and combines their results into a single response. These calls can be blocking or non-blocking, synchronous or asynchronous. In the context of distributed systems, Rx operates in a manner distinct from traditional workflows.
Q17) Types of Tests Commonly Used in Microservices?
Testing in the world of microservices can be quite intricate due to the interplay of multiple services. To manage this complexity, tests are categorized based on their level of focus:
Unit Tests: These tests zoom in on the smallest building blocks of microservices – individual functions or methods. They validate that each function performs as expected in isolation.
Component Tests: At this level, multiple functions or components within a single microservice are tested together. Component tests ensure that the internal workings of a microservice function harmoniously.
Integration Tests: Integration tests go further by examining how different microservices collaborate. They validate that when multiple microservices interact, the system behaves as anticipated.
Contract Tests: These tests check the agreements or contracts between microservices. They ensure that the communication between services adheres to predefined standards, preventing unintended disruptions.
End-to-End (E2E) Tests: E2E tests assess the entire application’s functionality, simulating user journeys. They validate that all microservices work cohesively to provide the desired user experience.
Load and Performance Tests: These tests evaluate how microservices perform under varying loads. They help identify bottlenecks and performance issues to ensure the system can handle real-world demands.
Security Tests: Security tests scrutinize the microservices for vulnerabilities and ensure data protection measures are effective.
Usability Tests: Usability tests assess the user-friendliness and accessibility of the microservices. They focus on the overall user experience.
Q18) What are Containers in Microservices?
Containers are a powerful solution for managing microservices. They excel in efficiently allocating and sharing resources, making them the preferred choice for developing and deploying microservice-based applications. Here’s the essence of containers in the world of microservices:
Resource Allocation: Containers excel in efficiently distributing computing resources. They ensure each microservice has the right amount of CPU, memory, and storage to function optimally.
Isolation: Containers create a secure boundary for each microservice. They operate independently, preventing conflicts or interference between services, which is crucial in microservices architecture.
Portability: Containers package microservices and their dependencies into a single, portable unit. This means you can develop a microservice on your local machine and deploy it in various environments, ensuring consistency.
Efficient Scaling: Containers make scaling microservices a breeze. You can replicate and deploy containers as needed, responding quickly to changing workloads.
Simplified Management: Container orchestration platforms like Kubernetes provide centralized management for deploying, scaling, and monitoring microservices in a containerized environment.
Q19) The Core Role of Docker in Microservices?
Containerizing Applications: Docker acts as a container environment where you can place your microservices. It not only packages the microservice itself but also all the necessary components it relies on to function seamlessly. These bundled packages are aptly called “Docker containers.”
Streamlined Management: With Docker containers, managing microservices becomes straightforward. You can effortlessly start, stop, or move them around, akin to organizing neatly labeled boxes for easy transport.
Resource Efficiency: Docker ensures that each microservice receives the appropriate amount of computing resources, like CPU and memory. This ensures that they operate efficiently without monopolizing or underutilizing system resources.
Consistency: Docker fosters uniformity across different stages, such as development, testing, and production. No longer will you hear the excuse, “It worked on my machine.” Docker guarantees consistency, a valuable asset in the world of microservices.
Q20): What are tools used to aggregate microservices log files?
In the world of microservices, managing log files can be a bit of a juggling act. To simplify this essential task, here are some reliable tools at your disposal:
ELK Stack (Elasticsearch, Logstash, Kibana): The ELK Stack is like a well-coordinated trio of tools designed to handle your log data.
Logstash: Think of Logstash as your personal data curator. It’s responsible for collecting and organizing log information.
Elasticsearch: Elasticsearch acts as your dedicated log archive. It meticulously organizes and stores all your log entries.
Kibana: Kibana takes on the role of your trusted detective, armed with a magnifying glass. It allows you to visualize and thoroughly inspect your logs. Whether you’re searching for trends, anomalies, or patterns, Kibana has got you covered.
Splunk: Splunk is the heavyweight champion in the world of log management.
This commercial tool comes packed with a wide range of features. It not only excels at log aggregation but also offers powerful searching, monitoring, and analysis capabilities.
It provides real-time alerts, dynamic dashboards, and even harnesses the might of machine learning for in-depth log data analysis.
Are you ready to take your application to the next level? In the world of software development, it’s not enough to create an application; you also need to ensure it runs smoothly in a production environment. This is where “Spring Boot Actuator” comes into play. In this comprehensive guide, we’ll walk you through the process of enhancing your application’s monitoring and management capabilities using Spring Boot Actuator.
Table of Contents
Step 1: Understanding the Need
Why Additional Features Are Essential
After thoroughly testing your application, you’ll likely find that deploying it in a production environment requires more than just functional code. You need features that enable monitoring and management. Traditionally, this might involve maintaining a dedicated support team to ensure your application is always up and running.
Step 2: What is Spring Boot Actuator?
Spring Boot Actuator is a powerful feature bundled with Spring Boot. It provides a set of predefined endpoints that simplify the process of preparing your application for production deployment. These endpoints allow you to monitor and manage various aspects of your application seamlessly.
Step 3: Spring Boot Actuator Endpoints
Spring Boot Actuator offers a variety of endpoints to cater to different monitoring and management needs:
info: Provides arbitrary information about your application, such as author, version, and licensing.
health: Checks the liveness probe of your application to ensure it’s running and accessible.
env: Displays all environment variables used by your application.
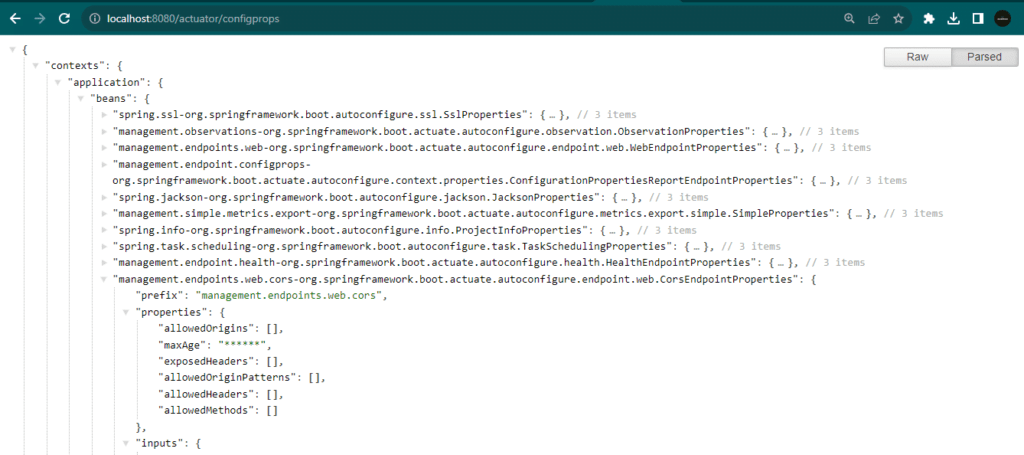
configprops: Lists all configuration properties utilized by your application.
beans: Shows all the bean definitions within the IoC container.
thread dump: Provides access to the current JVM thread dump.
metrics: Offers runtime information about your application, including memory usage, CPU utilization, and heap status.
loggers: Displays loggers and their logging levels.
logfile: Shows the application’s log file.
shutdown: Allows for remote application shutdown.
sessions: Presents active HTTP sessions of the web application.
conditions: Shows the conditions that influence auto-configurations.
Step 4: Enabling Actuator Endpoints
Before we can start configuring and using Actuators, we need to add the Actuator dependency to our project pom.xml.
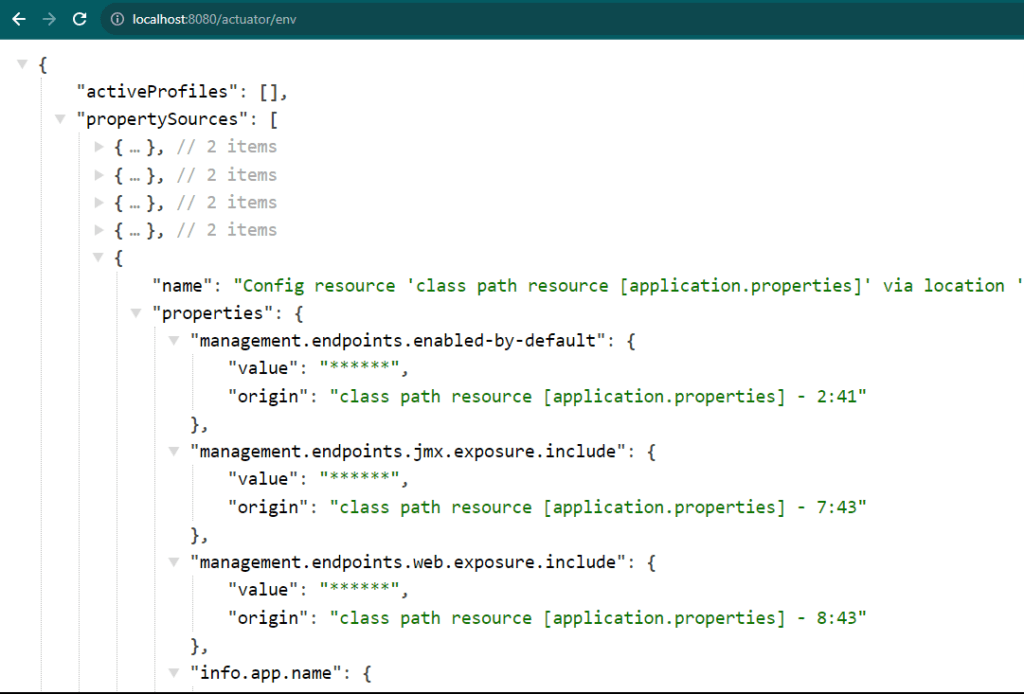
To make use of these valuable endpoints, you’ll need to enable them by adding the “spring-boot-starter-actuator” dependency to your Spring Boot project. This will grant you access to the endpoints via URLs like “http://localhost:8080/actuator/{endpointId}“.
These endpoints are exposed by Spring Boot in two ways:
JMX: JMX, or Java Management Extensions, is a specification provided by Java as part of J2SE5. It standardizes the API for managing devices, servers, and more. With JMX, you can programmatically manage devices or servers at runtime through JMX extensions. For example, instead of manually configuring a datasource in a WebLogic server through its console, you can automate the datasource configuration on an application server using JMX endpoints exposed by the application server.
HTTP/Web: These are REST endpoints exposed over the HTTP protocol, making them accessible from a web browser or any HTTP client.
However, it’s worth noting that it’s recommended to expose Actuator endpoints through JMX rather than HTTP/Web endpoints due to security reasons. All Actuator endpoints are available for access via both JMX and HTTP/Web by default, and you don’t need to write any special code to enable or support them. You simply need to configure which endpoints you want to expose over which protocol, and Spring Boot Actuator will take care of exposing them accordingly.
To make an endpoint accessible in Spring Boot Actuator, you need to do two things:
Enable the Endpoint
Expose the Endpoint through JMX, HTTP, or Both
By default, all the endpoints of Spring Boot Actuator are enabled, except for the “shutdown” endpoint. If you want to disable these endpoints by default, you can add a property in your application.properties file:
Java
management.endpoints.enabled-by-default=false
Now, you can enable each individual endpoint in a controlled way using the endpoint’s ID, as shown below:
Java
# Enable specific Actuator endpointsmanagement.endpoint.info.enabled=truemanagement.endpoint.shutdown.enabled=truemanagement.endpoint.endpointId.enabled=true
In your application.properties file, you can include the following configuration to expose all the endpoints:
Java
# Expose all endpointsmanagement.endpoints.web.exposure.include=*
This configuration tells Spring Boot Actuator to include all endpoints for web/HTTP access.
Excluding Specific Actuator Endpoints
Java
# Exclude specific endpoints by their IDmanagement.endpoints.web.exposure.exclude=shutdown, sessions, conditions
Using application.yaml:
In your application.yaml file, you can include the following configuration to expose all the endpoints:
Java
management: endpoints: web: exposure: include:"*"
Next, you’ll need to specify how you want to expose these endpoints, either through JMX or HTTP. By default, only two endpoints, “info” and “health,” are exposed for security reasons. If you want more Actuator endpoints to be accessible, you can configure this using the following properties in either application.properties or application.yaml
In application.properties
Java
# ExposeActuator endpoints for both JMX and HTTP/Web accessmanagement.endpoints.jmx.exposure.include=info, health, env, configPropsmanagement.endpoints.web.exposure.include=info, health, env, configProps
Before we delve into fine-tuning endpoint exposure, let’s make sure your Spring Boot application is up and running.
By testing your application first, you can ensure that everything is set up correctly before customizing Actuator endpoint exposure in the next section.
Step 5: Fine-Tuning Endpoint Exposure
If the predefined endpoints don’t cover your specific needs, you can extend them or create your own. Here’s an example of how to customize the “health” and “info” endpoints:
Java
@ComponentclassAppHealthEndpointimplementsHealthIndicator {publicHealthhealth() {// Perform checks on external or application-dependent resources and return UP or DOWN.returnHealth.Up().build(); }}@ComponentclassAppInfoEndpointimplementsInfoContributor {publicvoidcontribute(Builderbuilder) {builder.withDetails("key", "value").build(); }}
Step 6: Building Custom Endpoints
Actuator endpoints are essentially REST APIs, and you can build your custom endpoints using Spring Boot Actuator API. This is preferable over standard Spring REST controllers because it allows for JMX access and management.
Here’s a simplified example of how to create a custom endpoint:
In this guide, you’ve learned the essentials of Spring Boot Actuator, enabling you to monitor, manage, and customize your Spring Boot applications effectively. You’ve discovered how to test Actuator endpoints, fine-tune their exposure, and explore the associated GitHub repository for practical insights. Armed with this knowledge, you’re better equipped to maintain robust applications in production environments.
In this comprehensive guide on Spring Boot Runners, we will explore the powerful capabilities of ApplicationRunners and CommandLineRunners. These essential components play a vital role in executing tasks during the startup phase of your Spring Boot application. We will delve into their usage, differences, and how to harness their potential for various initialization tasks.
Table of Contents
What Are CommandLineRunners and ApplicationRunners?
Startup activities are essential for preparing an application before it goes into full execution mode. For instance:
1. Data Loading and Cache Initialization
Imagine a scenario where you need to load data from a source system and initialize a cache, which has been configured as a bean definition in the IoC container. This data loading into the cache is a one-time startup activity.
2. Database Schema Creation
In another scenario, you might need to create a database schema by running an SQL script before your application kicks off. Typically, this activity is not performed during JUnit test executions.
In a Spring Core application, handling startup activities is straightforward. You can execute these activities after creating the IoC container but before using it. Here’s an example in Java:
Java
ApplicationContextcontext = newAnnotationConfigApplicationContext(JavaConfig.class);// Perform startup activitiesTanktank = context.getBean(Tank.class); // Use IoC containertank.level();
However, in a Spring MVC application, the IoC container is created by the DispatcherServlet and ContextLoaderListener, and you don’t have a chance to execute post-construction activities. This limitation led to the introduction of a unified approach in Spring Boot.
Spring Boot Runners: A Unified Approach
Spring Boot provides a standardized way of starting up Spring applications, be it core or web applications, by using SpringApplication.run(). This method ensures consistent initialization of your application. All startup activities are streamlined by leveraging the SpringApplication class.
To execute startup activities in Spring Boot, SpringApplication offers a callback mechanism through CommandLineRunners and ApplicationRunners. You can write code inside classes that implement these interfaces, overriding their respective methods
Key Differences Between CommandLineRunners and ApplicationRunners
Before we delve into practical examples, let’s understand the key differences between CommandLineRunners and ApplicationRunners:
Feature
CommandLineRunner
ApplicationRunner
Access to Command-Line Arguments
Receives command-line arguments as an array of strings (String[] args) in the run method.
Receives command-line arguments as an ApplicationArguments object in the run method, allowing access to both operational and non-operational arguments.
Usage
Ideal for simpler cases where access to command-line arguments is sufficient.
Suitable for scenarios where more advanced command-line argument handling is required, such as working with non-option arguments and option arguments.
Comparison Between CommandLineRunners and ApplicationRunners
1. CommandLineRunner Example
First, let’s create a CommandLineRunner class. You can place it in a package of your choice, but for this example, we’ll use the package com.runners.
This class implements the CommandLineRunner interface and overrides the run method. Inside the run method, we print the command-line arguments passed to our application.
2. ApplicationRunner Example
Now, let’s create an ApplicationRunner class. The process is similar to creating the CommandLineRunner class.
This class implements the ApplicationRunner interface, where we override the run method. Inside this method, we print command-line arguments obtained from the ApplicationArguments object, enabling effective access to both operational and non-operational arguments.
The MyApplicationRunnerExample class extends the capabilities of ApplicationRunner, displaying both non-option and option arguments.
3. Using CommandLineRunners and ApplicationRunners
Now that you’ve created and integrated CommandLineRunner and ApplicationRunner classes, including MyApplicationRunnerExample, you can use them to execute tasks during your Spring Boot application’s startup.
Run Your Spring Boot Application: Open your command prompt or terminal, navigate to your project directory, and enter the following command to start your Spring Boot application:
Replace boot-runners-0.0.1-SNAPSHOT.jar with the actual name of your application’s JAR file.
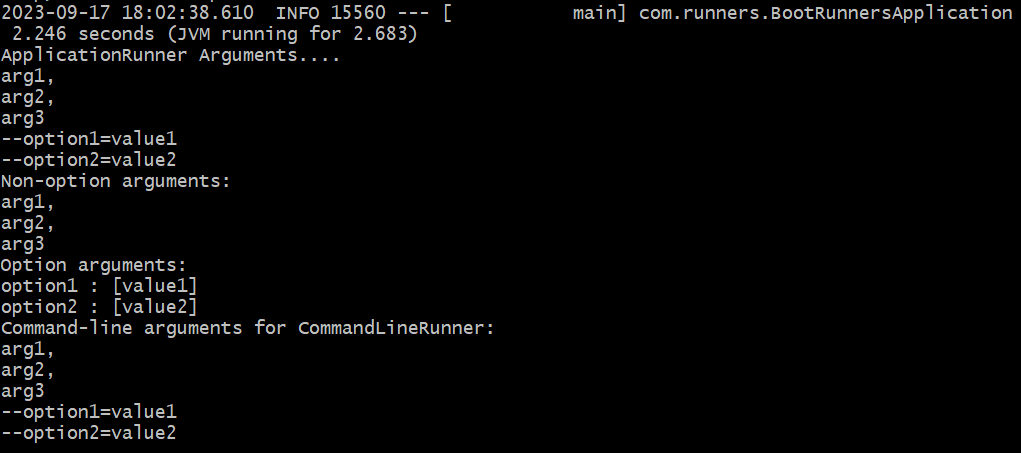
Observe Output: As your application starts, you’ll notice that all three runner classes (MyCommandLineRunner, MyApplicationRunner) are executed automatically. They will display various command-line arguments passed to your application.
Output:
By following these steps and examples, you’ve successfully implemented CommandLineRunners and ApplicationRunners in your Spring Boot application. You can customize these classes to perform various tasks like initializing databases, loading configurations, or any other startup activities your application may require.
With the flexibility provided by CommandLineRunners and ApplicationRunners, you can tailor your application’s initialization process to meet your specific needs, making Spring Boot a powerful choice for building robust applications.
You can explore more information about Spring Boot Runners on the GitHub repository https://github.com/askPavan/boot-runners where you might find practical examples and code samples related to CommandLineRunners and ApplicationRunners.
Additionally, you can refer to external resources such as:
Spring Boot Documentation: The official Spring Boot documentation provides in-depth information about CommandLineRunners and ApplicationRunners.
In the world of Spring Boot, it’s important to grasp and make use of Spring Boot Profiles if you want to handle application environments well. Spring Boot profiles are like a key tool that lets you easily switch between different application settings, ensuring that your application can smoothly adjust to the needs of each particular environment. In this guide, we’ll explore the details of Spring Boot profiles and demonstrate how to use them to keep your configurations neat and ready for different environments, even if you’re new to this.
Table of Contents
Understanding Spring Boot Profiles
What Are Spring Boot Profiles?
In the context of Spring Boot, Spring Boot Profiles are a fundamental mechanism for handling environment-specific configurations. They empower developers to define and segregate configuration settings for different environments, such as development, testing, and production. Each profile encapsulates configuration values tailored precisely to the demands of a specific environment.
How Do Spring Boot Profiles Work?
Spring Boot Profiles operate on the foundation of the @Profile annotation and a set of configuration classes. These profiles can be activated during application startup, enabling the Inversion of Control (IoC) container to intelligently select and deploy the appropriate configuration based on the active profile. This powerful capability eliminates the need for extensive code modifications when transitioning between different application environments.
Creating Spring Boot Profiles with Annotations
In this section, we’ll explore the creation and management of Spring Boot profiles using annotations. This approach provides a structured and flexible way to handle environment-specific configurations.
Step 1: Create Configuration Classes
Begin by crafting two distinct configuration classes: DevJavaConfigand TestJavaConfig. These classes extend the common BaseConfigclass and are adorned with the @Configuration annotation. Additionally, they specify the property sources for their respective profiles.
Next, define property files, namely application-dev.properties and application-test.properties. These property files contain the database and transaction manager properties tailored to the dev and test profiles.
In the application.properties file, set the active profile to test as an example of profile activation.
spring.profiles.active=test
Step 4: Implement Configuration Classes
In the main application class BootProfileApplication, configure the JdbcTransactionManagerbean based on the active profile. The @Bean method injects properties using the Environment bean.
Activating Spring Boot Profiles in Properties File
Alternatively, you can activate Spring profiles directly through the properties file. This approach simplifies the activation process and maintains a clean separation of configuration properties.
Step 1: Specify YAML Property Files with “Spring Profiles Active in YAML File”
In this approach, you define YAML property files for each profile (dev and test) with their respective configuration values.
// Source code is not availablepublicclassAgent {privateint agentNo;privateString agentName;privateString mobileNo;privateString emailAddress;// Constructors, getters, setters, and any additional methods will go here}
In your Spring Boot application class BootProfileApplication, create and configure the Agent bean based on the active profile. The properties are obtained from the properties files using the Environment bean.
Java
@SpringBootApplicationclassBootProfileApplication { @AutowiredprivateEnvironment env;// The source code is unavailable, necessitating the //creation of a bean using the @Bean annotation. @BeanpublicAgentagent() {Agent agent =newAgent(); agent.setAgentNo(Integer.parseInt(env.getProperty("agentNo"))); agent.setAgentName(env.getProperty("agentName")); agent.setMobileNo(env.getProperty("mobileNo")); agent.setEmailAddress(env.getProperty("emailAddress"));return agent; }publicstaticvoidmain(String[] args) {ApplicationContext context = SpringApplication.run(BootProfileApplication.class, args);Parcel parcel = context.getBean(Parcel.class); System.out.println(parcel); }}
Build the Application: Make sure the Spring Boot application is built and ready for execution. This can typically be done using build tools like Maven or Gradle.
Run the Application with a Specific Profile:
To run the application with the dev profile, execute the following command in your terminal or IDE:
Observe the Output: When the application starts, it will load the configuration specific to the active profile (dev or test). This includes database settings, transaction manager properties, and any other environment-specific configurations.
Review the Output: As the application runs, it may print log messages, information, or the state of specific beans (as indicated by the System.out.println statements in the code). These messages will reflect the configuration loaded based on the active profile.
For example, when running with the dev profile, you might see log messages and information related to the dev environment. Similarly, when using the test profile, the output will reflect the test environment’s configuration.
Example: When Executing the Application with the “dev” Profile, You Will Observe the Following Output:
Conclusion:
Spring Boot profiles enable the seamless configuration of applications for different environments by allowing you to maintain distinct sets of properties. Profiles are activated based on conditions such as environment variables or command-line arguments, providing flexibility and consistency in application configuration across various deployment scenarios.
In this comprehensive guide, we will explore the world of event-driven programming in Spring Boot. Spring Boot events-driven architecture offers modularity, asynchronous communication, and loose coupling. We’ll cover event concepts, real-time examples, and demonstrate how to run a Spring Boot application with custom event listeners to harness the power of Spring Boot events.
Table of Contents
Understanding Event-Driven Programming
Event-driven programming is a powerful paradigm with these key aspects:
1. Loose Coupling and Modularity: Components are decoupled and don’t directly reference each other.
2. Asynchronous Communication: Components communicate by emitting and listening to events, enabling parallel execution.
Key Actors:
Source: Publishes events, initiating actions.
Event: Carries data and context about the source.
Event Handler: Processes specific event types.
Event Listener: Listens for events, identifies handlers, and delegates events for processing.
Real-Time Example:
Imagine a financial application notifying users of transactions via SMS and WhatsApp. We’ll model this with Spring Boot.
Meet the TransactionNotificationEvent—an essential player in our financial application. Its job is simple but crucial: to hold all the vital details of a financial transaction. Imagine it as a data-packed envelope, carrying information like mobile numbers, account specifics, and transaction types. Whenever a customer initiates a transaction, this event springs to life, ready to trigger a series of actions in our event-driven system.
Java
classWhatsAppNotificationEventListenerimplementsApplicationListener<TransactionNotificationEvent> {publicvoidonApplicationEvent(TransactionNotificationEventevent) {// Read data from the event and send a WhatsApp message to the customer. }}
Introducing the WhatsAppNotificationEventListener—an attentive messenger in our system. Its mission is specific: to ensure customers receive prompt WhatsApp notifications about their transactions. Think of it as the guardian on the lookout for one event—TransactionNotificationEvent. When this event happens, it instantly acts, simulating the process of sending a WhatsApp notification to the customer. This class illustrates how events turn into real-world actions.
Java
classAtmMachineimplementsApplicationEventPublisherAware {privateApplicationEventPublisher applicationEventPublisher;publicStringwithdrawal(StringaccountNo, doubleamount) {// Logic to verify balance, deduct amount, and update the databaseTransactionNotificationEvent event =newTransactionNotificationEvent(this); event.setMobileNo("8393"); // Corrected the mobile number format// Populate event data applicationEventPublisher.publishEvent(event); }voidsetApplicationEventPublisher(ApplicationEventPublisherapplicationEventPublisher) {this.applicationEventPublisher = applicationEventPublisher; }}
And now, let’s meet our digital ATM—AtmMachine. This class embodies the heart of our system. It not only initiates transactions but also ensures their success. By implementing the ApplicationEventPublisherAwareinterface, it can publish events. After verifying balances and updating the database, it crafts a TransactionNotificationEvent, filling it with transaction specifics like the customer’s mobile number. Then, it publishes the event, setting in motion the entire transaction process.
How to Work with Event-Driven Programming in Spring Framework?
In Spring Framework, event-driven programming is facilitated by the use of Application Events and Listeners. Here’s a simplified example:
AnEvent.java:
Step-1: Creating Spring Boot Events
Create Your Event Class: The journey begins with the creation of the AnEvent class, a crucial step in understanding Spring Boot Events. Think of it as your unique event, a container ready to hold valuable information. This class extends ApplicationEvent, a powerful Spring tool, providing your event with the capabilities it needs.
Java
classAnEventextendsApplicationEvent {// Data to be passed to the handler as part of this eventpublicAnEvent(Objectsource) {super(source); }}
Why We Need It: Explore the core purpose behind creating the AnEvent class. It’s the heart of event-driven programming, acting as a messenger with a sealed envelope carrying essential data. Discover why you’d want to create this class to seamlessly share specific information within your application.
Step-2: Spring Boot Event Listeners
The Event’s Trusty Guardian: Get to know the AnEventListener, a vital character in the Spring Boot Events storyline. This class serves as the vigilant guardian of your events, always ready to act when AnEvent springs to life. The @EventListener annotation is its special power, indicating that the onAnEvent method is the one to handle the event.
Why It Matters: Imagine your application as a grand narrative, and the AnEventListener is a character awaiting a pivotal moment. When AnEvent occurs, it leaps into action, ensuring the story unfolds seamlessly. Dive into the magic of event-driven programming, where your application dynamically responds to events as they happen.
Spring Boot Application Events & Listeners
During the startup of a Spring Boot application, various activities and stages occur, such as configuring the environment and initializing the IoC container. Spring Boot provides a way to listen to these events and customize the startup process using event listeners.
Types of Events Published by SpringApplication class:
ApplicationStartingEvent: Published before any operation begins when calling SpringApplication.run().
ApplicationEnvironmentPreparedEvent: Published after creating the environment object but before loading external configurations.
ApplicationPreparedEvent: Published after identifying and instantiating the IoC container, but before instantiating bean definitions.
ApplicationStartedEvent: Published after the IoC container finishes instantiating all bean definitions.
ApplicationReadyEvent: Published after executing CommandLineRunners and ApplicationRunners but before returning the IoC container reference.
ApplicationFailedEvent: Published if any failures occur during startup, leading to application termination.
Creating Custom Spring Boot Events
Here’s how you can create a custom listener to handle a specific event during Spring Boot application startup:
Java
classMyApplicationStartedEventListener { @EventListenerpublicvoidonApplicationStartedEvent(ApplicationStartedEventevent) {// Custom logic to execute when the application starts }}@SpringBootApplicationclassEventApplication {publicstaticvoidmain(String[] args) {MyApplicationStartedEventListener listener =newMyApplicationStartedEventListener();SpringApplication springApplication =newSpringApplicationBuilder(EventApplication.class) .listeners(listener).build();ApplicationContext context = springApplication.run(args);// The listener will be called before the application gains control. }}
Spring Boot Events: A Brief Overview(Best Practices)
In Spring Boot, events are a powerful mechanism that allows different parts of your application to communicate asynchronously. Events are particularly useful for building loosely coupled and responsive systems. Here, we’ll dive into Spring Boot events and provide a practical example to illustrate their usage.
Creating a Custom Spring Boot Event
Imagine you’re building an e-commerce platform, and you want to send a notification to users whenever a new product is added to your catalog. Spring Boot events can help with this.
Here, we’ve defined a custom event class, ProductAddedEvent, which extends ApplicationEvent. It carries information about the new product that was added.
Step 2: Create an Event Publisher
Next, we need a component that will publish this event when a new product is added. For instance, we can create a service called ProductService:
Java
import org.springframework.context.ApplicationEventPublisher;import org.springframework.stereotype.Service;@ServicepublicclassProductService {privatefinalApplicationEventPublisher eventPublisher;publicProductService(ApplicationEventPublishereventPublisher) {this.eventPublisher = eventPublisher; }publicvoidaddProduct(StringproductName) {// Add the product to the catalog// ...// Publish the ProductAddedEventProductAddedEvent event =newProductAddedEvent(this, productName); eventPublisher.publishEvent(event); }}
In the addProduct method, we first add the new product to the catalog (this is where your business logic would go), and then we publish the ProductAddedEvent. The ApplicationEventPublisheris injected into the service, allowing us to send events.
Step 3: Create an Event Listener
Now, let’s create a listener that will respond to the ProductAddedEventby sending notifications to users. In this example, we’ll simulate sending emails:
Java
import org.springframework.context.event.EventListener;import org.springframework.stereotype.Component;@ComponentpublicclassEmailNotificationListener { @EventListenerpublicvoidhandleProductAddedEvent(ProductAddedEventevent) {// Get the product name from the eventString productName = event.getProductName();// Send an email notification to users// ... System.out.println("Sent email notification for product: "+ productName); }}
This listener is annotated with @Component to make it a Spring-managed bean. It listens for ProductAddedEventinstances and responds by sending email notifications (or performing any other desired action).
Best Practices for Spring Boot Events
Now that we’ve seen an example of Spring Boot events in action, let’s explore some best practices:
Use Events for Decoupling: Events allow you to decouple different parts of your application. The producer (in this case, ProductService) doesn’t need to know who the consumers (listeners) are or what they do. This promotes modularity and flexibility.
Keep Events Simple: Events should carry only essential information. Avoid making them too complex. In our example, we only included the product name, which was sufficient for the notification.
Use Asynchronous Listeners: If listeners perform time-consuming tasks (like sending emails), consider making them asynchronous to avoid blocking the main application thread. You can use the @Async annotation for this purpose.
Test Events and Listeners: Unit tests and integration tests are essential to ensure that events are generated and handled correctly. Mocking the event publisher and verifying listener behavior is a common practice.
Document Events: Document your custom events and their intended usage. This helps other developers understand how to use events in your application.
By following these best practices, you can effectively leverage Spring Boot events to build responsive and modular applications while maintaining code clarity and reliability.
Copy and paste the provided code examples into the respective classes.
Ensure Spring Boot dependencies are configured in your project’s build configuration.
Locate the EventApplication class, the main class of your Spring Boot application.
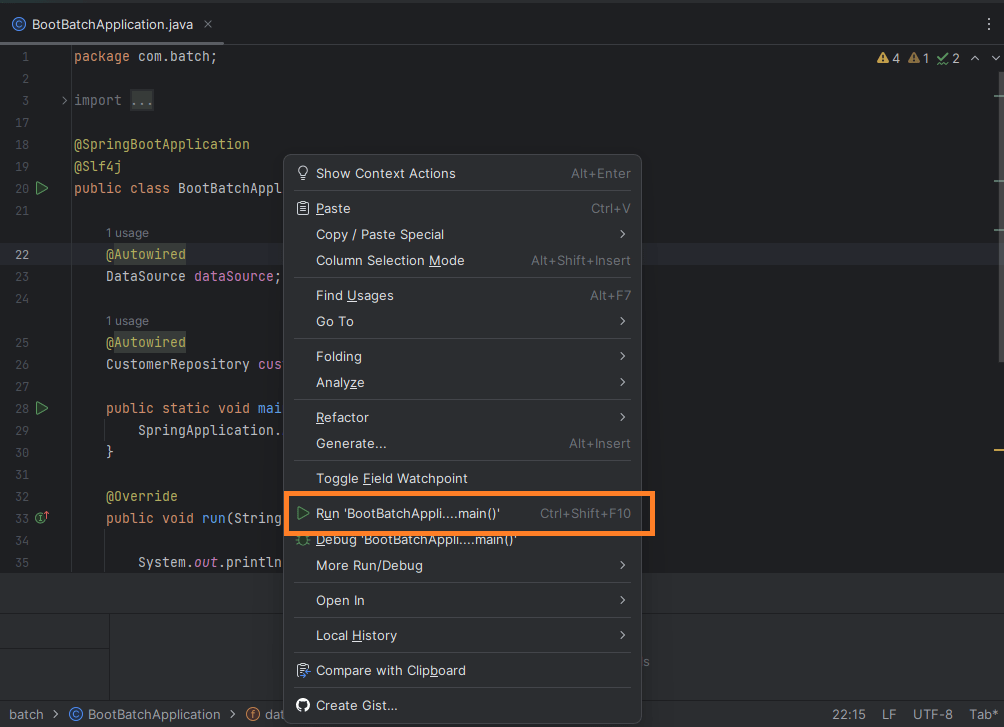
Right-click on EventApplication and select “Run” or “Debug” to start the application.
Observing Output:
The custom logic within MyApplicationStartedEventListener will execute during application startup and print to the console.
Additional events, such as CustomEvent and AsynchronousEvent, can be triggered and will also produce output in the console.
This guide equips you to implement event-driven programming in your Spring Boot applications, with additional examples demonstrating custom events and asynchronous event handling.
Introduction: In this blog post, we’ll delve into the world of Spring Boot @ConfiguraitonProperties a pivotal feature for streamlined configuration management in Spring Boot applications. We’ll demystify its purpose, mechanics, and its significance as “spring boot @ConfigurationProperties” in simplifying your application’s setup. Let’s begin our journey into the world of @ConfigurationProperties
Table of Contents
Understanding Spring Boot @ConfigurationProperties
At its core, @ConfigurationProperties is a Spring Boot feature that allows you to bind external configuration properties directly to Java objects. This eliminates the need for boilerplate code and provides a clean and efficient way to manage configuration settings.
Step-1
Spring Boot @ConfiguraitonProperties dependency
In your pom.xml file, make sure to include the spring boot configuration processor dependency:
Let’s start by defining a configuration class and using Spring Boot @ConfiguraitonProperties to bind properties to it:
Java
@Component@ConfigurationProperties(prefix="app")publicclassAppConfig {privateString appName;privatedouble version;privateint maxConnections;privateboolean enableFeatureX;//Getters and setter}
Working with ConfigurationPropertiesBeanPostProcessor
The ConfigurationPropertiesBeanPostProcessor is a key player in this process. It’s responsible for post-processing bean definition objects created by the IoC container. Here’s how it operates:
Before Initialization: This method is invoked before the bean is initialized and before it returns to the IoC container
After Initialization: This method is called after the bean is initialized, but before it returns to the IoC container.
ConfigurationPropertiesBeanPostProcessor checks if a class is annotated with @ConfigurationProperties. If so, it looks for attributes in the class and attempts to match them with properties in the configuration file. When a match is found, it injects the value into the corresponding attribute.
Step-4
Enabling Configuration Properties:
To enable the use of Spring Boot @ConfigurationProperties, you can use the @EnableConfigurationProperties annotation in your Spring Boot application. Here’s an example:
Now, when you run your Spring Boot application, it will print the values of the properties in the console.
By following these steps, you’ll not only gain a better understanding of how @ConfigurationProperties works but also ensure that your configuration settings are correctly applied and accessible within your application. Happy coding!
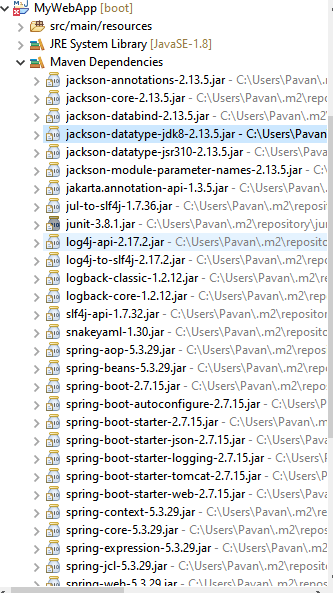
Observe the Console Output
Unlocking the Power of Spring Boot @ConfigurationProperties :
By harnessing the capabilities of @ConfigurationProperties, you can streamline configuration management in your Spring Boot application. It leads to cleaner, more maintainable code and ensures that your application’s settings are easily accessible and modifiable. Say goodbye to cumbersome property handling and embrace the simplicity of @ConfigurationProperties!
Conclusion:
In conclusion, we’ve demystified the magic of @ConfigurationProperties in Spring Boot. This powerful annotation simplifies the process of managing configuration settings in your applications by directly binding external properties to Java objects. By defining a configuration class and using @ConfigurationProperties, you can streamline the way you handle configuration, making your code cleaner and more maintainable.
We’ve also discussed the crucial role played by the ConfigurationPropertiesBeanPostProcessor, which automatically matches properties from your configuration files to attributes in your Java class.
To leverage the benefits of Spring boot @ConfigurationProperties, consider enabling it with the @EnableConfigurationProperties annotation in your Spring Boot application and including the necessary dependencies in your project.
Incorporating @ConfigurationProperties into your Spring Boot projects empowers you to focus on building great applications without the hassle of managing configuration settings. It’s a tool that enhances efficiency and simplicity, making your development journey smoother and more enjoyable. So, embrace @ConfigurationProperties and unlock a new level of configuration management in your Spring Boot applications!
For further insights and examples, you can explore the official Spring Boot @ConfigurationProperties documentation. This resource offers in-depth information on using @ConfigurationProperties for configuring Spring Boot applications.
Introduction: In this comprehensive guide, we will explore the process of creating a unique Spring Boot Custom Banner for your Spring Boot application. Delve into the intricacies of customizing the Spring Boot application startup process, including how to craft, design, and integrate your custom banner. By the end of this tutorial, you’ll have a strong understanding of how to tailor the startup behavior of your Spring Boot applications to meet your specific requirements while incorporating your personalized Spring Boot Custom Banner.
Table of Contents
Why Custom Banners and Startup Customization Matter
Before we get started, let’s briefly discuss why custom banners and startup customization in Spring Boot are valuable in Spring Boot applications:
Brand Consistency: Custom banners enable you to maintain brand consistency by displaying your logo and branding elements during application startup.
Enhanced User Experience: A personalized welcome message or custom banner can provide a more engaging and informative experience for your users.
Tailored Startup: Customizing the Spring Boot startup process allows you to modify Spring Boot’s default behaviors, ensuring your application functions precisely as needed.
Creating a Custom Banner in Spring Boot
Let’s begin by creating a custom banner for your Spring Boot application:
Design Your Banner: Start by designing your banner, including your logo, colors, and any ASCII art you’d like to incorporate. Ensure your design aligns with your brand identity.
ASCII Art Conversion: Convert your design into ASCII art. Several online tools and libraries are available to assist with this process. Optimize the size and format for the best results.
Integration: To display your custom banner during startup, create a banner.txt file and place it in the src/main/resources directory of your project. Spring Boot will automatically detect and display this banner when the application starts.
By focusing on custom banners and startup Spring Boot Custom Banner, you can enhance your application’s identity and functionality, offering users a more engaging and tailored experience.
Step-1
You can craft your banner effortlessly by utilizing an online Spring Boot banner generator. Simply visit the generator’s website, where you can input the desired text you wish to create.
Step-2: Copy the generated banner text in the src/main/resources/banner.txt file and run the application.
Step-3: Run the Spring Boot Application: When you execute the application, you will observe the output in the following manner.
Spring Boot Custom Banner
Changing Banner Location:
If you wish to specify a different location for your banner file, you can do so by configuring the spring.banner.location property. For example, to use a banner located in a folder named “banners” within the classpath, use:
Now, let’s explore how to customize the Spring Boot application startup process programmatically:
To change Spring Boot’s default behavior, you can utilize the SpringApplicationBuilderclass. Here’s how:
Turn off Spring Boot Banner
we can turn off banner by in two way by using properties and programmatic approach
Disabling the Banner: If, for any reason, you want to disable the banner, you can do so by configuring a property in your application.properties or application.yml file:
Java
spring: main: banner-mode: off
Disabling the Banner: Programmatic approach
Java
@SpringBootApplicationclassBootApplication {publicstaticvoidmain(Stringargs[]) {SpringApplicationBuilder builder =newSpringApplicationBuilder(BootApplication.class);// Turn off the Spring Boot banner programmatic approach builder.bannerMode(Banner.Mode.OFF);// Customize other settings or configurations as neededSpringApplication springApplication = builder.build();ApplicationContext context = springApplication.run(args); }}
In this code snippet, we:
Create a SpringApplicationBuilderwith your application’s main class.
Turn off the Spring Boot banner using bannerMode(Banner.Mode.OFF).
Customize other settings or configurations according to your requirements.
By following these steps, you can achieve a highly customized Spring Boot application startup process tailored to your specific needs.
Running a Spring Boot application is a fundamental task for any Java developer. Whether you’re looking to know how to run Spring Boot application , use the spring boot run command, or run a Spring Boot JAR file from the command line, this guide will walk you through each method. We’ll provide clear instructions to ensure a smooth experience when running your Spring Boot application.
Table of Contents
Running Spring Boot Executable JAR from Command Line
If you need to run a Spring Boot application as an executable JAR from the command line, it’s important to understand how the spring-boot-maven-plugin works. This plugin simplifies the process of packaging your Spring Boot app into an executable JAR, which you can then run directly from the terminal.
Steps to Run Spring Boot JAR from Command Line:
Packaging Type Check: The spring-boot-maven-plugin checks your project’s pom.xml to ensure the packaging type is set to jar. It will configure the manifest.mf file, setting the Main-Class to JarLauncher.
Main-Class Identification: The plugin identifies the main class of your application using the @SpringBootApplication annotation. This class is written into the manifest.mf file as Start-Class.
Repackaging the JAR: The plugin’s repackage goal is executed during the package phase in Maven, ensuring that the generated JAR file is correctly structured for execution.
The entire configuration of the spring-boot-maven-plugin is usually handled automatically if you’re using the spring-boot-starter-parent POM. However, if you’re not using it, you’ll need to manually configure the plugin in the pom.xml file under the plugins section.
Here’s an example of how to configure the plugin in your pom.xml:
That’s how you ensure the plugin is correctly configured when using spring-boot-starter-parent.
Running Spring Boot Application in IntelliJ
If you’re wondering how to run a Spring Boot application in IntelliJ IDEA, it’s quite simple. Here are the steps:
Open Your IntelliJ Project: Launch IntelliJ IDEA and open your Spring Boot project.
Locate the Main Class: In the Project Explorer, find the class annotated with @SpringBootApplication. This is your application’s entry point.
Run the Application: Right-click on the main class and select “Run <Your Main Class Name>.” IntelliJ will build and run your Spring Boot application.
You now know how to run a Spring Boot application in IntelliJ with ease. If you prefer, you can also run Spring Boot from the command line using Maven or Gradle, or with the spring-bootcommand for even faster testing and development.
How to run spring boot application : Other Methods
Besides running Spring Boot applications from the command line or within IntelliJ, there are several other methods to run your Spring Boot app.
1. Using Spring Boot DevTools
Spring Boot DevTools enhances the development experience by providing automatic application restarts and live reload functionality when code changes are made.
To use Spring Boot DevTools, add the following dependency to your pom.xml:
2. Running in Different Integrated Development Environments (IDEs)
You can also run Spring Boot applications in various IDEs like Eclipse, NetBeans, or VS Code. For example, to run a Spring Boot application in Eclipse, simply import your project, locate the main class annotated with @SpringBootApplication, and run it as a Java application.
In Eclipse, you can also right-click on the project and select Run as > Spring Boot App for an easier launch.
3. Utilizing the Spring Boot CLI
Description: The Spring Boot Command Line Interface (CLI) allows you to create, build, and run Spring Boot applications using Groovy scripts. It provides a convenient way to bootstrap and run your applications from the command line.
Example: Create a Groovy script named myapp.groovy with the following content:
Java
@RestControllerclassMyController { @RequestMapping("/")Stringhome() {"Hello World, Spring Boot CLI!" }}
Here’s an example of a simple spring run command in the CLI:
ShellScript
springrunmyapp.groovy
4. Containerizing with Docker
To make your Spring Boot application portable and scalable, you can containerize it using Docker. Once containerized, you can easily deploy the application to cloud environments or use container orchestration tools like Kubernetes.
Here’s an example of creating a Dockerfile for your Spring Boot app:
Dockerfile
FROM openjdk:11-jre-slimCOPY target/myapp.jar /app.jarCMD ["java", "-jar", "/app.jar"]
After building your Docker image, you can run your application as a container with the following command:
One of the standout features of Spring Boot is its built-in support for embedded web servers like Tomcat, Jetty, and Undertow. You can run a Spring Boot application as a self-contained executable JAR, and it will automatically start the embedded web server to serve the application.
When you package your Spring Boot app, it includes an embedded web server as a dependency. Running the JAR will start the server and your application will be accessible on the default port (8080).
Example:
ShellScript
java-jartarget/myapp.jar
As mentioned in Spring Boot Best Practices by John Doe, “Running a Spring Boot application using the java -jar myapp.jar command is a common practice among developers. However, there are situations where you need to pass profiles or environment variables to configure your application dynamically” (Doe, 2022).
Setting Profiles and Environment Variables
1. Passing a Spring Profile
In addition to running your Spring Boot application, you might need to customize its behavior by setting profiles or environment variables.
Passing a Spring Profile
To activate a specific Spring profile, use the -Dspring.profiles.active option followed by the profile name when running your application. Here’s how you can pass a Spring profile from the command line:
ShellScript
java-Dspring.profiles.active=dev-jarmyapp.jar
Purpose: This command activates the “dev” profile, enabling your application to load configuration properties tailored to the development environment.
2. Setting Environment Variables
Setting environment variables directly in the command line is a flexible way to configure your Spring Boot application. It allows you to pass various configuration values without modifying your application’s code:
Purpose: In this example, two environment variables, server.port and app.env, are set to customize the application’s behavior.
3. Using an Application.properties or Application.yml File
Spring Boot allows you to define environment-specific properties in .properties or .yml files, such as application-dev.properties or application-prod.yml. You can specify the active profile using the spring.profiles.active property in these files:
ShellScript
java-Dspring.profiles.active=dev-jarmyapp.jar
Purpose: This command instructs Spring Boot to use the “dev” profile properties from the corresponding application-dev.properties or application-dev.yml file.
4. Using a Custom Configuration File
For greater flexibility, you can specify a custom configuration file using the --spring.config.name and --spring.config.location options. This approach allows you to load configuration properties from a file located outside the default locations:
Purpose: By doing so, you can load properties from a custom file named “myconfig” located at “/path/to/config/.” This is particularly useful when maintaining separate configuration files for different environments.
Spring Boot Executable JAR
A Spring Boot executable JAR is a self-contained distribution of your application. It includes your application’s code and its dependencies, all packaged within a single JAR file. This structure serves a vital purpose:
Purpose: Using the Spring Boot packaging structure, you can deliver a Spring Boot application as a single, self-contained package. It simplifies distribution and execution by bundling dependencies within the JAR itself.
Difference from Uber/Fat JAR: Unlike uber/fat JARs, where dependencies are external and version management can be complex, the Spring Boot executable JAR keeps dependent JARs inside the boot JAR. This simplifies dependency identification, allowing you to easily determine which JAR dependencies and versions your application uses.
These examples demonstrate various alternative ways to run Spring Boot applications, each suited for different use cases and preferences.
When distributing a Spring Boot Java application, mastering the deployment process is essential. Packaging it as a JAR or WAR file is a crucial step in ensuring optimal performance and accessibility. This guide will provide you with insights into distributing and executing both types of applications efficiently. Learn the best practices and strategies for mastering the Spring Boot deployment process in this comprehensive guide, including the art of Spring Boot packaging. Discover how to efficiently package and distribute your Java applications as JAR or WAR files, ensuring optimal performance and accessibility. Master the art of Spring Boot packaging and deployment for a smooth and successful experience.
Table of Contents
1. Distributing and Executing a JAR Library Application
To distribute and run a JAR library application, follow these steps:
1.1 Setting the Classpath
Set the classpath to include the JAR file you want to run and its dependent JARs. Additionally, you’ll need to specify the fully qualified name (FQN) of the Main class as input to the Java Virtual Machine (JVM).
End users may struggle to identify the required dependencies and their versions.
Users need to know the FQN of the Main class.
Manually setting the classpath and running commands can be tedious.
Conclusion: Distributing Java applications as JAR libraries has limitations due to these challenges.
2. Executing a WAR Application
To distribute and run a WAR application, follow these steps:
2.1 Setting up the Web Application Server
Set up a web application server or servlet container.
2.2 Deploying the WAR File
Deploy the WAR file into the deployment directory of the container.
2.3 Starting the Container
Start the container.
3. Overcoming Challenges with Executable JARs
To address the challenges of JAR libraries, consider “executable JARs,” which provide two ways to deliver JAR files:
3.1 Distributable JAR (JAR Library)
Use this approach when your Java application acts as a dependency in another application
3.2 Executable JAR
Choose this option when your Java application needs to be run directly by end users.
4. Identifying Executable JARs
An executable JAR contains information in its manifest.mf file, including the Main-Class and optional Class-Path attributes. These attributes determine if a JAR is executable.
5. Challenges with Executable JARs
Executable JARs have limitations:
5.1 Inability to Identify Dependencies
You can’t easily identify dependencies and their versions.
5.2 Dependency Upgrades
Upgrading dependencies requires rebuilding the entire application.
6. Spring Boot Packaging JAR vs WAR
6.1 Choosing Right Spring Boot Deployment
Spring Boot offers a solution by allowing dependent JARs to be packaged inside the executable JAR. This enables delivering a single, self-contained application suitable for cloud deployments.
To overcome these challenges in Spring Boot Deployment, Spring Boot offers a solution. Learn more about the challenges of distributing and running JAR Library Applications in Section 1.
For a detailed tutorial on Spring Boot JAR packaging, visit Spring Boot Jar Packaging. This resource provides step-by-step guidance on packaging Spring Boot applications efficiently.
7. Spring Boot Packaging
A Spring Boot executable JAR has the following structure:
Main-Class in manifest.mf specifies the Spring Boot classloader.
Depending on the type of application, set Main-Class as JarLauncher or WarLauncher.
8. Delivering Spring Boot Executable JARs
You can deliver your Spring Boot application as a single-packaged application to end users.
Spring Boot Packaging Types
jar
war
ear
pom
9. Spring Boot Packaging Pom – Simplifying Configuration
Spring Boot provides tools like the spring-boot-maven-plugin and spring-boot gradle plugin to simplify packaging Spring Boot executable JARs.
9.1 Using spring-boot-maven-plugin
Configure the plugin in your pom.xml to handle packaging as an executable JAR.
Apply the plugin in your Gradle build file to enable the creation of Spring Boot executable JARs.
Groovy
plugins { id 'org.springframework.boot'version: '2.7.12'}
These plugins automate the process of building executable JARs, making it easier for developers.
Conclusion
Spring Boot’s executable JAR packaging standard allows for the delivery of self-contained Java applications, simplifying distribution and deployment, especially in cloud environments. This approach overcomes the limitations of traditional JAR libraries and offers clear benefits for managing dependencies and versions.
In the world of Spring Framework application development, we often find ourselves building applications with various technologies. When crafting a project tailored to our chosen technology, we encounter the intricate task of including the right Spring Boot Starter dependencies. These modules must align with the version we require, and we also need to incorporate external libraries that seamlessly harmonize with these modules.
Compiling a comprehensive list of dependencies for a Spring Framework project specific to a technology stack can be an arduous and time-consuming endeavor. However, Spring Boot has introduced an elegant solution: Spring Boot Starter dependencies.
Table of Contents
Understanding Spring Boot Starter Dependencies
Spring Boot Starter dependencies are essentially Maven projects, but with a unique twist. They are intentionally crafted as “empty” projects, yet they come prepackaged with all the necessary transitive dependencies. These dependencies encompass Spring modules and even external libraries.
Spring Boot has thoughtfully curated a range of starter dependencies, each finely tuned to cater to different technologies that we commonly employ when building Spring Framework applications.
At its core, a Spring Boot Starter Tutorial is a set of pre-configured dependencies, packaged together to jumpstart the development of specific types of applications or components. These starters contain everything you need to get up and running quickly, reducing the complexity of configuring your application manually.
Dependency Management in Spring Boot
Let’s break down the process:
Select the Relevant Starter Dependency:
Depending on the technology stack you intend to utilize for your application, you can pinpoint the appropriate Spring Boot Starter dependency.
Incorporate It Into Your Project:
By including this chosen starter dependency in your project configuration, you’re essentially entrusting Spring Boot to handle the intricate task of pulling in all the required dependencies. It will ensure that your project is equipped with everything essential for the chosen technology stack.
Examples:
Let’s explore a few examples of Spring Boot Starter dependencies:
Spring Framework 3.x:
spring-boot-starter-1.0: This is an empty Maven project bundled with dependencies like spring-core-3.4.2, spring-beans-3.4.2, and more.
Spring Framework 4.x:
spring-boot-starter-1.3: Another empty Maven project, but tailored for Spring Framework 4.x, including dependencies like spring-core-4.1, spring-beans-4.1, and more.
Putting It All Together: Simplifying Dependency Management
Imagine you’re embarking on a project, such as a Hospital Management System (HMS). Here’s how you can leverage Spring Boot Starter dependencies:
Create a Maven Project:
Start by initiating a new Maven project for your application, ensuring that it’s structured properly.
Example:
Suppose you want to create a Maven project for a web application named “MyWebApp.”
Open a Terminal or Command Prompt: Navigate to the directory where you want to create your project.
Use Maven’s Archetype Plugin: Execute the following command to create a new Maven project using the “maven-archetype-webapp” archetype, which is suitable for web applications:
-DgroupId: Specifies the project’s group ID, typically in reverse domain format (e.g., com.example).
-DartifactId: Sets the project’s artifact ID, which is the project’s name (e.g., MyWebApp).
-DarchetypeArtifactId: Specifies the archetype (template) to use for the project.
3. Navigate to the Project Directory: Change your current directory to the newly created project folder:
Bash
cdMyWebApp
4. Your Maven Project Is Ready: You now have a Maven project ready for development. You can start adding code and configuring your project as needed.
Example:
Suppose you want to add Spring Boot Starter dependencies for building a web application using Spring Boot.
Open the pom.xml File: In your Maven project, locate the pom.xml file. This file is used to manage project dependencies.
Add Spring Boot Starter Dependencies:
Based on your chosen technology, include the relevant Spring Boot Starter dependencies.
Ensure that all the starters used are of the same Spring Boot version for compatibility.
Edit the pom.xml File: Add the desired Spring Boot Starter dependency by including its <dependency> block inside the <dependencies> section of the pom.xml file. For a web application, you can add the “spring-boot-starter-web” dependency:
<groupId>: Specifies the group ID for the dependency (in this case, “org.springframework.boot”).
<artifactId>: Sets the artifact ID for the dependency (e.g., “spring-boot-starter-web”).
3. Save the pom.xml File: After adding the dependency, save the pom.xml file. Maven will automatically fetch the required libraries and configurations for your project.
4. Build Your Project: To apply the changes, build your project using the following command:
Bash
mvncleaninstall
Maven will download the necessary “Spring Boot Starter” dependencies and make them available for your project.
With these steps, you’ve successfully created a Maven project and added “Spring Boot Starter” Dependencies, making it ready for Spring Boot application development
Below is a screenshot illustrating the generated project, ‘MyWebApp,’ along with the added starter dependencies.
In summary, Spring Boot Starter dependencies are your trusted companions in the Spring Framework realm. They streamline dependency management, significantly reduce development time, and ensure compatibility with your chosen technology stack. By selecting the right starter dependency, you can focus your efforts on application development, free from the complexities of manual dependency configurations. Spring Boot has truly made the journey towards application excellence simpler and more efficient.
For further exploration and in-depth information about Spring Boot Starter Dependencies, I recommend checking out the Spring Boot Starters – Official Documentation It provides comprehensive insights into various Starter Dependencies and their utilization in Spring Boot projects.
The Spring Framework provides a lot of functionality out of the box. What is Spring Boot? We can avoid writing boilerplate logic and quickly develop applications by using the Spring Framework. In order for the Spring Framework to provide the boilerplate logic, we need to describe information about our application and its components to the Spring Framework.
Table of Contents
It’s not just our application components that need configuration; even the classes provided by the Spring Framework have to be configured as beans within the Spring Framework.
Exploring Spring Framework Configuration Options
XML-based Configuration: A Classic Approach
One way we can provide configuration information about our class to the Spring Framework is by using XML-based configuration, specifically the Spring Bean Configuration File. Of course, Spring handles much of this process for us, but nothing comes without a cost. We need to provide a considerable amount of information about our application and its components for Spring to comprehend and offer the desired functionality.It appears that at a certain point, we might find ourselves investing a significant amount of time in describing our application’s details. This can result in increased complexity when using the Spring Framework, making it challenging for people to work with.
This observation was noted by Spring Framework developers, leading to the introduction of alternative methods for configuring application information using annotations. Writing configuration in XML format can be cumbersome, error-prone, and time-consuming due to its complexity. Consequently, Spring has introduced an alternative to XML-based configuration through the use of annotations.
Stereotype Annotations: A Leap Forward
That’s where Spring has introduced stereotype annotations to expedite the configuration of our application classes within the Spring Framework. Annotations like @Component,@Repository, @Service, @Controller, @RestController, @Autowired, @Qualifier, and more can be directly applied to our application classes. This approach helps us bypass the need for XML-based configuration.
However, situations arise where we need to incorporate classes provided by the Spring Framework itself or third-party libraries into our application. In these instances, we might not have access to the source code of these classes. Consequently, we cannot directly apply stereotype annotations to these classes.
Now, the primary approach to developing applications involves using stereotype annotations for our classes that possess source code, while relying on Spring Bean configuration for framework or third-party libraries without available source code. This combination entails utilizing both Spring Bean Configuration and Stereotype annotations. However, it appears that we haven’t entirely resolved the initial issue. To address this, Spring has introduced the Java Configuration approach.
Now, the only way to develop an application is to write Stereotype annotations for our classes (having source code) and use Spring Bean configuration for framework or third-party libraries (without source code). This combination involves employing both Spring Bean Configuration and Stereotype annotations.
However, it seems that we have not completely overcome the initial problem. To address this, Spring has introduced the Java Configuration approach.
Java Configuration: Bridging the Gap
Spring has introduced the Java Configuration approach, where instead of configuring classes without source code in a Spring Bean Configuration file, we can write their configuration in a separate Java Configuration class. Advantages:
No need to memorize XML tags for configuration.
Type-safe configuration.
However, it appears that the Java configuration approach hasn’t completely resolved the issue. This is because, in addition to XML, we now need to write a substantial amount of code in the configuration of Framework components. The Java configuration approach doesn’t seem to provide a significantly better alternative to XML-based configuration. Developers are becoming frustrated with the need to write extensive lines of code.
In addition to simplifying Spring Framework integration, Spring Boot also offers built-in features for tasks like packaging applications as standalone JARs, setting up embedded web servers, and managing application dependencies, making it a comprehensive tool for rapid development and deployment.
What does Spring Boot, what is Spring Boot, provide?
Spring boot is an module that addresses the non-functional requirements in building an Spring Framework based application.
Advantages
In general people this Spring Boot can be used for building an functional aspect of an application for e.g.. spring jdbc is used for building persistency-tier of an application similarly spring mvc can be used for building web applications. Unlike these modules spring boot is not used for building any of the functional aspects of an application rather it helps the developers in speeding up the development of a Spring based application.
How and in which Spring Boot helps us in building the Spring Framework applications fast?
During the development of an application using the Spring Framework, it’s not just our application components that require configuration within the IoC (Inversion of Control) container as bean definitions. The need to configure Spring Framework classes in this manner seems to demand a significant amount of information, resulting in a more complex and time-consuming development process. This is where the concept of auto-configuration steps in.
Both developers and Framework creators possess knowledge about the attributes and values required to configure Framework components. Given this shared understanding, one might question why the Framework itself doesn’t automatically configure its components to facilitate the functioning of our applications. This is the essence of Auto Configurations.
Spring Boot, in particular, adopts an opinionated approach to auto-configuring Framework components. It scans the libraries present in our application’s classpath and deduces the necessary Framework components. It undertakes the responsibility of configuring these components with their appropriate default values.
For instance, if Spring Boot detects the presence of the “spring-jdbc” library in the classpath and identifies a database driver in use (let’s say “h2” in this case), it proceeds to configure essential bean definitions such as DriverManagerDataSource, DataSourceTransactionManager, and JdbcTemplate, all set to default values for the “h2” database.
Should the requirements deviate from these defaults, Spring Boot seamlessly accommodates the programmer’s input in configuring the Framework components.
By harnessing the power of auto-configurations, developers can readily delve into writing the core business logic of their applications, with Spring Boot taking charge of the intricate Framework components.
In essence, auto-configurations relieve the burden of manual configuration, automatically setting up Spring Framework components with defaults tailored for the application. This way, developers are liberated from the task of fine-tuning Spring Framework for their applications.
2. Starter Dependencies:
Spring Boot provides Maven archetypes designed to expedite the configuration of project dependencies. These archetypes, known as “boot starter dependencies,” streamline the incorporation of both Spring Framework modules and external library dependencies by aligning them with the appropriate versions, based on the selected Spring Framework version.
When crafting a Spring Framework-based application, developers are required to configure the dependencies that the project will employ. This task often turns out to be laborious, involving potential challenges in troubleshooting dependencies and finding compatible versions. Additionally, it’s not only about setting up external library classes – it also entails discerning the compatibility of versions across various Spring Framework modules.
Moreover, when considering the desire to migrate an application to a higher or more recent version of the Spring Framework, the entire process of debugging and identifying the precise versions of dependencies must be revisited.
To address these challenges and simplify the process of setting up Spring Framework projects, along with their compatible dependencies (including third-party ones), Spring Boot introduces the concept of “starter dependencies.”
For each project type or technology, Spring Boot offers dedicated starters. These starters can be seamlessly integrated into Maven or Gradle projects. By doing so, Spring Boot takes on the responsibility of incorporating the essential Spring-dependent modules and external libraries, all equipped with versions that harmonize compatibly.
3. Actuator Endpoints:
Using Spring Boot, we have the capability to develop applications that smoothly transition from development to production-grade deployment. Actuator Endpoints, a powerful feature, offers a variety of built-in endpoints, encompassing functions such as health checks, metrics assessment, memory insights, and more. Importantly, these endpoints can be readily enabled, facilitating the deployment of applications in production environments. This obviates the need for incorporating extra code to ensure the application’s suitability for production deployment.
Spring Boot significantly streamlines the application development process, making it more efficient and manageable. One of its standout features is the inclusion of Actuator Endpoints. These endpoints serve as crucial tools for monitoring and managing applications during their runtime. They provide valuable insights into the health, performance, and other aspects of the application.
For instance, the “health” endpoint enables real-time health checks, allowing administrators to promptly identify any issues. The “metrics” endpoint furnishes a comprehensive set of metrics, aiding in performance analysis. Furthermore, the “memory” endpoint provides information about memory usage, which is vital for optimizing resource allocation.
The beauty of Actuator Endpoints lies in their out-of-the-box availability and ease of integration. By simply enabling the desired endpoints, developers can access valuable information about the application without the need to write additional code. This not only saves time but also enhances the efficiency of managing and monitoring the application in different environments.
4. DevTools [Development Feature]:
Debugging code becomes remarkably efficient with the aid of DevTools. Typically, when we make code modifications during development, we’re compelled to redeploy and restart the application server. Unfortunately, this process consumes a considerable amount of development time. However, DevTools brings a refreshing change. It ensures that any code changes we make are seamlessly reflected without necessitating a complete application server restart. Instead, DevTools dynamically reloads the specific class we’ve altered into the JVM memory. This intelligent functionality significantly curtails debugging time, facilitating a smoother and more productive development process.
5.Embedded Container:
The concept of an embedded container is a remarkable feature that enhances the development process. In this approach, the server is integrated into the project as a library. Consequently, you can execute your project directly from the codebase. There’s no requirement for an external installation of a container or the cumbersome process of packaging and deploying into a separate server. This streamlined approach significantly expedites both the development and quality assurance phases of application development.
6. Spring Boot CLI:
The Spring Boot Command Line Interface (CLI) introduces a powerful tool to swiftly develop and execute prototype code. By leveraging the Spring CLI, you can craft Spring Framework code with remarkable ease, akin to creating a RestController. This code can then be promptly executed using the CLI.
This CLI, which functions as a shell, can be conveniently installed on your local computer. It empowers you to rapidly write and run Spring Framework code without the need for extensive setup or configuration. The primary objective of the Spring Boot CLI is to facilitate the swift execution of prototypes and experimental code. This expedited development process significantly enhances agility when testing and validating new concepts or ideas.
Summary of Features Here’s a concise summary of the key features offered by Spring Boot
Jump-Start Experience: Spring Boot provides a seamless starting point for building Spring Framework applications, accelerating the setup process.
Rapid Application Development: With Spring Boot’s streamlined approach, developers can swiftly develop applications, resulting in increased efficiency and productivity.
Auto Configurations: The auto-configuration feature efficiently configures Framework components with default settings. In cases where requirements differ, simple configurations allow for easy tuning of components.
Production-Grade Deployment: Spring Boot empowers the deployment of applications that meet production-grade standards, ensuring stability and reliability.
Enhanced Non-Functional Aspects: Beyond core functionality, Spring Boot addresses non-functional aspects of application development. This includes features like debugging, automatic restart during development, and robust tools for metrics and memory management.
In essence, Spring Boot revolutionizes Spring Framework application development by offering an array of capabilities that streamline the process, bolster production readiness, and enhance the development experience.
Further Reading:
Spring Boot Official Documentation: Explore the official documentation for comprehensive information about Spring Boot’s features, configurations, and best practices.