Refactoring Legacy Code with Java 8 Lambda Expressions: A Detailed Guide with Examples

In software development, maintaining and updating legacy code can be a daunting task. Many older Java applications are difficult to maintain due to verbose, complex, and hard-to-read code. Java 8 introduced lambda expressions, which can significantly improve how we write and maintain code. Lambda expressions offer a simpler, more concise way to handle functional programming in Java.

In this post, we’ll dive deeper into the refactoring process, providing clear and detailed examples of how you can refactoring legacy code with Java 8 lambda expressions. Along the way, we’ll also discuss the common mistakes developers make when using lambda expressions and provide tips on how to avoid them.

Why Refactor Legacy Code?

When you inherit a legacy Java codebase, there are usually a few things you can count on: the code is likely long-winded, difficult to understand, and hard to maintain. Refactoring it can make a huge difference, and Java 8’s lambda expressions and functional programming features help solve these problems:

  • Reduced Boilerplate: Lambda expressions replace verbose anonymous inner classes, making the code more concise.
  • Improved Readability: With lambda expressions, you can express logic in a clear, functional style, making the code easier to understand.
  • Maintainability: Refactoring with modern Java features like lambdas simplifies future changes and makes the code easier to maintain.

Understanding Java 8 Lambda Expressions

A lambda expression in Java allows you to define the implementation of a functional interface (an interface with a single abstract method) in a more concise manner.

The basic syntax of a lambda expression is:

(parameters) -> expression

Example of a simple lambda expression:

(x, y) -> x + y

In this case, the lambda expression (x, y) -> x + y represents a method that takes two arguments and returns their sum.

In Java 8, functional interfaces are a key concept because lambda expressions must be used with interfaces that have a single abstract method. For instance, java.util.function.Predicate and java.util.function.Consumer are two functional interfaces.

Real-World Legacy Code Example

Let’s look at a real-world legacy example where we have to filter a list of Person objects to find adults (age >= 18).

File: LegacyCodeExample.java

import java.util.ArrayList;
import java.util.List;

public class LegacyCodeExample {
    public static void main(String[] args) {
        List<Person> people = new ArrayList<>();
        people.add(new Person("John", 25));
        people.add(new Person("Sarah", 16));
        people.add(new Person("David", 30));

        List<Person> adults = new ArrayList<>();
        for (Person person : people) {
            if (person.getAge() >= 18) {
                adults.add(person);
            }
        }

        for (Person person : adults) {
            System.out.println(person.getName());
        }
    }
}

class Person {
    private String name;
    private int age;

    public Person(String name, int age) {
        this.name = name;
        this.age = age;
    }

    public String getName() {
        return name;
    }

    public int getAge() {
        return age;
    }
}

Issues with Legacy Code

  1. Verbosity: The code contains multiple loops that are unnecessary.
  2. Manual Filtering: The code manually checks each Person object to determine if they meet the age condition.
  3. Maintenance: This structure is prone to bugs and harder to maintain as the application grows.

Refactoring Legacy Code with Java 8 Lambda Expressions

Using Java 8’s lambda expressions and streams, we can refactor this code to make it cleaner and more concise.

File: RefactoredCodeExample.java

import java.util.List;
import java.util.stream.Collectors;

public class RefactoredCodeExample {
    public static void main(String[] args) {
        List<Person> people = List.of(
            new Person("John", 25),
            new Person("Sarah", 16),
            new Person("David", 30)
        );

        // Use streams and lambda expression to filter adults
        List<Person> adults = people.stream()
                                    .filter(person -> person.getAge() >= 18)
                                    .collect(Collectors.toList());

        // Print the names of adults using forEach and lambda
        adults.forEach(person -> System.out.println(person.getName()));
    }
}

class Person {
    private String name;
    private int age;

    public Person(String name, int age) {
        this.name = name;
        this.age = age;
    }

    public String getName() {
        return name;
    }

    public int getAge() {
        return age;
    }
}

Key Changes

  • Stream API: We replace the for loop with the stream() method, which allows us to process the collection in a more functional style.
  • Lambda Expressions: The filtering condition person -> person.getAge() >= 18 is a lambda expression that checks if the person’s age is greater than or equal to 18.
  • forEach(): We use the forEach() method combined with a lambda expression to print out the names of the filtered list of adults.

Benefits of Refactoring

  1. Concise: The refactored code is much shorter and easier to read.
  2. Maintainable: With streams and lambdas, the code is less prone to bugs, and future modifications are easier to implement.
  3. Functional Style: Java now embraces a functional programming approach, and the refactored code is a good example of how you can take advantage of this paradigm.

Common Mistakes and How to Avoid Them

While lambda expressions make your code more concise, developers often make mistakes when using them. Here are some common pitfalls and tips for avoiding them:

1. Overusing Lambda Expressions

One common mistake is overusing lambda expressions where a simple for-loop or traditional approach would be better. For example, using streams and lambdas for very small datasets or simple operations can actually make the code harder to understand.

Mistake:

List<Person> people = List.of(new Person("John", 25), new Person("Sarah", 16));
// Using a stream unnecessarily for simple iteration
people.stream().forEach(person -> System.out.println(person.getName()));

Avoid This: If the logic is simple, a regular for-each loop might be more readable.

Better Approach:

for (Person person : people) {
    System.out.println(person.getName());
}

2. Not Handling Nulls Properly

Lambda expressions are concise, but they can sometimes overlook potential null values. If you don’t handle null properly, it can lead to NullPointerExceptions.

Mistake:

List<Person> people = null;
people.stream().forEach(person -> System.out.println(person.getName()));

Avoid This: Always check for null before applying a stream or lambda expression.

Better Approach:

if (people != null) {
    people.stream().forEach(person -> System.out.println(person.getName()));
}

Alternatively, use Optional to avoid null checks altogether.

3. Making Lambdas Too Complex

Lambda expressions are intended to simplify code, but they can become hard to read when they are too complex. If the lambda expression grows too complicated, it might be better to extract it into a method.

Mistake:

people.stream().filter(person -> person.getAge() >= 18 && person.getAge() < 65)
              .map(person -> person.getName() + " is an adult")
              .forEach(name -> System.out.println(name));

Avoid This: If your lambda expression is getting too complicated, refactor it into a separate method.

Better Approach:

public static boolean isAdult(Person person) {
    return person.getAge() >= 18 && person.getAge() < 65;
}

people.stream()
      .filter(CodeRefactorExample::isAdult)
      .map(person -> person.getName() + " is an adult")
      .forEach(System.out::println);

4. Neglecting Performance in Complex Streams

Streams are powerful, but they can sometimes introduce performance issues, especially with large datasets. If you’re performing operations like map, filter, and collect in sequence, they could lead to unnecessary overhead.

Mistake:

List<Person> adults = people.stream()
                             .filter(person -> person.getAge() >= 18)
                             .map(person -> person.getName())
                             .collect(Collectors.toList());

Avoid This: If you only need to perform a single operation, don’t use multiple stream operations. Try to reduce the number of operations when possible.

Better Approach:

List<String> adultNames = people.stream()
                                .filter(person -> person.getAge() >= 18)
                                .map(Person::getName)
                                .collect(Collectors.toList());

By eliminating unnecessary intermediate steps, we can make the code cleaner and potentially more efficient.

Conclusion

Refactoring legacy code with Java 8 lambda expressions can drastically improve the readability, maintainability, and performance of your applications. By embracing functional programming and using streams and lambdas, you can make your codebase more concise and easier to manage.

However, it’s important to use lambda expressions judiciously. Overuse, null handling, complex lambdas, and performance concerns are pitfalls that can make your code harder to maintain and debug.

Start incorporating these best practices today to modernize your legacy Java applications and improve the overall quality of your code.

Call to Action

Have you encountered any challenges or interesting solutions while refactoring legacy code with Java 8 lambda expressions? Share your experiences or ask questions in the comments below. Don’t forget to subscribe to our blog JavaDZone for more tutorials and tips on Java development!


FAQ

Q: What’s the best way to refactor legacy code with Java 8 lambdas? A: The best way is to identify areas where you’re using loops or anonymous classes. Replace them with stream operations or lambda expressions where appropriate. This simplifies the code and makes it more maintainable.

Q: Can lambda expressions help with performance? A: Lambda expressions can potentially improve performance, especially when used with streams. However, it’s important to carefully measure performance and avoid unnecessary stream operations in performance-critical sections.

Q: How do I handle null values when using lambdas? A: Always check for null values before using lambda expressions. You can also use Optional to handle nullable values gracefully.

Top 10 Java Full Stack Development Best Practices You Should Follow

Top 10 Java Full Stack Development Best Practices

In the fast-paced world of web development, being a Java full stack developer requires mastering a wide array of tools and technologies. Java has long been a trusted choice for backend development, but the role of a full stack Java developer goes beyond just backend programming. It involves working with both the frontend and backend to deliver end-to-end solutions. Whether you’re just starting or you’re an experienced developer, following the right practices is key to building high-quality, maintainable applications.

In this post, we’ll dive into the top 10 Java full stack development best practices you should follow in 2024. These best practices will not only help you build solid applications but will also ensure your code remains clean, efficient, and scalable. Let’s break them down.

Top 10 Java Full Stack Development Best Practices:

1. Master the Core Java Full Stack Developer Skills

To be a successful Java full stack developer, you need a broad understanding of both frontend and backend technologies. The backend, where Java excels, typically involves frameworks like Spring Boot, Hibernate, and REST APIs. On the frontend, you’ll need proficiency in HTML, CSS, JavaScript, and modern frontend libraries such as React.js or Angular.

Real-Time Example: Imagine you’re working on a task management app. The backend will handle tasks such as creating, updating, and deleting tasks, all powered by Java and Spring Boot. Meanwhile, the frontend will interact with users to display tasks and allow interactions, built using React.js.

Backend Tools:

  • Spring Boot (For building scalable backend services)
  • Hibernate (For ORM and database interactions)
  • JUnit (For writing unit tests)

Frontend Tools:

  • React.js/Angular (For building dynamic user interfaces)
  • HTML/CSS/JavaScript (For structuring and styling the frontend)

Having a strong grasp of both ends will allow you to build seamless applications.

2. Write Clean and Maintainable Code

When working as a Java full stack developer, clean code is more than just a best practice; it’s essential. Clean code not only improves readability but also reduces the likelihood of bugs and makes your codebase easier to maintain. For both frontend and backend, adopt practices like meaningful variable names, well-organized methods, and consistent indentation.

Real-Time Example: In a blogging platform, clean code makes it easier for your team to add features like tagging, comment moderation, and image uploads. Without clean code, these features might clash with existing functionalities, causing delays and errors.

Here’s an example of how you can keep your Java code clean:

// File: BlogPostService.java
public class BlogPostService {

    // Method to create a new blog post
    public BlogPost createBlogPost(String title, String content) {
        if (title == null || title.isEmpty() || content == null || content.isEmpty()) {
            throw new IllegalArgumentException("Title and content must not be empty");
        }
        
        BlogPost newPost = new BlogPost(title, content);
        blogPostRepository.save(newPost);
        return newPost;
    }
}

In this example, the method createBlogPost has a clear and meaningful name, and the logic is concise, making it easy to follow and extend.

3. Optimize Database Queries

Efficient database interactions are critical in Java full stack development. Inefficient queries can slow down your application, especially when dealing with large datasets. Always use indexed columns, avoid complex joins, and limit the number of records returned to ensure optimal performance.

Real-Time Example: Imagine you’re developing a social media platform where users post content, comment on each other’s posts, and like posts. As the platform grows, you need to ensure that fetching posts and comments is fast, even for millions of users.

Optimized Query Example using Hibernate:

// File: PostRepository.java
public class PostRepository {

    public List<Post> getUserPosts(Long userId) {
        return session.createQuery("FROM Post WHERE user.id = :userId ORDER BY createdAt DESC")
                      .setParameter("userId", userId)
                      .setMaxResults(10)
                      .list();
    }
}

By limiting the number of posts returned and sorting them efficiently, this query ensures that the page loads quickly even when the user has many posts.

4. Use RESTful APIs for Smooth Communication

In Java full stack development, RESTful APIs are a powerful way to enable smooth communication between the frontend and backend. APIs should follow REST principles: stateless interactions, use of standard HTTP methods (GET, POST, PUT, DELETE), and appropriate response codes.

Real-Time Example: For an e-commerce site, the backend would expose APIs to handle user authentication, product search, and order processing. The frontend would interact with these APIs to display data and interact with users.

Example of a RESTful API in Spring Boot:

// File: ProductController.java
@RestController
@RequestMapping("/api/products")
public class ProductController {

    @GetMapping("/{id}")
    public ResponseEntity<Product> getProductById(@PathVariable Long id) {
        Product product = productService.findProductById(id);
        return product != null ? ResponseEntity.ok(product) : ResponseEntity.notFound().build();
    }

    @PostMapping("/")
    public ResponseEntity<Product> createProduct(@RequestBody Product product) {
        Product newProduct = productService.createProduct(product);
        return ResponseEntity.status(HttpStatus.CREATED).body(newProduct);
    }
}

This controller provides two endpoints: one for retrieving a product by ID and another for creating new products, all adhering to REST principles.

5. Implement Security Best Practices

Security should be a top priority in Java full stack development. Protecting sensitive data, ensuring secure user authentication, and preventing attacks like SQL injection and XSS are essential. Use tools like Spring Security for authentication and authorization, and always encrypt sensitive data.

Real-Time Example: In a banking application, user information such as account numbers and transaction details needs to be encrypted, and only authorized users should access certain functionalities, such as transferring funds.

Spring Security Example:

// File: SecurityConfig.java
@Configuration
@EnableWebSecurity
public class SecurityConfig extends WebSecurityConfigurerAdapter {

    @Override
    protected void configure(HttpSecurity http) throws Exception {
        http.csrf().disable()
            .authorizeRequests()
            .antMatchers("/public/**").permitAll()
            .anyRequest().authenticated();
    }

    @Bean
    public PasswordEncoder passwordEncoder() {
        return new BCryptPasswordEncoder();
    }
}

This configuration disables CSRF (for simplicity) and uses BCrypt for password encoding, enhancing security.

6. Ensure Responsive Frontend Design

With mobile traffic growing, it’s critical that your Java full stack application is responsive. Use frameworks like Bootstrap or CSS techniques like Flexbox and Grid to create layouts that adapt to different screen sizes. A responsive design ensures that your application provides a seamless user experience across all devices.

Real-Time Example: On a news portal, your design should adapt to small screens, such as smartphones, ensuring users can read articles, watch videos, and share content no matter the device they’re using.

7. Automate Your Workflow with CI/CD

Continuous Integration and Continuous Deployment (CI/CD) is a modern best practice that streamlines development workflows. By automating testing, building, and deploying, CI/CD ensures that your application is always in a deployable state and minimizes manual errors.

Real-Time Example: In a collaborative software project, CI/CD pipelines can automatically build and deploy the application every time a developer pushes code to the repository, reducing downtime and ensuring faster releases.

8. Write Unit Tests and Practice TDD

Testing is crucial to ensure the reliability and stability of your code. Writing unit tests for both frontend and backend ensures that your code behaves as expected. Test-Driven Development (TDD) encourages writing tests before code, ensuring better coverage and reducing the likelihood of bugs.

Real-Time Example: For a task management app, unit tests can ensure that tasks are created correctly, users can mark tasks as completed, and the task list updates appropriately.

Example of a simple unit test in Java:

// File: TaskServiceTest.java
public class TaskServiceTest {

    @Test
    public void shouldCreateNewTask() {
        TaskService taskService = new TaskService();
        Task task = new Task("Complete project", "Finish coding the project");
        
        Task createdTask = taskService.createTask(task);
        
        assertNotNull(createdTask);
        assertEquals("Complete project", createdTask.getTitle());
    }
}

9. Leverage Caching for Faster Performance

To boost the performance of your application, consider implementing caching. Caching frequently accessed data reduces the number of database queries and accelerates response times. Use tools like Redis or EhCache to store data temporarily and retrieve it quickly.

10. Keep Learning and Stay Updated

The world of Java full stack development is always evolving, with new libraries, frameworks, and best practices emerging regularly. It’s important to stay updated with the latest trends, attend developer conferences, contribute to open-source projects, and continue learning new skills.

FAQ

Q1: What is a Java full stack developer?
A Java full stack developer is someone skilled in both backend (using Java) and frontend technologies to build complete web applications.

Q2: What core skills are needed for a Java full stack developer?
Core skills include Java programming, knowledge of frameworks like Spring Boot and Hibernate, frontend development with HTML, CSS, and JavaScript, and database management.

Q3: Why is clean code so important?
Clean code ensures that your code is readable, maintainable, and scalable, making it easier for others (and your future self) to work on it.

Q4: How can I get full stack Java developer training?
You can enroll in online courses from platforms like Udemy, Coursera, or LinkedIn Learning, or attend coding bootcamps that specialize in full stack Java development.


Thank you for reading! If you found this guide helpful, don’t forget to follow us for more tutorials and tips on Java full stack development. Happy coding!

CompletableFuture in Java

CompletableFuture in Java

In today’s fast-paced software development world, asynchronous programming is essential for building efficient and responsive applications. Java provides a powerful tool for managing asynchronous tasks through the CompletableFuture class. In this blog post, we’ll explore what asynchronous programming is, how CompletableFuture in java fits into this paradigm, and how you can leverage it to write cleaner and more performant code.

Understanding Asynchronous Programming

Before diving into CompletableFuture, it’s important to understand the concept of asynchronous programming.

Asynchronous Programming is a programming paradigm that allows a program to perform tasks in the background without blocking the main thread. This is particularly useful in scenarios where you have tasks that involve waiting, such as:

  • I/O operations: Reading from or writing to files, network communications, etc.
  • Long computations: Tasks that take a significant amount of time to complete.
  • User interactions: Operations that should not freeze the user interface, such as responding to clicks or input.

In traditional synchronous programming, if a task takes time to complete, it blocks the execution of subsequent tasks. For example, if you have a method that reads data from a file, the program must wait until the file reading is complete before it can continue executing the next line of code. This can lead to inefficient use of resources and a poor user experience.

Asynchronous programming allows your program to continue executing while the time-consuming task is being processed. This is achieved using constructs such as callbacks, promises, and futures, which enable your program to handle multiple operations concurrently.

What is CompletableFuture in Java 8?

Introduced in Java 8, CompletableFuture is part of the java.util.concurrent package. It represents a future result of an asynchronous computation. Unlike the traditional Future interface, CompletableFuture provides a more flexible and comprehensive API for handling asynchronous programming.

Key Features of CompletableFuture

  • Non-blocking Operations: CompletableFuture allows you to execute tasks asynchronously without blocking the main thread.
  • Pipeline Support: It supports chaining multiple asynchronous tasks, making it easy to handle complex workflows.
  • Exception Handling: It provides robust methods for handling exceptions that might occur during asynchronous execution.
  • Combine Futures: You can combine multiple futures to achieve more complex asynchronous workflows.

Basic Usage of CompletableFuture

Let’s start with a basic example to understand how CompletableFuture works. Suppose you want to perform a simple asynchronous computation of adding two numbers.

import java.util.concurrent.CompletableFuture;

public class CompletableFutureExample {
    public static void main(String[] args) {
        CompletableFuture<Integer> future = CompletableFuture.supplyAsync(() -> {
            // Simulating a delay
            try {
                Thread.sleep(1000);
            } catch (InterruptedException e) {
                e.printStackTrace();
            }
            return 5 + 10;
        });

        future.thenAccept(result -> System.out.println("The result is: " + result));
    }
}

In this example:

  1. CompletableFuture.supplyAsync starts an asynchronous computation that adds two numbers.
  2. thenAccept is a callback that is executed when the computation completes, printing the result.

Chaining Asynchronous Tasks

One of the powerful features of CompletableFuture is the ability to chain multiple asynchronous tasks. Let’s enhance the previous example to include a second computation that multiplies the result.

import java.util.concurrent.CompletableFuture;

public class ChainingExample {
    public static void main(String[] args) {
        CompletableFuture<Integer> future = CompletableFuture.supplyAsync(() -> {
            // Simulating a delay
            try {
                Thread.sleep(1000);
            } catch (InterruptedException e) {
                e.printStackTrace();
            }
            return 5 + 10;
        });

        CompletableFuture<Integer> chainedFuture = future.thenApply(result -> {
            // Chaining another computation
            return result * 2;
        });

        chainedFuture.thenAccept(result -> System.out.println("The final result is: " + result));
    }
}

Here’s what happens in this example:

  1. supplyAsync performs the initial addition.
  2. thenApply is used to multiply the result by 2.
  3. thenAccept prints the final result.

Combining Multiple Futures

Combining multiple futures is another powerful feature of CompletableFuture. Imagine you need to fetch user data and then fetch related posts concurrently. You can combine these futures as follows:

import java.util.concurrent.CompletableFuture;

public class CombiningFuturesExample {
    public static void main(String[] args) {
        CompletableFuture<String> userFuture = CompletableFuture.supplyAsync(() -> {
            // Simulating user data fetching
            return "User data";
        });

        CompletableFuture<String> postsFuture = CompletableFuture.supplyAsync(() -> {
            // Simulating posts fetching
            return "Posts data";
        });

        CompletableFuture<Void> combinedFuture = CompletableFuture.allOf(userFuture, postsFuture);

        combinedFuture.thenRun(() -> {
            try {
                // Retrieve results from the futures
                String userData = userFuture.get();
                String postsData = postsFuture.get();

                System.out.println("User Data: " + userData);
                System.out.println("Posts Data: " + postsData);
            } catch (Exception e) {
                e.printStackTrace();
            }
        });
    }
}

In this example:

  1. Two CompletableFuture instances are created for fetching user data and posts.
  2. CompletableFuture.allOf combines these futures and ensures that both complete before proceeding.
  3. thenRun retrieves and prints the results once both futures have completed.

Handling Exceptions

Proper exception handling is crucial in asynchronous programming. CompletableFuture provides methods to handle exceptions effectively. Here’s an example:

import java.util.concurrent.CompletableFuture;

public class ExceptionHandlingExample {
    public static void main(String[] args) {
        CompletableFuture<Integer> future = CompletableFuture.supplyAsync(() -> {
            // Simulating an error
            if (true) {
                throw new RuntimeException("Something went wrong");
            }
            return 10;
        });

        future.handle((result, ex) -> {
            if (ex != null) {
                System.out.println("Exception occurred: " + ex.getMessage());
                return 0; // Default value in case of an error
            }
            return result;
        }).thenAccept(result -> System.out.println("Result is: " + result));
    }
}

In this example:

  1. handle is used to process both the result and any exception that may have occurred.
  2. If an exception is thrown, it is handled gracefully, and a default value is returned.

Conclusion

CompletableFuture is a versatile tool for handling asynchronous programming in Java. By understanding its core features and capabilities, you can write cleaner, more efficient code that handles asynchronous tasks with ease. Whether you’re chaining tasks, combining multiple futures, or handling exceptions, CompletableFuture provides the flexibility you need to build robust and responsive applications.

Asynchronous programming might seem complex at first, but with tools like CompletableFuture, you can manage concurrency effectively and enhance your application’s performance and responsiveness.

Happy coding!

Java Programming Interview Questions and Answers

Are you preparing for a Java programming interview and wondering what questions might come your way? In this article, we delve into the most frequently asked Java programming interview questions and provide insightful answers to help you ace your interview. Whether you’re new to Java or brushing up on your skills, understanding these questions and their solutions will boost your confidence and readiness. Let’s dive into the key concepts Most Asked Java Programming Interview Questions and Answers.

Java Programming Interview Questions

What are the key features of Java?

Java boasts several key features that contribute to its popularity: platform independence, simplicity, object-oriented nature, robustness due to automatic memory management, and built-in security features like bytecode verification.

Differentiate between JDK, JRE, and JVM.

  • JDK (Java Development Kit): JDK is a comprehensive software development kit that includes everything needed to develop Java applications. It includes tools like javac (compiler), Java runtime environment (JRE), and libraries necessary for development.
  • JRE (Java Runtime Environment): JRE provides the runtime environment for Java applications. It includes the JVM (Java Virtual Machine), class libraries, and other files that JVM uses at runtime to execute Java programs.
  • JVM (Java Virtual Machine): JVM is an abstract computing machine that enables a computer to run Java programs. It converts Java bytecode into machine language and executes it.

Explain the principles of Object-Oriented Programming (OOP) and how they apply to Java.

Object-Oriented Programming (OOP) is a programming paradigm based on the concept of “objects,” which can contain data and code to manipulate the data. OOP principles in Java include:

  • Encapsulation: Bundling data (variables) and methods (functions) into a single unit (object).
  • Inheritance: Ability of a class to inherit properties and methods from another class.
  • Polymorphism: Ability to perform a single action in different ways. In Java, it is achieved through method overriding and overloading.
  • Abstraction: Hiding the complex implementation details and showing only essential features of an object.

What is the difference between abstract classes and interfaces in Java?

  • Abstract classes: An abstract class in Java cannot be instantiated on its own and may contain abstract methods (methods without a body). It can have concrete methods as well. Subclasses of an abstract class must provide implementations for all abstract methods unless they are also declared as abstract.
  • Interfaces: Interfaces in Java are like a contract that defines a set of methods that a class must implement if it implements that interface. All methods in an interface are by default abstract. A class can implement multiple interfaces but can extend only one class (abstract or concrete).

Discuss the importance of the main() method in Java and its syntax.

The main() method is the entry point for any Java program. It is mandatory for every Java application and serves as the starting point for the JVM to begin execution of the program. Its syntax is:

public static void main(String[] args) {
    // Program logic goes here
}

Here, public specifies that the method is accessible by any other class. static allows the method to be called without creating an instance of the class. void indicates that the method does not return any value. String[] args is an array of strings passed as arguments when the program is executed.

How does exception handling work in Java? Explain the try, catch, finally, and throw keywords.

Exception handling in Java allows developers to handle runtime errors (exceptions) gracefully.

  • try: The try block identifies a block of code in which exceptions may occur.
  • catch: The catch block follows the try block and handles specific exceptions that occur within the try block.
  • finally: The finally block executes whether an exception is thrown or not. It is used to release resources or perform cleanup operations.
  • throw: The throw keyword is used to explicitly throw an exception within a method or block of code.

Describe the concept of multithreading in Java and how it is achieved.

Multithreading in Java allows concurrent execution of multiple threads within a single process. Threads are lightweight sub-processes that share the same memory space and can run concurrently. In Java, multithreading is achieved by extending the Thread class or implementing the Runnable interface and overriding the run() method.

What are synchronization and deadlock in Java multithreading? How can they be avoided?

  • Synchronization: Synchronization in Java ensures that only one thread can access a synchronized method or block of code at a time. It prevents data inconsistency issues that arise when multiple threads access shared resources concurrently.
  • Deadlock: Deadlock occurs when two or more threads are blocked forever, waiting for each other to release resources. It can be avoided by ensuring that threads acquire locks in the same order and by using timeouts for acquiring locks.

Explain the difference between == and .equals() methods in Java.

  • == operator: In Java, == compares references (memory addresses) of objects to check if they point to the same memory location.
  • .equals() method: The .equals() method is used to compare the actual contents (values) of objects to check if they are logically equal. It is usually overridden in classes to provide meaningful comparison.

What is the Java Collections Framework? Discuss some key interfaces and classes within it.

The Java Collections Framework is a unified architecture for representing and manipulating collections of objects. Some key interfaces include:

  • List: Ordered collection that allows duplicate elements (e.g., ArrayList, LinkedList).
  • Set: Unordered collection that does not allow duplicate elements (e.g., HashSet, TreeSet).
  • Map: Collection of key-value pairs where each key is unique (e.g., HashMap, TreeMap).

How does garbage collection work in Java?

Garbage collection in Java is the process of automatically reclaiming memory used by objects that are no longer reachable (unreferenced) by any live thread. The JVM periodically runs a garbage collector thread that identifies and removes unreferenced objects to free up memory.

Explain the concept of inheritance in Java with an example.

Inheritance in Java allows one class (subclass or child class) to inherit the properties and behaviors (methods) of another class (superclass or parent class). It promotes code reusability and supports the “is-a” relationship. Example:

// Parent class
class Animal {
    void eat() {
        System.out.println("Animal is eating...");
    }
}

// Child class inheriting from Animal
class Dog extends Animal {
    void bark() {
        System.out.println("Dog is barking...");
    }
}

// Usage
public class Main {
    public static void main(String[] args) {
        Dog dog = new Dog();
        dog.eat();  // Inherited method
        dog.bark(); // Own method
    }
}

What are abstract classes in Java? When and how should they be used?

Abstract classes in Java are classes that cannot be instantiated on their own and may contain abstract methods (methods without a body). They are used to define a common interface for subclasses and to enforce a contract for all subclasses to implement specific methods. Abstract classes are typically used when some methods should be implemented by subclasses but other methods can have a default implementation.

Explain the difference between final, finally, and finalize in Java.

  • final keyword: final is used to declare constants, prevent method overriding, and prevent inheritance (when applied to classes).
  • finally block: finally is used in exception handling to execute a block of code whether an exception is thrown or not. It is typically used for cleanup actions (e.g., closing resources).
  • finalize() method: finalize() is a method defined in the Object class that is called by the garbage collector before reclaiming an object’s memory. It can be overridden to perform cleanup operations before an object is destroyed.

What is the difference between throw and throws in Java exception handling?

  • throw keyword: throw is used to explicitly throw an exception within a method or block of code.
  • throws keyword: throws is used in method signatures to declare that a method can potentially throw one or more exceptions. It specifies the exceptions that a method may throw, allowing the caller of the method to handle those exceptions.

Discuss the importance of generics in Java and provide an example.

Generics in Java enable classes and methods to operate on objects of various types while providing compile-time type safety. They allow developers to write reusable code that can work with different data types. Example:

// Generic class
class Box<T> {
    private T content;

    public void setContent(T content) {
        this.content = content;
    }

    public T getContent() {
        return content;
    }
}

// Usage
public class Main {
    public static void main(String[] args) {
        Box<Integer> integerBox = new Box<>();
        integerBox.setContent(10);
        int number = integerBox.getContent(); // No type casting required
        System.out.println("Content of integerBox: " + number);
    }
}

What are lambda expressions in Java? How do they improve code readability?

Lambda expressions in Java introduce functional programming capabilities and allow developers to concisely express instances of single-method interfaces (functional interfaces). They improve code readability by reducing boilerplate code and making the code more expressive and readable.

Explain the concept of Java Virtual Machine (JVM). Why is it crucial for Java programs?

Java Virtual Machine (JVM) is an abstract computing machine that provides the runtime environment for Java bytecode to be executed. It converts Java bytecode into machine-specific instructions that are understood by the underlying operating system. JVM ensures platform independence, security, and memory management for Java programs.

What are annotations in Java? Provide examples of built-in annotations.

Annotations in Java provide metadata about a program that can be used by the compiler or at runtime. They help in understanding and processing code more effectively. Examples of built-in annotations include @Override, @Deprecated, @SuppressWarnings, and @FunctionalInterface.

Discuss the importance of the equals() and hashCode() methods in Java.

  • equals() method: The equals() method in Java is used to compare the equality of two objects based on their content (value equality) rather than their reference. It is overridden in classes to provide custom equality checks.
  • hashCode() method: The hashCode() method returns a hash code value for an object, which is used in hashing-based collections like HashMap to quickly retrieve objects. It is recommended to override hashCode() whenever equals() is overridden to maintain the contract that equal objects must have equal hash codes.

Java 8 Interview Questions and Answers

Java 8 Interview Questions and Answers

Are you preparing for a Java 8 interview and seeking comprehensive insights into commonly asked topics? Java 8 introduced several groundbreaking features such as Lambda expressions, Stream API, CompletableFuture, and Date Time API, revolutionizing the way Java applications are developed and maintained. To help you ace your interview, this guide provides a curated collection of Java 8 interview questions and answers, covering essential concepts and practical examples. Whether you’re exploring functional programming with Lambda expressions or mastering concurrent programming with CompletableFuture, this resource equips you with the knowledge needed to confidently navigate Java 8 interviews.

Java 8 Interview Questions and Answers

What are the key features introduced in Java 8?

  • Java 8 introduced several significant features, including Lambda Expressions, Stream API, Functional Interfaces, Default Methods in Interfaces, Optional class, and Date/Time API (java.time package).

What are Lambda Expressions in Java 8? Provide an example.

  • Lambda Expressions are anonymous functions that allow you to treat functionality as a method argument. They simplify the syntax of writing functional interfaces.Example:

Example:

// Traditional approach
Runnable runnable = new Runnable() {
    @Override
    public void run() {
        System.out.println("Hello from a traditional Runnable!");
    }
};

// Using Lambda Expression
Runnable lambdaRunnable = () -> {
    System.out.println("Hello from a lambda Runnable!");
};

// Calling the lambda Runnable
lambdaRunnable.run();

Explain the Stream API in Java 8. Provide an example of using Streams.

  • The Stream API allows you to process collections of data in a functional manner, supporting operations like map, filter, reduce, and collect.Example:
// Filtering and printing even numbers using Streams
List<Integer> numbers = Arrays.asList(1, 2, 3, 4, 5, 6, 7, 8, 9, 10);

numbers.stream()
       .filter(num -> num % 2 == 0)
       .forEach(System.out::println);

What are Functional Interfaces in Java 8? Provide an example.

  • Functional Interfaces have exactly one abstract method and can be annotated with @FunctionalInterface. They are used to enable Lambda Expressions.Example:java
// Functional Interface
@FunctionalInterface
interface Calculator {
    int calculate(int a, int b);
}

// Using a Lambda Expression to implement the functional interface
Calculator addition = (a, b) -> a + b;

// Calling the calculate method
System.out.println("Result of addition: " + addition.calculate(5, 3));

What are Default Methods in Interfaces? How do they support backward compatibility?

  • Default Methods allow interfaces to have methods with implementations, which are inherited by classes implementing the interface. They were introduced in Java 8 to support adding new methods to interfaces without breaking existing code.

Explain the Optional class in Java 8. Provide an example of using Optional.

  • Optional is a container object used to represent a possibly null value. It helps to avoid NullPointerExceptions and encourages more robust code.Example:
// Creating an Optional object
Optional<String> optionalName = Optional.ofNullable(null);

// Checking if a value is present
if (optionalName.isPresent()) {
    System.out.println("Name is present: " + optionalName.get());
} else {
    System.out.println("Name is absent");
}

How does the Date/Time API (java.time package) improve upon java.util.Date and java.util.Calendar?

  • The Date/Time API introduced in Java 8 provides a more comprehensive, immutable, and thread-safe way to handle dates and times, addressing the shortcomings of the older Date and Calendar classes.

What are Method References in Java 8? Provide examples of different types of Method References.

  • Method References allow you to refer to methods or constructors without invoking them. There are four types: static method, instance method on a particular instance, instance method on an arbitrary instance of a particular type, and constructor references.Example:
// Static method reference
Function<String, Integer> converter = Integer::parseInt;

// Instance method reference
List<String> words = Arrays.asList("apple", "banana", "orange");
words.stream()
     .map(String::toUpperCase)
     .forEach(System.out::println);

Explain the forEach() method in Iterable and Stream interfaces. Provide examples of using forEach().

  • The forEach() method is used to iterate over elements in collections (Iterable) or streams (Stream) and perform an action for each element.Example with Iterable:
List<String> names = Arrays.asList("Alice", "Bob", "Charlie");
names.forEach(System.out::println);

Example with Stream:

List<Integer> numbers = Arrays.asList(1, 2, 3, 4, 5);
numbers.stream()
       .forEach(System.out::println);

How can you handle concurrency in Java 8 using CompletableFuture? Provide an example.

  • CompletableFuture is used for asynchronous programming in Java, enabling you to write non-blocking code that executes asynchronously and can be composed with other CompletableFuture instances.

Example:

// Creating a CompletableFuture
CompletableFuture<String> future = CompletableFuture.supplyAsync(() -> {
    // Simulating a long-running task
    try {
        Thread.sleep(2000);
    } catch (InterruptedException e) {
        e.printStackTrace();
    }
    return "Hello, CompletableFuture!";
});

// Handling the CompletableFuture result
future.thenAccept(result -> System.out.println("Result: " + result));

// Blocking to wait for the CompletableFuture to complete (not recommended in production)
future.join();

What are the advantages of using Lambda Expressions in Java 8?

  • Lambda Expressions provide a concise way to express instances of single-method interfaces (functional interfaces). They improve code readability and enable functional programming paradigms in Java.

Provide an example of using Predicate functional interface in Java 8.

List<String> names = Arrays.asList("Alice", "Bob", "Charlie", "David");

// Using Predicate to filter names starting with 'A'
Predicate<String> startsWithAPredicate = name -> name.startsWith("A");

List<String> filteredNames = names.stream()
                                 .filter(startsWithAPredicate)
                                 .collect(Collectors.toList());

System.out.println("Filtered names: " + filteredNames);

Explain the use of method chaining with Streams in Java 8.

  • Method chaining allows you to perform multiple operations on a stream in a concise manner. It combines operations like filter, map, and collect into a single statement.Example:
List<String> names = Arrays.asList("Alice", "Bob", "Charlie", "David");

List<String> modifiedNames = names.stream()
                                 .filter(name -> name.length() > 3)
                                 .map(String::toUpperCase)
                                 .collect(Collectors.toList());

System.out.println("Modified names: " + modifiedNames);

What are the differences between map() and flatMap() methods in Streams? Provide examples.

  • map() is used to transform elements in a stream one-to-one, while flatMap() is used to transform each element into zero or more elements and then flatten those elements into a single stream.Example with map():
List<String> words = Arrays.asList("Hello", "World");

List<Integer> wordLengths = words.stream()
                                .map(String::length)
                                .collect(Collectors.toList());

System.out.println("Word lengths: " + wordLengths);

Example with flatMap():

List<List<Integer>> numbers = Arrays.asList(
    Arrays.asList(1, 2),
    Arrays.asList(3, 4),
    Arrays.asList(5, 6)
);

List<Integer> flattenedNumbers = numbers.stream()
                                        .flatMap(List::stream)
                                        .collect(Collectors.toList());

System.out.println("Flattened numbers: " + flattenedNumbers);

Explain the use of the reduce() method in Streams with an example.

  • reduce() performs a reduction operation on the elements of the stream and returns an Optional. It can be used for summing, finding maximum/minimum, or any custom reduction operation.Example:
List<Integer> numbers = Arrays.asList(1, 2, 3, 4, 5);

// Summing all numbers in the list
Optional<Integer> sum = numbers.stream()
                               .reduce((a, b) -> a + b);

if (sum.isPresent()) {
    System.out.println("Sum of numbers: " + sum.get());
} else {
    System.out.println("List is empty");
}

What is the DateTime API introduced in Java 8? Provide an example of using LocalDate.

  • The DateTime API (java.time package) provides classes for representing date and time, including LocalDate, LocalTime, LocalDateTime, etc. It is immutable and thread-safe.Example:
// Creating a LocalDate object
LocalDate today = LocalDate.now();
System.out.println("Today's date: " + today);

// Getting specific date using of() method
LocalDate specificDate = LocalDate.of(2023, Month.JULY, 1);
System.out.println("Specific date: " + specificDate);

How can you sort elements in a collection using Streams in Java 8? Provide an example.

  • Streams provide a sorted() method to sort elements based on natural order or using a Comparator.Example:
List<String> names = Arrays.asList("Alice", "Bob", "Charlie", "David");

// Sorting names alphabetically
List<String> sortedNames = names.stream()
                                .sorted()
                                .collect(Collectors.toList());

System.out.println("Sorted names: " + sortedNames);

Explain the concept of Optional in Java 8. Why is it useful? Provide an example.

  • Optional is a container object used to represent a possibly null value. It helps to avoid NullPointerExceptions and encourages more robust code by forcing developers to handle null values explicitly.Example:
String nullName = null;
Optional<String> optionalName = Optional.ofNullable(nullName);

// Using Optional to handle potentially null value
String name = optionalName.orElse("Unknown");
System.out.println("Name: " + name);

How does parallelStream() method improve performance in Java 8 Streams? Provide an example.

  • parallelStream() allows streams to be processed concurrently on multiple threads, potentially improving performance for operations that can be parallelized.Example:
List<Integer> numbers = Arrays.asList(1, 2, 3, 4, 5, 6, 7, 8, 9, 10);

// Using parallelStream to calculate sum
int sum = numbers.parallelStream()
                 .mapToInt(Integer::intValue)
                 .sum();

System.out.println("Sum of numbers: " + sum);

What are the benefits of using CompletableFuture in Java 8 for asynchronous programming? Provide an example.

  • CompletableFuture simplifies asynchronous programming by allowing you to chain multiple asynchronous operations and handle their completion using callbacks.Example:
// Creating a CompletableFuture
CompletableFuture<String> future = CompletableFuture.supplyAsync(() -> {
    // Simulating a long-running task
    try {
        Thread.sleep(2000);
    } catch (InterruptedException e) {
        e.printStackTrace();
    }
    return "Hello, CompletableFuture!";
});

// Handling the CompletableFuture result
future.thenAccept(result -> System.out.println("Result: " + result));

// Blocking to wait for the CompletableFuture to complete (not recommended in production)
future.join();

Explain the concept of Method References in Java 8. Provide examples of different types of Method References.

  • Method References allow you to refer to methods or constructors without invoking them directly. There are four types: static method, instance method on a particular instance, instance method on an arbitrary instance of a particular type, and constructor references.Example of static method reference:
List<String> names = Arrays.asList("Alice", "Bob", "Charlie");

// Using static method reference
names.forEach(System.out::println);

Example of instance method reference:

List<String> names = Arrays.asList("Alice", "Bob", "Charlie");

// Using instance method reference
names.stream()
     .map(String::toUpperCase)
     .forEach(System.out::println);

What is the difference between forEach() and map() methods in Streams? Provide examples.

  • forEach() is a terminal operation that performs an action for each element in the stream, while map() is an intermediate operation that transforms each element in the stream into another object.Example using forEach():
List<String> names = Arrays.asList("Alice", "Bob", "Charlie");

// Using forEach to print names
names.forEach(System.out::println);

Example using map():

List<String> names = Arrays.asList("Alice", "Bob", "Charlie");

// Using map to transform names to uppercase
List<String> upperCaseNames = names.stream()
                                   .map(String::toUpperCase)
                                   .collect(Collectors.toList());

System.out.println("Uppercase names: " + upperCaseNames);

What are the advantages of using Streams over collections in Java 8?

  • Streams provide functional-style operations for processing sequences of elements. They support lazy evaluation, which can lead to better performance for large datasets, and allow for concise and expressive code.

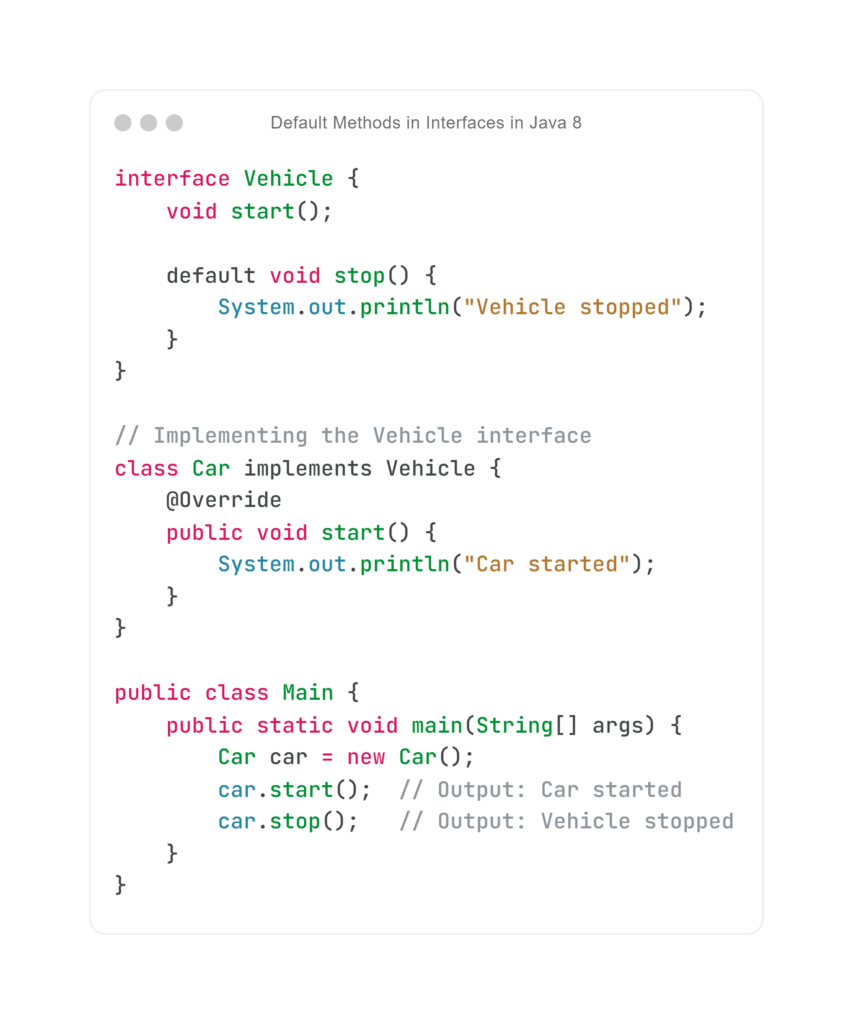
Explain the concept of Default Methods in Interfaces in Java 8. Provide an example.

  • Default Methods allow interfaces to have methods with implementations. They were introduced in Java 8 to support backward compatibility by allowing interfaces to evolve without breaking existing implementations. Example:
Java 8 Interview Questions

Explain the concept of Functional Interfaces in Java 8. Provide an example of using a Functional Interface.

  • Functional Interfaces have exactly one abstract method and can be annotated with @FunctionalInterface. They can have multiple default methods but only one abstract method, making them suitable for use with Lambda Expressions.Example:
@FunctionalInterface
interface Calculator {
    int calculate(int a, int b);
}

// Using a Lambda Expression to implement the functional interface
Calculator addition = (a, b) -> a + b;

// Calling the calculate method
System.out.println("Result of addition: " + addition.calculate(5, 3));

What are the benefits of using the DateTime API (java.time package) introduced in Java 8?

  • The DateTime API provides improved handling of dates and times, including immutability, thread-safety, better readability, and comprehensive support for date manipulation, formatting, and parsing.

Explain how to handle null values using Optional in Java 8. Provide an example.

  • Optional is a container object used to represent a possibly null value. It provides methods like orElse(), orElseGet(), and orElseThrow() to handle the absence of a value gracefully.Example:
String nullName = null;
Optional<String> optionalName = Optional.ofNullable(nullName);

// Using Optional to handle potentially null value
String name = optionalName.orElse("Unknown");
System.out.println("Name: " + name);

How can you perform grouping and counting operations using Collectors in Java 8 Streams? Provide examples.

  • Collectors provide reduction operations like groupingBy(), counting(), summingInt(), etc., to collect elements from a stream into a collection or perform aggregations.Example of groupingBy():
List<String> names = Arrays.asList("Alice", "Bob", "Charlie", "David", "Bob");

// Grouping names by their length
Map<Integer, List<String>> namesByLength = names.stream()
                                                .collect(Collectors.groupingBy(String::length));

System.out.println("Names grouped by length: " + namesByLength);

Example of counting():

List<String> names = Arrays.asList("Alice", "Bob", "Charlie", "David", "Bob");

// Counting occurrences of each name
Map<String, Long> nameCount = names.stream()
                                  .collect(Collectors.groupingBy(name -> name, Collectors.counting()));

System.out.println("Name counts: " + nameCount);

What are the advantages of using CompletableFuture for asynchronous programming in Java 8? Provide an example.

  • CompletableFuture simplifies asynchronous programming by allowing you to chain multiple asynchronous operations and handle their completion using callbacks (thenApply(), thenAccept(), etc.).Example:
// Creating a CompletableFuture
CompletableFuture<String> future = CompletableFuture.supplyAsync(() -> {
    // Simulating a long-running task
    try {
        Thread.sleep(2000);
    } catch (InterruptedException e) {
        e.printStackTrace();
    }
    return "Hello, CompletableFuture!";
});

// Handling the CompletableFuture result
future.thenAccept(result -> System.out.println("Result: " + result));

// Blocking to wait for the CompletableFuture to complete (not recommended in production)
future.join();

Explain how to handle parallelism using parallelStream() in Java 8 Streams. Provide an example.

  • parallelStream() allows streams to be processed concurrently on multiple threads, potentially improving performance for operations that can be parallelized, such as filtering, mapping, and reducing.Example:
List<Integer> numbers = Arrays.asList(1, 2, 3, 4, 5, 6, 7, 8, 9, 10);

// Using parallelStream to calculate sum
int sum = numbers.parallelStream()
                 .mapToInt(Integer::intValue)
                 .sum();

System.out.println("Sum of numbers: " + sum);

Method Reference in Java 8

Method Reference in Java 8 allows a functional interface method to be mapped to a specific method using the :: (double colon) operator. This technique simplifies the implementation of functional interfaces by directly referencing existing methods. The referenced method can be either a static method or an instance method. It’s important that the functional interface method and the specified method have matching argument types, while other elements such as return type, method name, and modifiers can differ.

If the specified method is a static method, the syntax is:

ClassName::methodName

If the method is an instance method, the syntax is:

ObjectReference::methodName

A functional interface can refer to a lambda expression and can also refer to a method reference. Therefore, a lambda expression can be replaced with a method reference, making method references an alternative syntax to lambda expressions.

Example with Lambda Expression

class Task {
    public static void main(String[] args) {
        Runnable r = () -> {
            for (int i = 0; i <= 10; i++) {
                System.out.println("Child Thread");
            }
        };
        Thread t = new Thread(r);
        t.start();

        for (int i = 0; i <= 10; i++) {
            System.out.println("Main Thread");
        }
    }
}

Example with Method Reference

class Task {
    public static void printChildThread() {
        for (int i = 0; i <= 10; i++) {
            System.out.println("Child Thread");
        }
    }

    public static void main(String[] args) {
        Runnable r = Task::printChildThread;
        Thread t = new Thread(r);
        t.start();

        for (int i = 0; i <= 10; i++) {
            System.out.println("Main Thread");
        }
    }
}

In the above example, the Runnable interface’s run() method is referring to the Task class’s static method printChildThread().

Method Reference to an Instance Method

interface Processor {
    void process(int i);
}

class Worker {
    public void display(int i) {
        System.out.println("From Method Reference: " + i);
    }

    public static void main(String[] args) {
        Processor p = i -> System.out.println("From Lambda Expression: " + i);
        p.process(10);

        Worker worker = new Worker();
        Processor p1 = worker::display;
        p1.process(20);
    }
}

In this example, the functional interface method process() is referring to the Worker class instance method display().

The main advantage of method references is that we can reuse existing code to implement functional interfaces, enhancing code reusability.

Constructor Reference in Java 8

We can use the :: (double colon) operator to refer to constructors as well.

Syntax:

ClassName::new
Example:
class Product {
    private String name;

    Product(String name) {
        this.name = name;
        System.out.println("Constructor Executed: " + name);
    }
}

interface Creator {
    Product create(String name);
}

class Factory {
    public static void main(String[] args) {
        Creator c = name -> new Product(name);
        c.create("From Lambda Expression");

        Creator c1 = Product::new;
        c1.create("From Constructor Reference");
    }
}

In this example, the functional interface Creator is referring to the Product class constructor.

Note: In method and constructor references, the argument types must match.

Here is the link for the Java 8 quiz:
Click here

Related Articles:

Predicate in Java 8 with Examples

Predicate in Java 8: A predicate is a function that takes a single argument and returns a boolean value. In Java, the Predicate interface was introduced in version 1.8 specifically for this purpose, as part of the java.util.function package. This interface serves as a functional interface, designed with a single abstract method: test().

Predicate Interface

The Predicate interface is defined as follows:

@FunctionalInterface
public interface Predicate<T> {
    boolean test(T t);
}

This interface allows the use of lambda expressions, making it highly suitable for functional programming practices.

Example 1: Checking if an Integer is Even

Let’s illustrate this with a simple example of checking whether an integer is even:

Traditional Approach:

public boolean test(Integer i) {
    return i % 2 == 0;
}

Lambda Expression:

Predicate<Integer> isEven = i -> i % 2 == 0;
System.out.println(isEven.test(4)); // Output: true
System.out.println(isEven.test(7)); // Output: false

Complete Predicate Program Example:

import java.util.function.Predicate;

public class TestPredicate {
    public static void main(String[] args) {
        Predicate<Integer> isEven = i -> i % 2 == 0;
        System.out.println(isEven.test(4));  // Output: true
        System.out.println(isEven.test(7));  // Output: false
        // System.out.println(isEven.test(true)); // Compile-time error
    }
}

More Predicate Examples

Example 2: Checking String Length

Here’s how you can determine if the length of a string exceeds a specified length:

Predicate<String> isLengthGreaterThanFive = s -> s.length() > 5;
System.out.println(isLengthGreaterThanFive.test("Generate")); // Output: true
System.out.println(isLengthGreaterThanFive.test("Java"));     // Output: false

Example 3: Checking Collection Emptiness

You can also check if a collection is not empty using a predicate:

import java.util.Collection;
import java.util.function.Predicate;

Predicate<Collection<?>> isNotEmpty = c -> !c.isEmpty();

Combining Predicates

Predicates can be combined using logical operations such as and(), or(), and negate(). This allows for building more complex conditions.

Example 4: Combining Predicates

Here’s an example demonstrating how to combine predicates:

import java.util.function.Predicate;

public class CombinePredicates {
    public static void main(String[] args) {
        int[] numbers = {0, 5, 10, 15, 20, 25, 30};

        Predicate<Integer> isGreaterThan10 = i -> i > 10;
        Predicate<Integer> isOdd = i -> i % 2 != 0;

        System.out.println("Numbers greater than 10:");
        filterNumbers(isGreaterThan10, numbers);

        System.out.println("Odd numbers:");
        filterNumbers(isOdd, numbers);

        System.out.println("Numbers not greater than 10:");
        filterNumbers(isGreaterThan10.negate(), numbers);

        System.out.println("Numbers greater than 10 and odd:");
        filterNumbers(isGreaterThan10.and(isOdd), numbers);

        System.out.println("Numbers greater than 10 or odd:");
        filterNumbers(isGreaterThan10.or(isOdd), numbers);
    }

    public static void filterNumbers(Predicate<Integer> predicate, int[] numbers) {
        for (int number : numbers) {
            if (predicate.test(number)) {
                System.out.println(number);
            }
        }
    }
}

Predicate in Java 8: Using and(), or(), and negate() Methods

In Java programming, the Predicate interface from the java.util.function package offers convenient methods to combine and modify predicates, allowing developers to create more sophisticated conditions.

Example 1: Combining Predicates with and()

The and() method enables the combination of two predicates. It creates a new predicate that evaluates to true only if both original predicates return true.

import java.util.function.Predicate;

public class CombinePredicatesExample {
    public static void main(String[] args) {
        Predicate<Integer> isGreaterThan10 = i -> i > 10;
        Predicate<Integer> isEven = i -> i % 2 == 0;

        // Combined predicate: numbers greater than 10 and even
        Predicate<Integer> isGreaterThan10AndEven = isGreaterThan10.and(isEven);

        // Testing the combined predicate
        System.out.println("Combined Predicate Test:");
        System.out.println(isGreaterThan10AndEven.test(12)); // Output: true
        System.out.println(isGreaterThan10AndEven.test(7));  // Output: false
        System.out.println(isGreaterThan10AndEven.test(9));  // Output: false
    }
}

Example 2: Combining Predicates with or()

The or() method allows predicates to be combined so that the resulting predicate returns true if at least one of the original predicates evaluates to true.

import java.util.function.Predicate;

public class CombinePredicatesExample {
    public static void main(String[] args) {
        Predicate<Integer> isEven = i -> i % 2 == 0;
        Predicate<Integer> isDivisibleBy3 = i -> i % 3 == 0;

        // Combined predicate: numbers that are either even or divisible by 3
        Predicate<Integer> isEvenOrDivisibleBy3 = isEven.or(isDivisibleBy3);

        // Testing the combined predicate
        System.out.println("Combined Predicate Test:");
        System.out.println(isEvenOrDivisibleBy3.test(6));  // Output: true
        System.out.println(isEvenOrDivisibleBy3.test(9));  // Output: true
        System.out.println(isEvenOrDivisibleBy3.test(7));  // Output: false
    }
}

Example 3: Negating a Predicate with negate()

The negate() method returns a predicate that represents the logical negation (opposite) of the original predicate.

import java.util.function.Predicate;

public class NegatePredicateExample {
    public static void main(String[] args) {
        Predicate<Integer> isEven = i -> i % 2 == 0;

        // Negated predicate: numbers that are not even
        Predicate<Integer> isNotEven = isEven.negate();

        // Testing the negated predicate
        System.out.println("Negated Predicate Test:");
        System.out.println(isNotEven.test(3));  // Output: true
        System.out.println(isNotEven.test(6));  // Output: false
    }
}

and() Method: Combines two predicates so that both conditions must be true for the combined predicate to return true.

or() Method: Creates a predicate that returns true if either of the two predicates is true.

negate() Method: Returns a predicate that represents the logical negation (inverse) of the original predicate.

Best Practices for Using Predicate in Java 8

  1. Descriptive Names: Use descriptive variable names for predicates to enhance code readability (e.g., isEven, isLengthGreaterThanFive).
  2. Conciseness: Keep lambda expressions concise and avoid complex logic within them.
  3. Combination: Utilize and(), or(), and negate() methods to compose predicates for more refined conditions.
  4. Stream Operations: Predicates are commonly used in stream operations for filtering elements based on conditions.
  5. Null Handling: Consider null checks if predicates may encounter null values.
  6. Documentation: Document predicates, especially those with complex logic, to aid understanding for others and future reference.

Conclusion

Predicates in Java provide a powerful mechanism for testing conditions on objects, offering flexibility and efficiency in code design. By leveraging lambda expressions and method references, developers can write cleaner and more expressive code. Start incorporating predicates into your Java projects to streamline logic and improve maintainability.

Java 8 Quiz
Here is the link for the Java 8 quiz:
Click here

Related Articles:

Discovering Java’s Hidden Features for Better Code

Discovering Java’s Hidden Features for Better Code

Introduction

Java is a powerful language with numerous features that can enhance your coding experience. This post, titled “Discovering Java’s Hidden Features for Better Code,” uncovers lesser-known Java features to help you write better and more efficient code.

1. Optional.ofNullable for Safer Null Handling

Avoid NullPointerExceptions using Optional.ofNullable.

Example:

import java.util.Optional;

public class OptionalExample {
    public static void main(String[] args) {
        String value = null;
        Optional<String> optionalValue = Optional.ofNullable(value);

        optionalValue.ifPresentOrElse(
            v -> System.out.println("Value is: " + v),
            () -> System.out.println("Value is absent")
        );
    }
}

Output:

Value is absent

In this example, Optional.ofNullable checks if value is null and allows us to handle it without explicit null checks.

2. Using Streams for Simplified Data Manipulation

Java Streams API offers a concise way to perform operations on collections.

Advanced Stream Operations:

import java.util.Arrays;
import java.util.List;
import java.util.Map;
import java.util.stream.Collectors;

public class StreamExample {
    public static void main(String[] args) {
        List<String> names = Arrays.asList("Alice", "Bob", "Charlie", "David", "Edward");

        // Filter and Collect
        List<String> filteredNames = names.stream()
                                          .filter(name -> name.length() > 3)
                                          .collect(Collectors.toList());
        System.out.println("Filtered Names: " + filteredNames);

        // Grouping by length
        Map<Integer, List<String>> groupedByLength = names.stream()
                                                          .collect(Collectors.groupingBy(String::length));
        System.out.println("Grouped by Length: " + groupedByLength);
    }
}

Output:

Filtered Names: [Alice, Charlie, David, Edward]
Grouped by Length: {3=[Bob], 5=[Alice, David], 7=[Charlie, Edward]}

This demonstrates filtering a list and grouping by string length using streams, simplifying complex data manipulations.

3. Pattern Matching for Instanceof: Simplifying Type Checks

Introduced in Java 16, pattern matching for instanceof simplifies type checks and casts.

Real-World Example:

public class InstanceofExample {
    public static void main(String[] args) {
        Object obj = "Hello, World!";
        
        if (obj instanceof String s) {
            System.out.println("The string length is: " + s.length());
        } else {
            System.out.println("Not a string");
        }
    }
}

Output:

The string length is: 13

Pattern matching reduces boilerplate code and enhances readability by combining type check and cast in one step.

4. Compact Number Formatting for Readable Outputs

Java 12 introduced compact number formatting, ideal for displaying numbers in a human-readable format.

Example Usage:

import java.text.NumberFormat;
import java.util.Locale;

public class CompactNumberFormatExample {
    public static void main(String[] args) {
        NumberFormat compactFormatter = NumberFormat.getCompactNumberInstance(Locale.US, NumberFormat.Style.SHORT);
        String result = compactFormatter.format(1234567);
        System.out.println("Compact format: " + result);
    }
}

Output:

Compact format: 1.2M

This feature is useful for presenting large numbers in a concise and understandable manner, suitable for dashboards and reports.

5. Text Blocks for Clearer Multi-line Strings

Java 13 introduced text blocks, simplifying the handling of multi-line strings like HTML, SQL, and JSON.

Example Usage:

public class TextBlockExample {
    public static void main(String[] args) {
        String html = """
                      <html>
                          <body>
                              <h1>Hello, World!</h1>
                          </body>
                      </html>
                      """;
        System.out.println(html);
    }
}

Output:

<html>
    <body>
        <h1>Hello, World!</h1>
    </body>
</html>

Text blocks improve code readability by preserving the formatting of multi-line strings, making them easier to maintain and understand.

6. Unlocking Java’s Concurrent Utilities for Efficient Multithreading

The java.util.concurrent package offers robust utilities for concurrent programming, enhancing efficiency and thread safety.

Example Usage:

import java.util.Queue;
import java.util.concurrent.ConcurrentLinkedQueue;

public class ConcurrentLinkedQueueExample {
    public static void main(String[] args) {
        Queue<String> queue = new ConcurrentLinkedQueue<>();

        // Adding elements
        queue.add("Element1");
        queue.add("Element2");

        // Polling elements
        System.out.println("Polled: " + queue.poll());
        System.out.println("Polled: " + queue.poll());
    }
}

Output:

Polled: Element1
Polled: Element2

ConcurrentLinkedQueue is a thread-safe collection, ideal for concurrent applications where multiple threads access a shared collection.

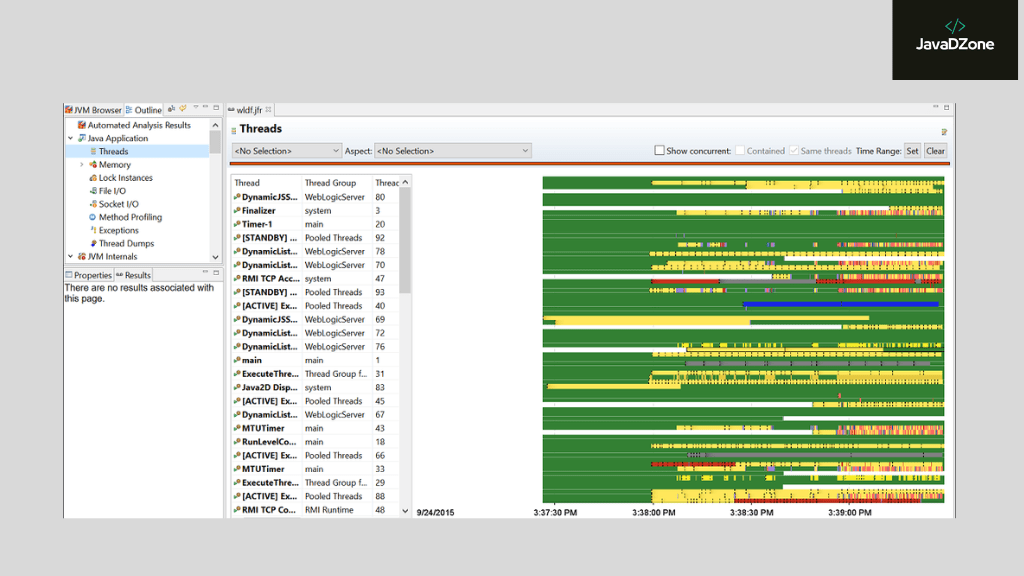
7. Performance Tuning with Java Flight Recorder (JFR)

Java Flight Recorder (JFR) is a built-in feature of Oracle JDK and OpenJDK that provides profiling and diagnostic tools for optimizing Java applications.

Example Usage:

public class JFRDemo {
    public static void main(String[] args) throws InterruptedException {
        // Enable Java Flight Recorder (JFR)
        enableJFR();

        // Simulate application workload
        for (int i = 0; i < 1000000; i++) {
            String result = processRequest("Request " + i);
            System.out.println("Processed: " + result);
        }

        // Disable Java Flight Recorder (JFR)
        disableJFR();
    }

    private static String processRequest(String request) {
        // Simulate processing time
        try {
            Thread.sleep(10);
        } catch (InterruptedException e) {
            e.printStackTrace();
        }
        return "Processed " + request;
    }

    private static void enableJFR() {
        // Code to enable JFR
        // Example: -XX:+UnlockCommercialFeatures -XX:+FlightRecorder
    }

    private static void disableJFR() {
        // Code to disable JFR
        // Example: -XX:-FlightRecorder
    }
}

Explanation:

  • Enabling JFR: Configure JVM arguments like -XX:+UnlockCommercialFeatures -XX:+FlightRecorder to enable JFR. This allows JFR to monitor application performance metrics.
  • Simulating Workload: The processRequest method simulates a workload, such as handling requests. JFR captures data on CPU usage, memory allocation, and method profiling during this simulation.
  • Disabling JFR: After monitoring, disable JFR using -XX:-FlightRecorder to avoid overhead in production environments.

Java Flight Recorder captures detailed runtime information, including method profiling and garbage collection statistics, aiding in performance tuning and troubleshooting.

Discovering Java's Hidden Features for Better Code

8. Leveraging Method Handles for Efficient Reflection-Like Operations

Method handles provide a flexible and performant alternative to Java’s reflection API for method invocation and field access.

Before: How We Used to Code with Reflection

Before method handles were introduced, Java developers typically used reflection for dynamic method invocation. Here’s a simplified example of using reflection:

import java.lang.reflect.Method;

public class ReflectionExample {
    public static void main(String[] args) throws Exception {
        String str = "Hello, World!";
        Method method = String.class.getMethod("substring", int.class, int.class);
        String result = (String) method.invoke(str, 7, 12);
        System.out.println(result); // Output: World
    }
}

Reflection involves obtaining Method objects, which can be slower due to runtime introspection and type checks.

With Method Handles: Enhanced Performance and Flexibility

Method handles offer a more direct and efficient way to perform dynamic method invocations:

import java.lang.invoke.MethodHandle;
import java.lang.invoke.MethodHandles;
import java.lang.invoke.MethodType;

public class MethodHandlesExample {
    public static void main(String[] args) throws Throwable {
        MethodHandles.Lookup lookup = MethodHandles.lookup();
        MethodHandle mh = lookup.findVirtual(String.class, "substring", MethodType.methodType(String.class, int.class, int.class));

        String result = (String) mh.invokeExact("Hello, World!", 7, 12);
        System.out.println(result); // Output: World
    }
}

Output:

World

Method handles enable direct access to methods and fields, offering better performance compared to traditional reflection.

9. Discovering Java’s Hidden Features for Better Code:

Enhanced Date and Time Handling with java.time

Java 8 introduced the java.time package, providing a modern API for date and time manipulation, addressing shortcomings of java.util.Date and java.util.Calendar.

Example Usage:

import java.time.LocalDate;
import java.time.LocalTime;
import java.time.LocalDateTime;
import java.time.format.DateTimeFormatter;

public class DateTimeExample {
    public static void main(String[] args) {
        LocalDate date = LocalDate.now();
        LocalTime time = LocalTime.now();
        LocalDateTime dateTime = LocalDateTime.now();

        DateTimeFormatter formatter = DateTimeFormatter.ofPattern("yyyy-MM-dd HH:mm:ss");
        String formattedDateTime = dateTime.format(formatter);

        System.out.println("Current Date: " + date);
        System.out.println("Current Time: " + time);
        System.out.println("Formatted Date-Time: " + formattedDateTime);
    }
}

Output:

Current Date: 2024-06-15
Current Time: 14:23:45.123
Formatted Date-Time: 2024-06-15 14:23:45

The java.time API simplifies date and time handling with immutable and thread-safe classes, supporting various date-time operations and formatting.

Conclusion

By leveraging these hidden gems in Java, you can streamline your code, enhance performance, and simplify complex tasks. These features not only improve productivity but also contribute to writing cleaner, more maintainable Java applications. Embrace these tools and techniques to stay ahead in your Java development journey!

Record Classes in Java 17

In Java, we often create multiple classes, including functional classes such as service or utility classes that perform specific tasks. Additionally, we create classes solely for the purpose of storing or carrying data, a practice demonstrated by the use of record classes in Java 17.

For example:

public class Sample {
   private final int id = 10;
   private final String name = "Pavan";
}

When to use Record Classes in Java

When our object is immutable and we don’t intend to change its data, we create such objects primarily for data storage. Let’s explore how to create such a class in Java.

class Student {
    private final int id;
    private final String name;
    private final String college;

    public Student(int id, String name, String college) {
        this.id = id;
        this.name = name;
        this.college = college;
    }

    public int getId() {
        return id;
    }

    public String getName() {
        return name;
    }

    public String getCollege() {
        return college;
    }

    @Override
    public String toString() {
        return "Student{" +
                "id=" + id +
                ", name='" + name + '\'' +
                ", college='" + college + '\'' +
                '}';
    }

    @Override
    public boolean equals(Object o) {
        if (this == o) return true;
        if (o == null || getClass() != o.getClass()) return false;
        Student student = (Student) o;
        return id == student.id && Objects.equals(name, student.name)
                          && Objects.equals(college, student.college);
    }

    @Override
    public int hashCode() {
        return Objects.hash(id, name, college);
    }
}

public class RecordTest {

    public static void main(String[] args) {
        Student s1 = new Student(1, "Pavan", "IIIT");
        Student s2 = new Student(2, "Sachin", "Jntu");
        Student s3 = new Student(2, "Sachin", "Jntu");

        System.out.println(s1.getName());
        System.out.println(s1);
        System.out.println(s1.equals(s2));
        System.out.println(s2.equals(s3)); //true
    }
}

Ouput:

Record Classes in Java 17

In this code, we’ve created a Student class to represent student data, ensuring immutability by making fields id, name, and college final. Additionally, we’ve overridden toString(), equals(), and hashCode() methods for better readability and correct comparison of objects. Finally, we’ve tested the class in RecordTest class by creating instances of Student and performing some operations like printing details and checking for equality.

In Java 17, with the introduction of the records feature, the Student class can be replaced with a record class. It would look like this:

record Student (int id, String name, String college){}

public class RecordTest {

    public static void main(String[] args) {
        Student s1 = new Student(1, "Pavan", "IIIT");
        Student s2 = new Student(2, "Sachin", "Jntu");
        Student s3 = new Student(2, "Sachin", "Jntu");

        //we don't have get method in records, 
        //we can acces name like below.
        System.out.println(s1.name());
        System.out.println(s1);
        System.out.println(s1.equals(s2));
        System.out.println(s2.equals(s3)); //true

    }
}

Output:

Record Classes Java 17
  1. Parameterized Constructors: Record classes internally define parameterized constructors. All variables within a record class are private and final by default, reflecting the immutable nature of records.
  2. Equals() Method Implementation: By default, a record class implements the equals() method, ensuring proper equality comparison between instances.
  3. Automatic toString() Method: The toString() method is automatically defined for record instances, facilitating better string representation.
  4. No Default Constructor: It’s important to note that record classes do not have a default constructor. Attempting to instantiate a record class without parameters, like Student s = new Student();, would result in an error.
  5. Inheritance and Interfaces: Record classes cannot extend any other class because they implicitly extend the Record class. However, they can implement interfaces.
  6. Additional Methods: Methods can be added to record classes. Unlike traditional classes, record classes do not require getter and setter methods for accessing variables. Instead, variables are accessed using the syntax objectName.varName(). For example: s.name().

Java 21 Features with Examples

Latest Posts:

For additional information on Java 17 features, please visit

Singleton Design Pattern in Java: Handling All Cases

Singleton design pattern in java

The Singleton Design Pattern: A widely-used and classic design pattern. When a class is designed as a singleton, it ensures that only one instance of that class can exist within an application. Typically, we employ this pattern when we need a single global access point to that instance.

1. How to create a singleton class


To make a class a singleton, you should follow these steps:

a) Declare the class constructor as private: By declaring the class constructor as private, you prevent other classes in the application from creating objects of the class directly. This ensures that only one instance is allowed.

b) Create a static method: Since the constructor is private, external classes cannot directly call it to create objects. To overcome this, you can create a static method within the class. This method contains the logic for checking and returning a single object of the class. Since it’s a static method, it can be called without the need for an object. This method is often referred to as a factory method or static factory method.

c) Declare a static member variable of the same class type: In the static method mentioned above, you need to keep track of whether an object of the class already exists. To achieve this, you initially create an object and store it in a member variable. In subsequent calls to the method, you return the same object stored in the member variable. However, member variables cannot be accessed directly in static methods, so you declare the member variable as a static variable to hold the reference to the class’s single instance.

Here’s a sample piece of code to illustrate these concepts:

The UML representation of the singleton pattern is as follows:

Singleton Design Pattern in Java

Important points to keep in mind:

  • The CacheManager() constructor is declared as private.
  • The class contains a static variable named instance.
  • The getInstance() method is static and serves as a factory method for creating instances of the class.
Java
public class CacheManager {

	// Declare a static member of the same class type.
	private static CacheManager instance;

	// Private constructor to prevent other classes from creating objects.
	private CacheManager() {
	}

	// Declare a static method to create only one instance.
	private static CacheManager getInstance() {
		if (instance == null) {
			instance = new CacheManager();
		}
		return instance;
	}
}

We can express the above code in various alternative ways, and there are numerous methods to enhance its implementation. Let’s explore some of those approaches in the sections below.

1.1 Eager Initialization

In the previous code, we instantiated the instance on the first call to the getInstance() method. Instead of deferring instantiation until the method is called, we can initialize it eagerly, well before the class is loaded into memory, as demonstrated below:

Java
public class CacheManager {

	// Instantiate the instance object during class loading.
	private static CacheManager instance = new CacheManager();

	private CacheManager() {
	}

	private static CacheManager getInstance() {
		return instance;
	}
}

1.2 Static Block Initialization

If you are familiar with the concept of static blocks in Java, you can utilize this concept to instantiate the singleton class, as demonstrated below:

Java
public class CacheManager {

	private static CacheManager instance;

	// The static block executes only once when the class is loaded.
	static {
		instance = new CacheManager();
	}

	private CacheManager() {
	}

	private static CacheManager getInstance() {
		return instance;
	}
}

However, the drawback of the above code is that it instantiates the object even when it’s not needed, during class loading.

1.3 Lazy Initialization

In many cases, it’s advisable to postpone the creation of an object until it’s actually needed. To achieve this, we can delay the instantiation process until the first call to the getInstance() method. However, a challenge arises in a multithreaded environment when multiple threads are executing simultaneously; it might lead to the creation of more than one instance of the class. To prevent this, we can declare the getInstance() method as synchronized.

1.4 Override clone() Method and Throw CloneNotSupportedException

To prevent a singleton class from being cloneable, it is recommended to implement the class from the Cloneable interface and override the clone() method. Within this method, we should throw CloneNotSupportedException to prevent cloning of the object. The clone() method in the Object class is protected and not visible outside the class, unless it is overridden. So, it’s important to implement Cloneable and throw an exception in the clone() method.

However, there’s a problem with the above code. After the first call to getInstance(), subsequent calls to the method will still check the instance == null condition, even though it’s not necessary. Acquiring and releasing locks are costly operations, and we should minimize them. To address this issue, we can implement a double-check for the condition.

Additionally, it’s recommended to declare the static member instance as volatile to ensure thread-safety in a multi-threaded environment.

1.5 Serialization and Deserialization Issue

Serialization and deserialization of a singleton class can create multiple instances, violating the singleton rule. To address this, we need to implement the readResolve() method within the singleton class. During the deserialization process, the readResolve() method is called to reconstruct the object from the byte stream. By implementing this method and returning the same instance, we can avoid the creation of multiple objects even during serialization and deserialization.

Now, let’s revisit the provided code to address the issue:

Java
public class CacheSerialization {

	public static void main(String[] args) throws FileNotFoundException, IOException, ClassNotFoundException {
	
		CacheManager cacheManager1 = CacheManager.getInstance();
		ObjectOutputStream oos = new ObjectOutputStream(new FileOutputStream(
				new File("D:\\cacheManager.ser")));
		oos.writeObject(cacheManager1);

		CacheManager cacheManager2 = null;
		ObjectInputStream ois = new ObjectInputStream(new FileInputStream(
				new File("D:\\cacheManager.ser")));
		cacheManager2 = (CacheManager) ois.readObject();

		System.out.println("cacheManager1 == cacheManager2 :  " + (cacheManager1 == cacheManager2)); // false
	}
}

In this code, you’re experiencing an issue where cacheManager1 and cacheManager2 instances do not behave as expected after deserialization it return false. This discrepancy indicates the creation of duplicate objects, which contradicts the desired behavior of a singleton pattern.

To resolve this issue, you can rectify your CacheManager class by adding a readResolve() method. This method ensures that only one instance is maintained throughout the deserialization process, thereby preserving the correct behavior of the singleton pattern.

Here is the final version of the singleton class, which addresses all the relevant cases:

Java
import java.io.Serializable;

public class CacheManager implements Serializable, Cloneable {
    private static volatile CacheManager instance;

    // Private constructor to prevent external instantiation.
    private CacheManager() {
    }

    // Method to retrieve the singleton instance.
    private static CacheManager getInstance() {
        if (instance == null) {
            synchronized (CacheManager.class) {
                // Double-check to ensure a single instance is created.
                if (instance == null) {
                    instance = new CacheManager();
                }
            }
        }
        return instance;
    }

    // This method is called during deserialization to return the existing instance.
    public Object readResolve() {
        return instance;
    }

    // Prevent cloning by throwing CloneNotSupportedException.
    @Override
    public Object clone() throws CloneNotSupportedException {
        throw new CloneNotSupportedException();
    }
}

In conclusion, the provided code defines a robust implementation of the Singleton Design Pattern in Java. It guarantees that only one instance of the CacheManager class is created, even in multithreaded environments, thanks to double-checked locking and the use of the volatile keyword.

Moreover, it addresses potential issues with serialization and deserialization by implementing the readResolve() method, ensuring that only a single instance is maintained throughout the object’s lifecycle. Additionally, it prevents cloning of the singleton object by throwing CloneNotSupportedException in the clone() method.

Conclusion: Ensuring Singleton Design Pattern Best Practices

In summary, this code exemplifies a well-rounded approach to creating and safeguarding a singleton class while adhering to best practices and design principles.

Java 21 Features With Examples

Java 21 features with examples

Java 21 brings some exciting new features to the world of programming. In this article, we’ll explore these Java 21 features with practical examples to make your Java coding experience even better.

Please download OpenJDK 21 and add it to the PATH environment variable before switching to Java 21.

Java 21 Features:

1. Pattern Matching for Switch

Java 21 brings a powerful feature called Pattern Matching for Switch. It simplifies switch statements, making them more concise and readable. Check out an example:

Before java 21

// Before Java 21
String response = "yes";

switch (response) {
    case "yes":
    case "yeah":
        System.out.println("You said yes!");
        break;
    case "no":
    case "nope":
        System.out.println("You said no!");
        break;
    default:
        System.out.println("Please choose.");
}

In Java 21, you can rewrite the code provided above as follows:

// Java 21 Pattern Matching for Switch
String response = "yes";
switch (response) {
    case "yes", "yeah" -> System.out.println("You said yes!");
    case "no", "nope" -> System.out.println("You said no!");
    default -> System.out.println("Please choose.");
}

Explore more about Pattern Matching for Switch in the full article.

2. Unnamed Patterns and Variables

Java 21 introduces Unnamed Patterns and Variables, making your code more concise and expressive. Here is a short part to show you an example:

String userInput = "User Input"; 

try { 
    int number = Integer.parseInt(userInput);
    // Use 'number'
} catch (NumberFormatException ex) { 
    System.out.println("Invalid input: " + userInput);
}

Now, with Java 21, the above code can be rewritten as follows

String userInput = "User Input"; 

try { 
    int number = Integer.parseInt(userInput);
    // Use 'number'
} catch (NumberFormatException _) { 
    System.out.println("Invalid input: " + userInput);
}

In this updated version, we no longer use the ‘ex’ variable; instead, we’ve replaced it with an underscore (_). This simple change helps streamline the code and makes it more concise.

For a deep dive into this feature and more practical examples, visit the full article.

3. Unnamed Classes and Instance Main Methods

Java 21 introduces a fresh approach to defining classes and instance main methods right in your code. Let’s take a quick look at how this feature operates:

// Java 21 Examples of Classes Without Names and Main Methods Inside Instances
public class UnnamedClassesDemo {
    void main(String[] args) {
        System.out.println("Hello from an unnamed class!");
    }
}

Explore more about unnamed classes and instance main methods in the full article.

4. String Templates in Java

Java 21 introduces String Templates, simplifying string concatenation. Take a look:

// Java (using String.format)
String name = "Sachin P";
String message = String.format("Welcome %s", Java);

In Java 21, you can create a message using this syntax:

String name = "Sachin P";
String message = STR."Welcome  \{name}!";

Discover the power of string templates and practical examples in the full article.

5. Sequenced Collections in Java 21

Java 21 introduces Sequenced Collections, making it easier to work with ordered data. Here’s a glimpse:

List<Integer> list = new ArrayList<Integer>(); 
	list.add(0);
	list.add(1);
	list.add(2);
	
	// Fetch the first element (element at index 0)
	int firstElement = list.get(0);
	
	// Fetch the last element
	int lastElement = list.get(list.size() - 1);

In Java 21, you can retrieve elements using the following code.

List<Integer> list = new ArrayList<Integer>(); 
	list.add(0);
	list.add(1);
	list.add(2);
	
	// Fetch the first element (element at index 0)
	int firstElement = list.getFirst();
	
	// Fetch the last element
	int lastElement = list.getLast();

Learn more about SequencedCollection, SequencedSet and SequencedMap and explore practical examples in the full article.

To put it simply, Java 21 brings some exciting improvements to the language. Features like Unnamed Patterns and Variables, along with Pattern Matching for Switch, make coding easier and improve code readability. These enhancements make Java development more efficient and enjoyable. Java developers now have the tools to write cleaner and more expressive code, marking a significant step forward in the world of Java programming.

If you’re curious to explore more features and details about Java 21, I recommend checking out the official Java release notes available at this link: Java 21 Release Notes. These release notes provide comprehensive information about all the changes and enhancements introduced in Java 21.

Java 21 Pattern Matching for Switch Example

Java has been constantly evolving to meet the demands of modern programming. With the release of Java 21, a notable feature called Java 21 Pattern Matching for Switch has been introduced. In this article, we’ll explore what this feature is all about, how it works, and see some real-world examples to understand its practical applications.

Introducing Java 21’s Pattern Matching for Switch

Java 21 brings a significant improvement known as Pattern Matching for Switch, which revolutionizes the way we handle switch statements. This feature makes code selection more straightforward by letting us use patterns in case labels. It not only improves code readability but also reduces redundancy and simplifies complex switch statements.

How Pattern Matching Improves Switch Statements

Pattern Matching allows developers to utilize patterns in case labels, making it easier to match and extract components from objects. This eliminates the need for casting and repetitive instanceof checks, resulting in cleaner and more efficient code. Let’s dive into some practical examples to understand how Pattern Matching functions in real-world scenarios.

Practical Examples

Example 1: Matching a Specific Value

Consider a scenario where you need to categorize shapes based on their names. In traditional switch statements, you might do the following:

switch (shape) {
    case "circle":
        System.out.println("Handling circle logic");
        break;
    case "rectangle":
        System.out.println("Handling rectangle logic");
        break;
    case "triangle":
        System.out.println("Handling triangle logic");
        break;
    default:
        // Handle other cases
}

With Pattern Matching, you can simplify above code:

switch (shape) {
    case "circle" -> {
    	 System.out.println("Handling circle logic");
    }
    case "rectangle" -> {
        System.out.println("Handling rectangle logic");
    }
    case "triangle" -> {
       System.out.println("Handling triangle logic");
    }
    default -> {
        // Handle other cases
    }
}

Pattern Matching allows for a more concise and readable switch statement.

Example 2: Matching Complex Objects

Pattern Matching can also simplify code when dealing with complex objects. Suppose you have a list of vehicles, and you want to perform specific actions based on the vehicle type:

for (Object v : vehicles) {
    if (v instanceof Car) {
        Car car = (Car) v;
        //car logic
    } else if (v instanceof Scooter) {
        Scooter scooter = (Scooter) v;
        //scooter logic
    } else if (v instanceof Jeep) {
        Jeep jeep = (Jeep) v;
        //jeep logic
    }
}

The code above can be rewritten using Pattern Matching.

for (Object v : vehicles) {

    return switch (v) {
        case Car car -> {
            //car logic
        }
        case Scooter scooter -> {
            //scooter logic
        }
        case Jeep jeep -> {
            //jeep logic
        }
    }
}

Pattern Matching simplifies the code and eliminates the need for explicit casting.

Example 3: Java 21 – Handling Null Cases in Switch Statements

Before Java 21, switch statements and expressions posed a risk of throwing NullPointerExceptions when the selector expression was evaluated as null.

public void handleGreetings(String s) {
 // If 's' is null and we don't handle it, it will result in a NullPointerException.
    if (s == null) {
        System.out.println("No message available.");
        return;
    }
    switch (s) {
        case "Hello", "Hi" -> System.out.println("Greetings!");
        case "Bye" -> System.out.println("Goodbye!");
        default -> System.out.println("Same to you!");
    }
}

Java 21 Introduces a New Null Case Label. above code can rewritten like this

public void handleGreetingsInJava21(String s) {
    switch (s) {
        case null           -> System.out.println("No message available.");
        case "Hello", "Hi" -> System.out.println("Hello there!");
        case "Bye"         -> System.out.println("Goodbye!");
        default            -> System.out.println("Same to you!");
    }
}

Example 4: Java 21 Pattern Matching with Guards

In Java 21, pattern case labels can apply to multiple values, leading to conditional code on the right-hand side of a switch rule. However, we can now simplify our code using guards, allowing ‘when’ clauses in switch blocks to specify guards to pattern case labels.

Before Java 21.

public void testInput(String response) {

    switch (response) {
        case null -> System.out.println("No message available.");
        case String s when s.equalsIgnoreCase("MAYBE") -> {
            System.out.println("Not sure, please decide.");
        }
        case String s when s.equalsIgnoreCase("EXIT") -> {
            System.out.println("Exiting now.");
        }
        default -> System.out.println("Please retry.");
    }
}

Using Java 21 – Simplified Code

public void test21Input(String response) {

    switch (response) {
        case null -> System.out.println("No message available.");
        case String s when s.equalsIgnoreCase("MAYBE") -> {
            System.out.println("Not sure, please decide.");
        }
        case String s when s.equalsIgnoreCase("EXIT") -> {
            System.out.println("Exiting now.");
        }
        default -> System.out.println("Please retry.");
    }
}

With Java 21’s new features, your code becomes more concise and easier to read, making pattern matching a powerful tool in Java programming toolkit.

Benefits of Java 21

  1. Improved code readability
  2. Reduced boilerplate code
  3. Simplified complex switch statements
  4. Enhanced developer productivity

In conclusion, Java 21 Pattern Matching for Switch is a valuable addition to the Java language, making code selection more straightforward and efficient. By using patterns in switch statements, developers can write cleaner, more concise, and more readable code, ultimately improving software quality and maintainability.

For additional information on pattern matching in Java, you can visit the following link: Pattern Matching (JEP 441) – OpenJDK. This link provides detailed information about the Java Enhancement Proposal (JEP) for pattern matching in Java.

Java 21 Unnamed Patterns and Variables with Examples

Java 21 Unnamed Patterns and Variables is introduced as a preview feature JEP-443 that simplifies data processing. It enables the use of unnamed patterns and variables, denoted by an underscore character (_), to match components within data structures without specifying their names or types. Additionally, you can create variables that are initialized but remain unused in the code.

Let’s break this down in simpler terms:

Introduction:

Before we dive into the world of Java records, let’s consider a situation where the conciseness of code
presents a challenge. In this instance, we will work with two record types: “Team” and “Member.”

record ProjectInfo(Long projectID, String projectName, Boolean isCompleted) {
  // Constructor and methods (if any)
}

record TeamMemberInfo(Long memberID, String memberName, LocalDate joinDate, Boolean isActive, ProjectInfo projectInfo) {
  // Constructor and methods (if any)
}

In Java, records provide a streamlined approach to create immutable data structures, particularly suitable for storing plain data. They eliminate the need for traditional getter and setter methods.

Now, let’s delve into how record patterns can simplify code by deconstructing instances of these records into their constituent components.

TeamMemberInfo teamMember = new TeamMemberInfo(101L, "Alice", LocalDate.of(1985, 8, 22), true, projectInfo);

if (teamMember instanceof TeamMemberInfo(Long id, String name, LocalDate joinDate, Boolean isActive, ProjectInfo projInfo)) {
  System.out.printf("Team member %d joined on %s.", id, joinDate); 
  //Team member 101 joined on 1985-8-22
}

When working with record patterns, it’s often the case that we require only certain parts of the record and not all of them.
In above example, we exclusively used the “id” and “joinDate” components.
The presence of other components such as “name,” “isActive,” and “projInfo” doesn’t enhance clarity; instead, they add brevity without improving readability.

In Java 21, this new feature is designed to eliminate this brevity.

Exploring Unnamed Patterns and Variables

In Java 21, a new feature introduces the use of underscores (_) to represent record components and local variables, indicating our lack of interest in them.

With this new feature, we can revise the previous example more concisely as shown below.
It’s important to observe that we’ve substituted the “name,” “isActive,” and “projInfo” components with underscores (_).

if (teamMember instanceof TeamMemberInfo(Long id, _, LocalDate joinDate, _, _)) {
  System.out.printf("Team member %d joined on %s.", id, joinDate); //Team member 101 joined on 1985-8-22
}

In a similar manner, we can employ the underscore character with nested records when working with the TeamMemberInfo record,
especially when we don’t need to use certain components. For example, consider the following scenario where we only
require the team member’s ID for specific database operations, and the other components are unnecessary.

if (teamMember instanceof TeamMemberInfo(Long id, _, _, _, _)) {
  // Utilize the team member's ID
  System.out.println("Team Member ID is: " + id);  //Team Member ID is: 101
}

In this code, the underscore (_) serves as a placeholder for the components we don’t need to access
within the TeamMemberInfo record.

Starting from Java 21, you can use unnamed variables in these situations:

  1. Within a local variable declaration statement in a code block.
  2. In the resource specification of a ‘try-with-resources’ statement.
  3. In the header of a basic ‘for’ statement.
  4. In the header of an ‘enhanced for loop.’
  5. As an exception parameter within a ‘catch’ block.
  6. As a formal parameter within a lambda expression.

Java 21 Unnamed Patterns and Variables Practical Examples

Let’s dive into a few practical examples to gain a deeper understanding.

Example 1: Local Unnamed Variable

Here, we create a local unnamed variable to handle a situation where we don’t require the result.

int _ = someFunction(); // We don't need the result

Example 2: Unnamed Variable in a ‘catch’ Block

In this case, we use an unnamed variable within a ‘catch’ block to handle exceptions without utilizing the caught value.

String userInput = "Your input goes here"; 

try { 
    int number = Integer.parseInt(userInput);
    // Use 'number'
} catch (NumberFormatException _) { 
    System.out.println("Invalid input: " + userInput);
}

Example 3: Unnamed Variable in a ‘for’ Loop

In the following example, we employ an unnamed variable within a simple ‘for’ loop, where the result of the runOnce() function is unused.

for (int i = 0, _ = runOnce(); i < array.length; i++) {
  // ... code that utilizes 'i' ...
}

Example 4: Unnamed Variable in Lambda Expression

// Define a lambda expression with an unnamed parameter
 Consumer<String> printMessage = (_) -> {
 		System.out.println("Hello, " + _);
 };

// Use the lambda expression with an unnamed parameter
printMessage.accept("John"); //Hello, John

Example 5: Unnamed Variable in try-with-resources

try (var _ = DatabaseConnection.openConnection()) {
    ... no use of the established database connection ...
}

In all the above examples, where the variables remain unused and their names are irrelevant, we simply declare them without providing a name, using the underscore (_) as a placeholder. This practice enhances code clarity and reduces unnecessary distractions.

Conclusion
Java 21 introduces a convenient feature where you can use underscores (_) as placeholders for unnamed variables. This simplifies your code by clearly indicating that certain variables are intentionally unused within their specific contexts. You can apply unnamed variables in multiple situations, such as local variable declarations, ‘try-with-resources’ statements, ‘for’ loop headers, ‘enhanced for’ loops, ‘catch’ block parameters, and lambda expressions. This addition to Java 21 improves code readability and helps reduce unnecessary clutter when you need to declare variables but don’t actually use them in your code.

Java 21 Unnamed Classes and Instance Main Methods

Java is evolving to make it easier for beginners to start coding without the complexity of large-scale programming. With the introduction of Unnamed Classes in Java 21, this enhancement allows students to write simple programs initially and gradually incorporate more advanced features as they gain experience. This feature aims to simplify the learning curve for newcomers.

Simplifying a Basic Java Program

Think about a straightforward Java program, like one that calculates the sum of two numbers:

public class AddNumbers { 

    public static void main(String[] args) { 
        int num1 = 5;
        int num2 = 7;
        int sum = num1 + num2;
        System.out.println("The sum is: " + sum); //12
    }
}

This program may appear more complicated than it needs to be for such a simple task. Here’s why:

  • The class declaration and the mandatory public access modifier are typically used for larger programs but are unnecessary here.
  • The String[] args parameter is designed for interacting with external components, like the operating system’s shell. However, in this basic program, it serves no purpose and can confuse beginners.
  • The use of the static modifier is part of Java’s advanced class-and-object model. For beginners, it can be perplexing. To add more functionality to this program, students must either declare everything as static (which is unconventional) or Learn about static and instance members and how objects are created.

In Java 21, making it easier for beginners to write their very first programs without the need to understand complex features designed for larger applications. This enhancement involves two key changes

1. Instance Main Methods:

The way Java programs are launched is changing, allowing the use of instance main methods. These methods don’t need to be static, public, or have a String[] parameter. This modification enables simplifying the traditional “Hello, World!” program to something like this:

class GreetingProgram {
    void greet() {
        System.out.println("Hello, World!");
    }
}

Execute the program using the following command: java --source 21 --enable-preview GreetingProgram.java

Output

Hello, World!

2. Unnamed Classes:

Java programmers introducing unnamed classes to eliminate the need for explicit class declarations, making the code cleaner and more straightforward:

void main() {
    System.out.println("Welcome to Java 21 Features");
}

Save this file with a name of your choice, then run the program using the following command: java --source 21 --enable-preview YourFileName.java

Ensure that you replace “YourFileName” with the actual name of your file.

Output:

Welcome to Java 21 Features

Please find the reference output below.

Java 21 Unnamed Classes and Instance Main Methods

Please note that these changes are part of a preview language feature, and they are disabled by default. To try them out in JDK 21, you can enable preview features using the following commands:

Bash
Compile the program with: javac --release 21 --enable-preview FileName.java

run it with: java --source 21 --enable-preview FileName.java

You can find more information about these features on the official OpenJDK website by visiting the following link: Java Enhancement Proposal 443 (JEP 443).

To sum it up, Java 21 is bringing some fantastic improvements to make programming more beginner-friendly and code cleaner. With the introduction of instance main methods and unnamed classes, Java becomes more accessible while maintaining its strength. These changes mark an exciting milestone in Java’s evolution, making it easier for newcomers to dive into coding. Since these features are in preview, developers have the opportunity to explore and influence the future of Java programming.

Java String Templates in Java 21: Practical Examples

What exactly is a String Template?

Template strings, often known as Java string templates, are a common feature found in many programming languages, including TypeScript template strings and Angular interpolation. Essentially, they allow us to insert variables into a string, and the variable values are determined at runtime. As a result, Java string templates generate varying output based on the specific values of the variables.

Here are examples of Java string templates with different greetings and names:

// TypeScript
const nameTS = "John";
const messageTS = `Welcome ${nameTS}!`;

// Angular
const nameAngular = "Jane";
const messageAngular = `Welcome {{ ${nameAngular} }}!`;

// Python
namePython = "Alice"
messagePython = "Welcome {namePython}!"

// Java (using String.format)
String nameJava = "Bob";
String messageJava = String.format("Welcome %s", nameJava);

Each of the examples provided above will give you the same result when used with the same ‘name’ variable. JEP-430 is an effort to introduce template string support in the Java programming language, much like what you see here:

In Java 21, you can create a message using this syntax:

String name = "Bob";
String message = STR."Welcome  \{name}!";

String Templates in the Java Language

The Old-Fashioned Way

String formatting in Java is not a new concept. Historically, programmers have employed various methods to create formatted strings, including string concatenation, StringBuilder, String.format(), and the MessageFormat class.

public class WelcomeMessage {

    public static void main(String[] args) {
        String message;
        String name = "John";

        // Concatenate a welcome message
        message = "Welcome " + name + "!";

        // Use String.format for formatting
        message = String.format("Welcome %s!", name);

        // Format using MessageFormat
        message = new MessageFormat("Welcome {0}!").format(new Object[] { name });

        // Construct efficiently with StringBuilder
        message = new StringBuilder().append("Welcome ").append(name).append("!").toString();

        // Display the final welcome message
        System.out.println(message);
    }
}

the output for each method will be the same, and it will display:

Welcome John!

Java String Templates in Java 21: Secure Interpolation

Java 21 has introduced template expressions, drawing inspiration from other programming languages. These expressions enable dynamic string interpolation during runtime. What sets Java’s approach apart is its focus on minimizing security risks, particularly when handling string values within SQL statements, XML nodes, and similar scenarios.

In terms of syntax, a template expression resembles a regular string literal with a specific prefix:

// Code Example
String message = STR."Greetings \{name}!";

In this context:

  • STR represents the template processor.
  • There is a dot operator (.) connecting the processor and the expression.
  • The template string contains an embedded expression in the form of {name}.
  • The outcome of the template processor, and consequently the result of evaluating the template expression, is often a String—although this isn’t always the case.

Template Processors in Java 21

In the world of Java, you’ll encounter three distinct template processors:

STR: This processor takes care of standard interpolation, making it a versatile choice for string manipulation.

FMT: Unlike its counterparts, FMT not only performs interpolation but also excels at interpreting format specifiers located to the left of embedded expressions. These format specifiers are well-documented within Java’s Formatter class.

RAW: RAW stands as a steadfast template processor, primarily generating unprocessed StringTemplate objects.

Here’s an example demonstrating how each of these processors can be utilized:

Here’s an example demonstrating how each of these processors can be utilized:

import static java.lang.StringTemplate.STR;
import static java.lang.StringTemplate.RAW;

public class TemplateProcessorTest {
    public static void main(String[] args) {
        String name = "JavaDZone";

        System.out.println(STR."Welcome to \{name}");
        System.out.println(RAW."Welcome to \{name}.");
    }
}

To put it into action, execute the following command within your terminal or command prompt:

Bash
java --enable-preview --source 21 TemplateProcessorTest.java

Be sure to substitute “TemplateProcessorTest.java” with the actual name of your Java class.

Performing Arithmetic Operations within Expressions

In Java 21, you have the capability to carry out arithmetic operations within expressions, providing you with the means to compute values and showcase the results directly within the expression itself.

For instance, consider the following code snippet:

int operand1 = 10, operand2 = 20;

String resultMessage = STR."\{operand1} + \{operand2} = \{operand1 + operand2}";  // This will result in "10 + 20 = 30"

You can use multi-line expressions:

For the sake of improving code readability, you can split an embedded expression into multiple lines, emulating the style often seen in nested method calls resembling a builder pattern.

Here’s an example to illustrate this:

System.out.println(STR."The current date is: \{
    DateTimeFormatter.ofPattern("yyyy-MM-dd")
        .format(LocalDateTime.now())
}");

Exploring String Templates in Java 21

The following Java class, StringTemplateTest, serves as an illustrative example of utilizing string templates with the STR template processor. It demonstrates how to integrate string interpolation and various expressions within template strings. Each section is accompanied by a description to provide a clear understanding of the usage.

import static java.lang.StringTemplate.STR;
import java.time.LocalDateTime;
import java.time.format.DateTimeFormatter;
import java.time.LocalTime;

public class StringTemplateTest {

  private static String name = "JavaDZone";
  private String course = "Java21 Features";
  private static int a = 100;
  private static int b = 200;

  public static void main(String[] args) {
  
      // Using variable in template expression.
      System.out.println(STR."Welcome to \{name}");

       // Utilizing a method in the template expression.
      System.out.println(STR."Welcome to \{getName()}");

      
      StringTemplateTest st = new StringTemplateTest();

     // Using non-static variable in the template expression.
      System.out.println(STR."Welcome to \{st.course}");

       // Performing arithmetic operations within the expression.
      System.out.println(STR."\{a} + \{b} = \{a+b}");

        // Displaying the current date using expression
      System.out.println(STR."The current date is: \{DateTimeFormatter.ofPattern("yyyy-MM-dd").format(LocalDateTime.now())}");
      
      }


  public static String getName() {
    return name;
  }
  
}

To put it into action, execute the following command within your terminal or command prompt:

Bash
java --enable-preview --source 21 StringTemplateTest .java

make sure to change “StringTemplateTest.java” with the actual name of your Java class.

Java String Templates

If you attempt to run or compile the StringTemplateTest class using the traditional java or javac methods, you may encounter the following error:

Java String Templates in java 21

This error message indicates that string templates are considered a preview feature in Java, and they are not enabled by default. To enable and utilize string templates in your code, you should use the --enable-preview –source 21 flag when running or compiling your Java program. This flag allows you to take advantage of string templates’ functionality.

In summary, this Java tutorial has explored the concept of string templates in Java. This feature was introduced in Java 21 as a preview, offering a fresh addition to the language’s capabilities. To stay updated on potential improvements and enhancements to this feature, be sure to keep an eye on the Java release notes. Enjoy your learning journey!

Sequenced Collections in java 21: Practical Examples

In the world of Java programming, the introduction of Sequenced Collections in Java 21 has brought significant improvements to existing Collection classes and interfaces. This new feature allows easy access to both the first and last elements of a collection, thanks to the inclusion of default library methods. It also enables developers to obtain a reversed view of the collection with a simple method call.

It’s important to clarify that in this context, “encounter order” does not refer to the physical arrangement of elements within the collection. Instead, it means that one element can be positioned either before (closer to the first element) or after (closer to the last element) another element in the ordered sequence.

Let’s dive deeper into this exciting addition, which has been part of Java since the release of Java 21 JEP-431

These newly introduced interfaces are

  1. SequencedCollection
  2. SequencedSet
  3. SequencedMap

Now, let’s illustrate the power of Sequenced Collections in Java 21 with a practical example:

Example: Managing a Playlist Imagine you’re developing a music streaming application in Java. In this application, you need to maintain a playlist of songs, allowing users to navigate easily between tracks. The introduction of Sequenced Collections becomes incredibly valuable in this scenario.

By utilizing SequencedSet, you can ensure that songs in the playlist maintain a specific order, enabling users to move seamlessly from one song to the next or return to the previous one. Additionally, you can use SequencedCollection to manage song history, making it effortless for users to retrace their listening journey, starting from the first song they played to the most recent one.

This real-life example illustrates how Sequenced Collections in Java 21 can enhance the user experience and streamline the management of ordered data in your applications.

Sequenced Collections in java 21

Sequenced Collections in Java 21 Made Simple

The SequencedCollection interface introduces a set of methods to streamline the addition, retrieval, and removal of elements at both ends of a collection. It also offers the ‘reversed()’ method, which presents a reversed view of the collection. Worth noting is that, apart from ‘reversed()’, all these methods are default methods, accompanied by default implementations

public interface SequencedCollection<E> extends Collection<E> {

    SequencedCollection<E> reversed();
    default void addFirst(E e) {
    }
    default void addLast(E e) {
    }
    default E getFirst() {
    }
    default E getLast() {
    }
    default E removeFirst() {
    }
    default E removeLast() {
    }
}

For instance, consider the following code snippet where we create an ArrayList and perform new sequenced operations on it:

ArrayList<Integer> list = new ArrayList<>();

list.add(10);          // Adds 10 to the list.
list.addFirst(0);      // Adds 0 to the beginning of the list.
list.addLast(20);      // Adds 20 to the end of the list.
System.out.println("list: " + list);        // Output: list: [0, 10, 20]
System.out.println(list.getFirst());         // Output: 0
System.out.println(list.getLast());          // Output: 20
System.out.println(list.reversed());        // Output: [20, 10, 0]

This code demonstrates how Sequenced Collections simplify the management of ordered data within a collection, offering easy access to elements at both ends and providing a convenient method to view the collection in reverse order.

SequencedSet: Streamlined Collection Sorting

The SequencedSet interface is designed specifically for Set implementations, such as LinkedHashSet. It builds upon the SequencedCollection interface while customizing the ‘reversed()’ method. The key distinction lies in the return type of ‘SequencedSet.reversed()’, which is now ‘SequencedSet’.

Sequencedset.class

public interface SequencedSet<E> extends SequencedCollection<E>, Set<E> {
    SequencedSet<E> reversed();  // Overrides and specifies the return type for reversed() method.
}

Example: Using SequencedSet

Let’s explore an example of how to utilize SequencedSet with LinkedHashSet:

import java.util.*;


public class SequencedSetExample {

    public static void main(String[] args) {
      LinkedHashSet<Integer> hashSet = new LinkedHashSet<>(List.of(5, 8, 12, 9, 10));

      System.out.println("LinkedHashSet contents: " + hashSet); // Output: [5, 8, 12, 9, 10]
      // First element in the LinkedHashSet.
      System.out.println("First element: " + hashSet.getFirst()); // Output: 5
      
      // Last element in the LinkedHashSet.
      System.out.println("Last element: " + hashSet.getLast()); // Output: 10
      
      // reversed view of the LinkedHashSet.
      System.out.println("Reversed view: " + hashSet.reversed()); // Output: [10, 9, 12, 8, 5]
    }

}

When you run this class, you’ll see the following output:

YAML
LinkedHashSet contents: [5, 8, 12, 9, 10]
First element: 5
Last element: 10
Reversed view: [10, 9, 12, 8, 5]

SequencedMap: Changing How Maps Are Ordered

Understanding SequencedMap

SequencedMap is a specialized interface designed for Map classes like LinkedHashMap, introducing a novel approach to managing ordered data within maps. Unlike SequencedCollection, which handles individual elements, SequencedMap offers its unique methods that manipulate map entries while considering their access order.

Exploring SequencedMap Features

SequencedMap introduces a set of default methods to enhance map entry management:

  • firstEntry(): Retrieves the first entry in the map.
  • lastEntry(): Retrieves the last entry in the map.
  • pollFirstEntry(): Removes and returns the first entry in the map.
  • pollLastEntry(): Removes and returns the last entry in the map.
  • putFirst(K k, V v): Inserts an entry at the beginning of the map.
  • putLast(K k, V v): Inserts an entry at the end of the map.
  • reversed(): Provides a reversed view of the map.
  • sequencedEntrySet(): Returns a SequencedSet of map entries, maintaining the encounter order.
  • sequencedKeySet(): Returns a SequencedSet of map keys, reflecting the encounter order.
  • sequencedValues(): Returns a SequencedCollection of map values, preserving the encounter order.

Example: Utilizing SequencedMap

LinkedHashMap<Integer, String> hashMap = new LinkedHashMap<>();
        hashMap.put(10, "Ten");
        hashMap.put(20, "Twenty");
        hashMap.put(30, "Thirty");
        hashMap.put(40, "Fourty");
        hashMap.put(50, "Fifty");

        System.out.println("hashmap: " + hashMap);
        // Output: {10=Ten, 20=Twenty, 30=Thirty, 40=Fourty, 50=Fifty}

        hashMap.put(0, "Zero");
        hashMap.put(100, "Hundred");

        System.out.println(hashMap); // {10=Ten, 20=Twenty, 30=Thirty, 40=Fourty, 50=Fifty, 0=Zero, 100=Hundred}

        // Fetching the first entry
        System.out.println("Fetching first entry: " + hashMap.entrySet().iterator().next());
        // Output: Fetching the first entry: 10=Ten

        // Fetching the last entry
        Entry<Integer, String> lastEntry = null;
        for (java.util.Map.Entry<Integer, String> entry : hashMap.entrySet()) {

In the traditional approach, prior to Java 21, working with a LinkedHashMap to manage key-value pairs involved manual iteration and manipulation of the map. Here’s how it was done

LinkedHashMap<Integer, String> hashMap = new LinkedHashMap<>();
        hashMap.put(10, "Ten");
        hashMap.put(20, "Twenty");
        hashMap.put(30, "Thirty");
        hashMap.put(40, "Fourty");
        hashMap.put(50, "Fifty");

        System.out.println("hashmap: " + hashMap);
        // Output: {10=Ten, 20=Twenty, 30=Thirty, 40=Fourty, 50=Fifty}

        hashMap.put(0, "Zero");
        hashMap.put(100, "Hundred");

        System.out.println(hashMap); // {10=Ten, 20=Twenty, 30=Thirty, 40=Fourty, 50=Fifty, 0=Zero, 100=Hundred}


        // Fetching the first entry
        System.out.println("Fetching first entry: " + hashMap.entrySet().iterator().next());
        // Output: Fetching the first entry: 10=Ten


        // Fetching the last entry
        Entry<Integer, String> lastEntry = null;
        for (java.util.Map.Entry<Integer, String> entry : hashMap.entrySet()) {
            lastEntry = entry;
        }
        System.out.println("Fetching last entry: " + lastEntry); // Output: Fetching the last entry: 100=Hundred


        // Removing the first entry
        Entry<Integer, String> removedFirstEntry = hashMap.entrySet().iterator().next();
        hashMap.remove(removedFirstEntry.getKey());
        System.out.println("Removing first entry: " + removedFirstEntry);
        // Output: Removing the first entry: 10=Ten


        hashMap.remove(lastEntry.getKey());
        System.out.println("Removing last entry: " + lastEntry);
        // Output: Removing the last entry: 100=Hundred


        System.out.println("hashMap: " + hashMap);
        // Output after removals: {20=Twenty, 30=Thirty, 40=Fourty, 50=Fifty, 0=Zero}


        LinkedHashMap<Integer, String> reversedMap = new LinkedHashMap<>();
        List<Entry<Integer, String>> entries = new ArrayList<>(hashMap.entrySet());

        Collections.reverse(entries);

        for (Entry<Integer, String> entry : entries) {
            reversedMap.put(entry.getKey(), entry.getValue());
        }


        System.out.println("Reversed view of the map: " + reversedMap);
        // Output: Reversed view of the map: {50=Fifty, 40=Fourty, 30=Thirty, 20=Twenty,
        // 10=Ten}

However, in Java 21, with the introduction of sequenced collections, managing a LinkedHashMap has become more convenient. Here’s the updated code that demonstrates this.

import java.util.LinkedHashMap;


public class SequencedMapExample {
 
    public static void main(String[] args) {
        
       LinkedHashMap<Integer, String> hashMap = new LinkedHashMap<>();
       hashMap.put(10, "Ten");
       hashMap.put(20, "Twenty");
       hashMap.put(30, "Thirty");
       hashMap.put(40, "Fourty");
       hashMap.put(50, "Fifty");

       System.out.println(hashMap); 
       // Output: {10=Ten, 20=Twenty, 30=Thirty, 40=Fourty, 50=Fifty}

       hashMap.putFirst(0, "Zero");
       hashMap.putLast(100, "Hundred");
       
       System.out.println(hashMap); 
       // Output after adding elements at the beginning and end:
       // {0=Zero, 10=Ten, 20=Twenty, 30=Thirty, 40=Fourty, 50=Fifty, 100=Hundred}

       System.out.println("Fetching first entry: " + hashMap.firstEntry());
       // Fetching the first entry: 0=Zero

       System.out.println("Fetching last entry: " + hashMap.lastEntry());
       // Fetching the last entry: 100=Hundred
        
       System.out.println("Removing first entry: " + hashMap.pollFirstEntry());
       // Removing the first entry: 0=Zero

       System.out.println("Removing last entry: " + hashMap.pollLastEntry());
       // Removing the last entry: 100=Hundred

       System.out.println("hashMap: " + hashMap);
       // Output after removals: {10=Ten, 20=Twenty, 30=Thirty, 40=Fourty, 50=Fifty}

       System.out.println("Reversed: " + hashMap.reversed());
       // Reversed view of the map: {50=Fifty, 40=Fourty, 30=Thirty, 20=Twenty, 10=Ten}
    }
}

Conclusion: Simplifying Java 21

Sequenced collections are a valuable addition to Java 21, enhancing the language’s ease of use. These features simplify collection management, making coding in Java 21 even more accessible and efficient. Enjoy the benefits of these enhancements in your Java 21 development journey!