Spring Boot 3.x Web Application Example

Spring Boot 3.x Web Application Example

Spring Boot has revolutionized Java development by simplifying the process of building robust web applications. In this blog post, we’ll walk through creating a simple Spring Boot 3.x Web Application. This example will highlight best practices, ensure SEO optimization, and provide clear, easy-to-understand explanations.

What is Spring Boot?

Spring Boot is a powerful framework that enables developers to create stand-alone, production-grade Spring-based applications with minimal configuration. It offers features like embedded servers, auto-configuration, and starter dependencies, which streamline the development process.

Prerequisites

Before we start, ensure you have the following installed:

  • Java Development Kit (JDK) 17 or later
  • Maven (for dependency management)
  • An IDE (such as IntelliJ IDEA or Eclipse)

Setting Up the Spring Boot Application

Step 1: Create a New Spring Boot Project

You can quickly generate a Spring Boot project using the Spring Initializr:

  1. Select Project: Choose Maven Project.
  2. Select Language: Choose Java.
  3. Spring Boot Version: Select 3.x (latest stable version).
  4. Project Metadata:
    • Group: com.javadzone
    • Artifact: spring-boot-web-example
    • Name: spring-boot-web-example
    • Package Name: com.javadzone.springbootweb
  5. Add Dependencies:
    • Spring Web
    • Spring Boot DevTools (for automatic restarts)
    • Thymeleaf (for server-side template rendering)

Click Generate to download the project zip file. Unzip it and open it in your IDE.

Step 2: Project Structure

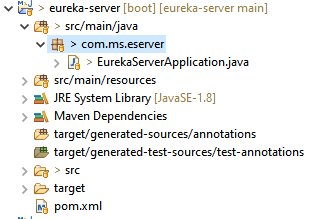
Your project structure should look like this:

spring-boot-web-example
├── src
│   └── main
│       ├── java
│       │   └── com
│       │       └── javadzone
│       │           └── springbootweb
│       │               ├── SpringBootWebExampleApplication.java
│       │               └── controller
│       │                   └── HomeController.java
│       └── resources
│           ├── static
│           ├── templates
│           │   └── home.html
│           └── application.properties
└── pom.xml

Step 3: Create the Main Application Class

Open SpringBootWebExampleApplication.java and add the @SpringBootApplication annotation. This annotation enables auto-configuration and component scanning.

package com.javadzone.springbootweb;

import org.springframework.boot.SpringApplication;
import org.springframework.boot.autoconfigure.SpringBootApplication;

@SpringBootApplication
public class SpringBootWebExampleApplication {
    public static void main(String[] args) {
        SpringApplication.run(SpringBootWebExampleApplication.class, args);
    }
}

Step 4: Create a Controller

Next, create a new class HomeController.java in the controller package to handle web requests.

package com.javadzone.springbootweb.controller;

import org.springframework.stereotype.Controller;
import org.springframework.ui.Model;
import org.springframework.web.bind.annotation.GetMapping;

@Controller
public class HomeController {

    @GetMapping("/")
    public String home(Model model) {
        model.addAttribute("message", "Welcome to Spring Boot Web Application!");
        return "home"; // This refers to home.html in templates
    }
}

Step 5: Create a Thymeleaf Template

Create a new file named home.html in the src/main/resources/templates directory. This file will define the HTML structure for your homepage.

<!DOCTYPE html>
<html xmlns:th="http://www.thymeleaf.org">
<head>
    <meta charset="UTF-8">
    <title>Spring Boot Web Example</title>
</head>
<body>
    <h1 th:text="${message}">Welcome!</h1>
    <footer>
        <p>© 2024 Spring Boot Web Application</p>
    </footer>
</body>
</html>

Step 6: Configure Application Properties

In the application.properties file located in src/main/resources, you can configure your application settings. Here’s a simple configuration to set the server port:

server.port=8080

Step 7: Run the Application

To run the application, navigate to your project directory and use the following command:

./mvnw spring-boot:run

If you’re using Windows, use:

mvnw.cmd spring-boot:run

Step 8: Access the Application

Open your web browser and navigate to http://localhost:8080. You should see the message “Welcome to Spring Boot Web Application!” displayed on the page.

Spring Boot 3.x Web Application Example

Best Practices

  1. Use @RestController for REST APIs: When creating RESTful services, use @RestController instead of @Controller.
  2. Handle Exceptions Globally: Implement a global exception handler using @ControllerAdvice to manage exceptions consistently.
  3. Externalize Configuration: Keep sensitive data and environment-specific configurations outside your codebase using application.properties or environment variables.
  4. Implement Logging: Use SLF4J with Logback for logging throughout your application.
  5. Write Tests: Always write unit and integration tests for your components to ensure reliability.

Conclusion

Congratulations! You’ve built a simple web application using Spring Boot 3.x. This example demonstrated how easy it is to set up a Spring Boot application, handle web requests, and render HTML using Thymeleaf. With the foundation in place, you can now expand this application by adding features like databases, security, and more.

Performance Tuning Spring Boot Applications

Performance Tuning Spring Boot

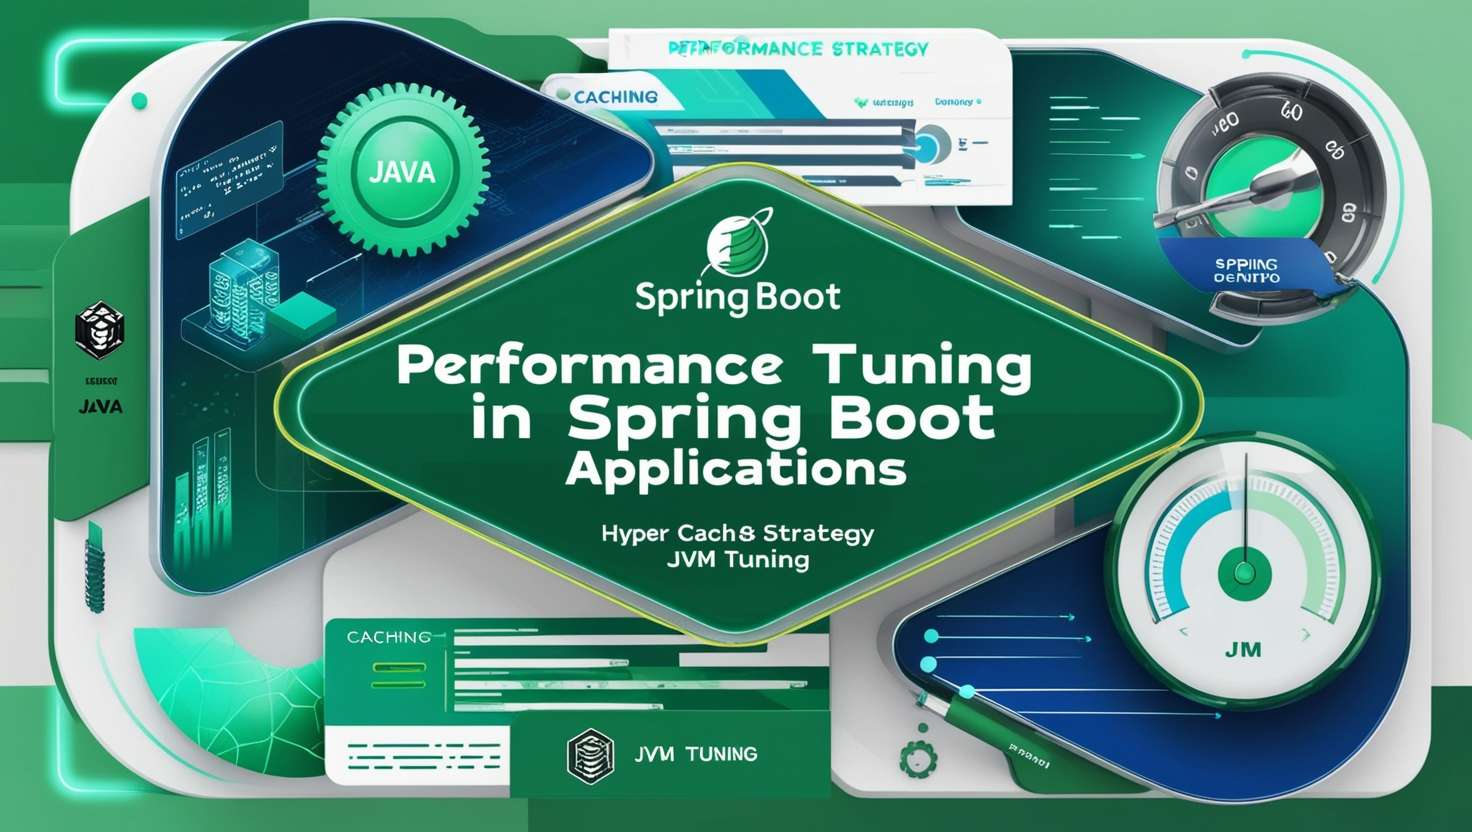
Spring Boot has emerged as a leading framework for building Java applications, praised for its ease of use and rapid development capabilities. However, Performance Tuning Spring Boot Applications is often an overlooked but critical aspect that can dramatically enhance the efficiency and responsiveness of your applications. In this blog post, we will explore various techniques for optimizing the performance of Spring Boot applications, including JVM tuning, caching strategies, and profiling, complete with detailed examples.

Why Performance Tuning Matters

Before diving into specifics, let’s understand why performance tuning is essential. A well-optimized application can handle more requests per second, respond more quickly to user actions, and make better use of resources, leading to cost savings. Ignoring performance can lead to sluggish applications that frustrate users and can result in lost business.

1. JVM Tuning

Understanding the JVM

Java applications run on the Java Virtual Machine (JVM), which provides an environment to execute Java bytecode. The performance of your Spring Boot application can be significantly impacted by how the JVM is configured.

Example: Adjusting Heap Size

One of the most common JVM tuning parameters is the heap size. The default settings may not be suitable for your application, especially under heavy load.

How to Adjust Heap Size

You can set the initial and maximum heap size using the -Xms and -Xmx flags. For instance:

java -Xms512m -Xmx2048m -jar your-spring-boot-app.jar

In this example:

  • Initial Heap Size (-Xms): The application starts with 512 MB of heap memory.
  • Maximum Heap Size (-Xmx): The application can grow up to 2048 MB.

This configuration is a good starting point but should be adjusted based on your application’s needs and the resources available on your server.

Garbage Collection Tuning

Another essential aspect of JVM tuning is garbage collection (GC). The choice of GC algorithm can significantly impact your application’s performance.

Example: Using G1 Garbage Collector

You can opt for the G1 garbage collector, suitable for applications with large heap sizes:

java -XX:+UseG1GC -jar your-spring-boot-app.jar

The G1 collector is designed for applications that prioritize low pause times, which can help maintain responsiveness under heavy load.

2. Caching Strategies

Caching is a powerful way to improve performance by reducing the number of times an application needs to fetch data from a slow source, like a database or an external API.

Example: Using Spring Cache

Spring Boot has built-in support for caching. You can easily add caching to your application by enabling it in your configuration file:

@SpringBootApplication
@EnableCaching
public class YourApplication {
    public static void main(String[] args) {
        SpringApplication.run(YourApplication.class, args);
    }
}

Caching in Service Layer

Let’s say you have a service that fetches user data from a database. You can use caching to improve the performance of this service:

@Service
public class UserService {

    @Autowired
    private UserRepository userRepository;

    @Cacheable("users")
    public User getUserById(Long id) {
        // Simulating a slow database call
        return userRepository.findById(id).orElse(null);
    }
}

How It Works:

  • The first time getUserById is called with a specific user ID, the method executes and stores the result in the cache.
  • Subsequent calls with the same ID retrieve the result from the cache, avoiding the database call, which significantly speeds up the response time.

Configuring Cache Provider

You can configure a cache provider like Ehcache or Hazelcast for more advanced caching strategies. Here’s a simple configuration example using Ehcache:

<dependency>
    <groupId>org.ehcache</groupId>
    <artifactId>ehcache</artifactId>
</dependency>
@Bean
public CacheManager cacheManager() {
    EhCacheCacheManager cacheManager = new EhCacheCacheManager();
    cacheManager.setCacheManager(ehCacheManagerFactoryBean().getObject());
    return cacheManager;
}

@Bean
public EhCacheManagerFactoryBean ehCacheManagerFactoryBean() {
    EhCacheManagerFactoryBean factory = new EhCacheManagerFactoryBean();
    factory.setConfigLocation(new ClassPathResource("ehcache.xml"));
    return factory;
}

3. Profiling Your Application

Profiling helps identify bottlenecks in your application. Tools like VisualVM, YourKit, or even Spring Boot Actuator can provide insights into your application’s performance.

Example: Using Spring Boot Actuator

Spring Boot Actuator provides several endpoints to monitor your application. You can add the dependency in your pom.xml:

<dependency>
    <groupId>org.springframework.boot</groupId>
    <artifactId>spring-boot-starter-actuator</artifactId>
</dependency>

Enabling Metrics

Once Actuator is set up, you can access performance metrics via /actuator/metrics. This provides insights into your application’s health and performance.

Example: Analyzing Slow Queries

Suppose you find that your application is experiencing delays in user retrieval. By enabling metrics, you can identify slow queries. To view query metrics, you can access:

GET /actuator/metrics/jdbc.queries

This endpoint provides metrics related to database queries, allowing you to pinpoint performance issues. You might discover that a particular query takes longer than expected, prompting you to optimize it.

Example: VisualVM for Profiling

For a more detailed analysis, you can use VisualVM, a monitoring and profiling tool. To use it, you need to enable JMX in your Spring Boot application:

java -Dcom.sun.management.jmxremote -Dcom.sun.management.jmxremote.port=12345 -Dcom.sun.management.jmxremote.authenticate=false -Dcom.sun.management.jmxremote.ssl=false -jar your-spring-boot-app.jar
  1. Connect VisualVM: Open VisualVM and connect to your application.
  2. Monitor Performance: Use the CPU and memory profiling tools to identify resource-intensive methods and threads.

Conclusion

Performance tuning in Spring Boot applications is crucial for ensuring that your applications run efficiently and effectively. By tuning the JVM, implementing caching strategies, and profiling your application, you can significantly enhance its performance.

Final Thoughts

Remember that performance tuning is an ongoing process. Regularly monitor your application, adjust configurations, and test different strategies to keep it running optimally. With the right approach, you can ensure that your Spring Boot applications provide the best possible experience for your users. Happy coding!
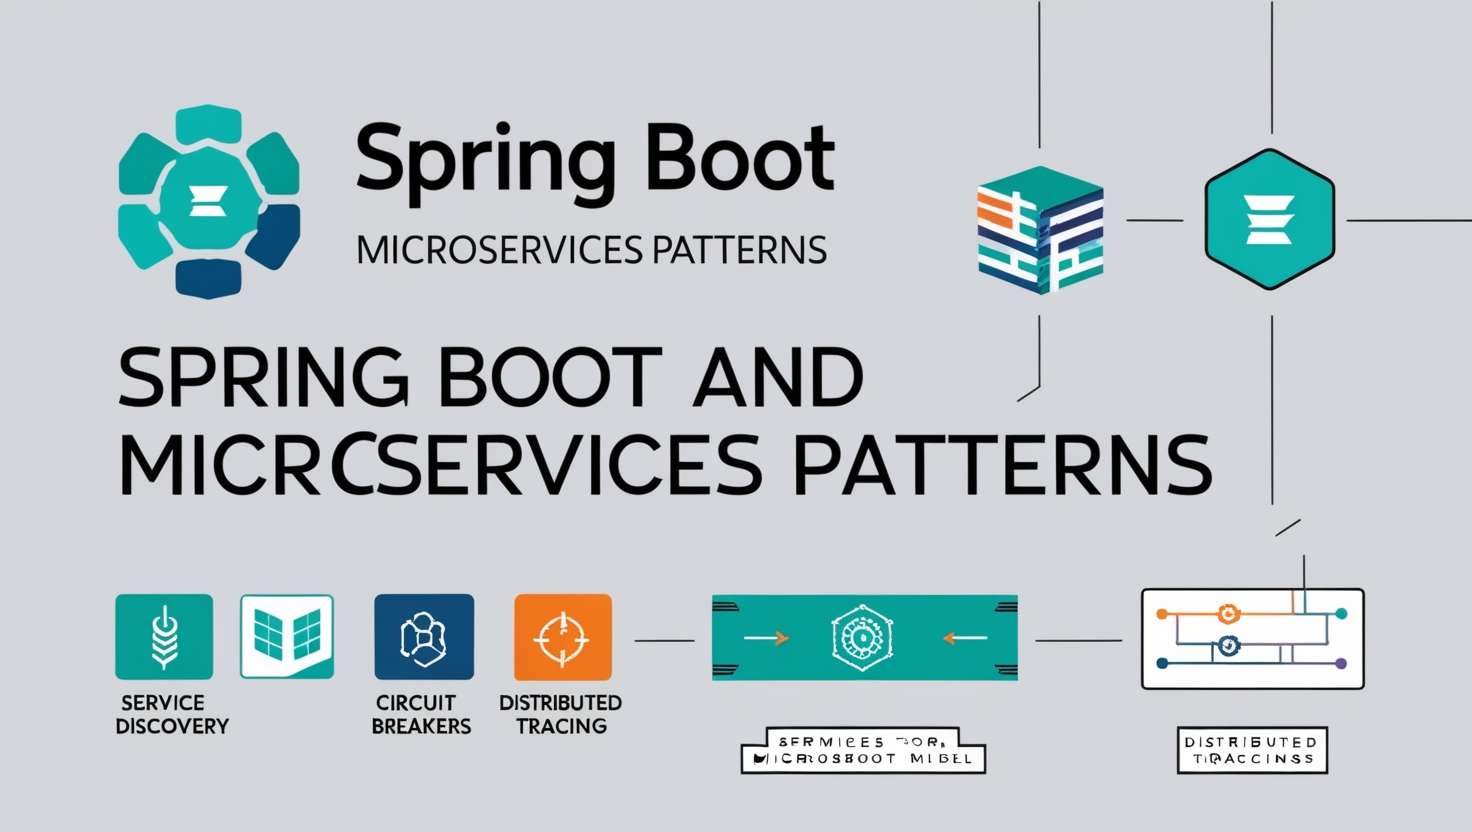
Spring Boot and Microservices Patterns

Spring Boot and Microservices Patterns

In the world of software development, microservices have gained immense popularity for their flexibility and scalability. However, implementing microservices can be a daunting task, especially with the myriad of patterns and practices available. This blog post explores various Spring Boot and Microservices Patterns and demonstrates how to implement them using Spring Boot, a powerful framework that simplifies the development of Java applications.

Spring Boot and Microservices Patterns

Spring Boot and Microservices Patterns

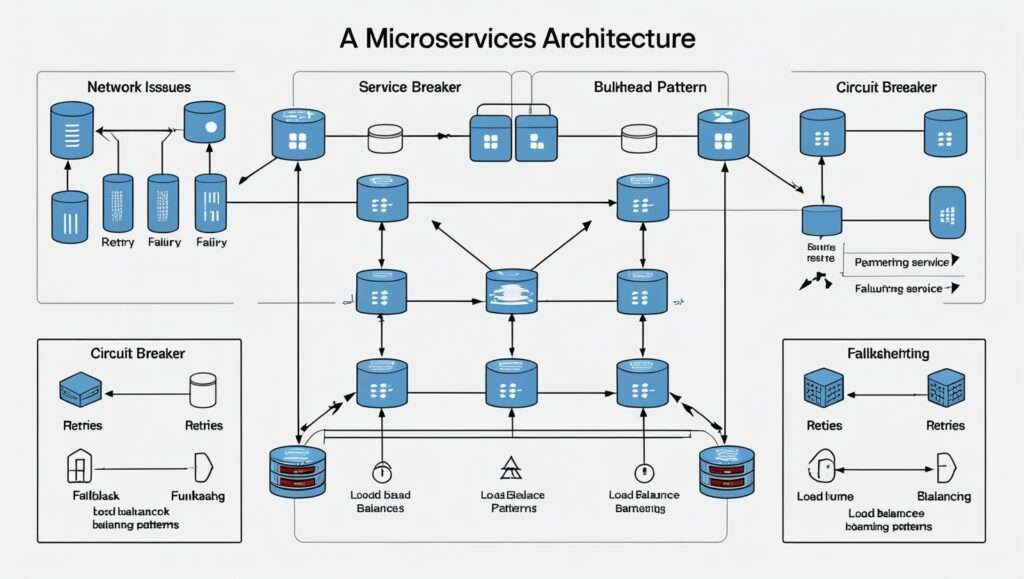
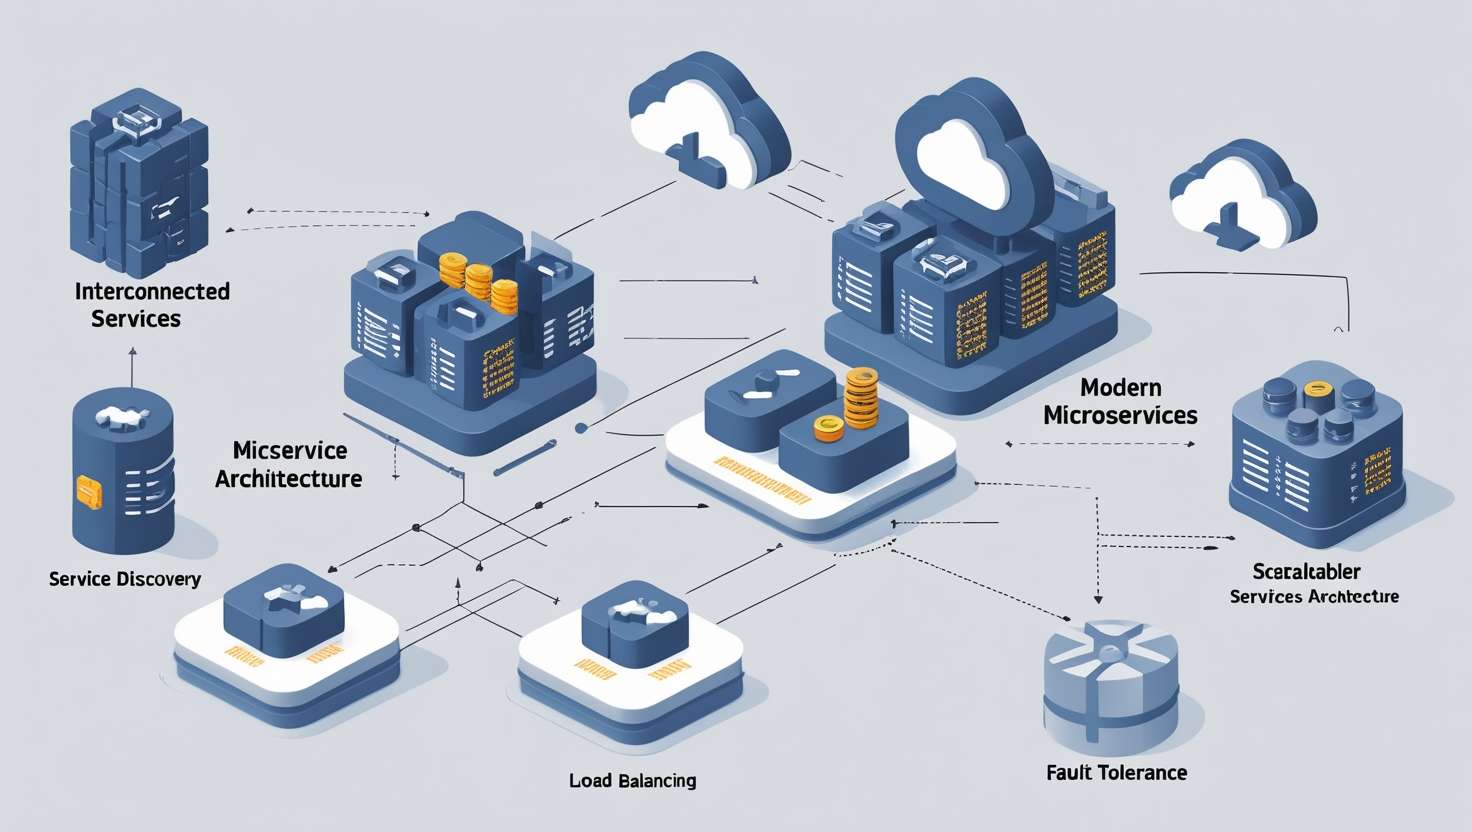
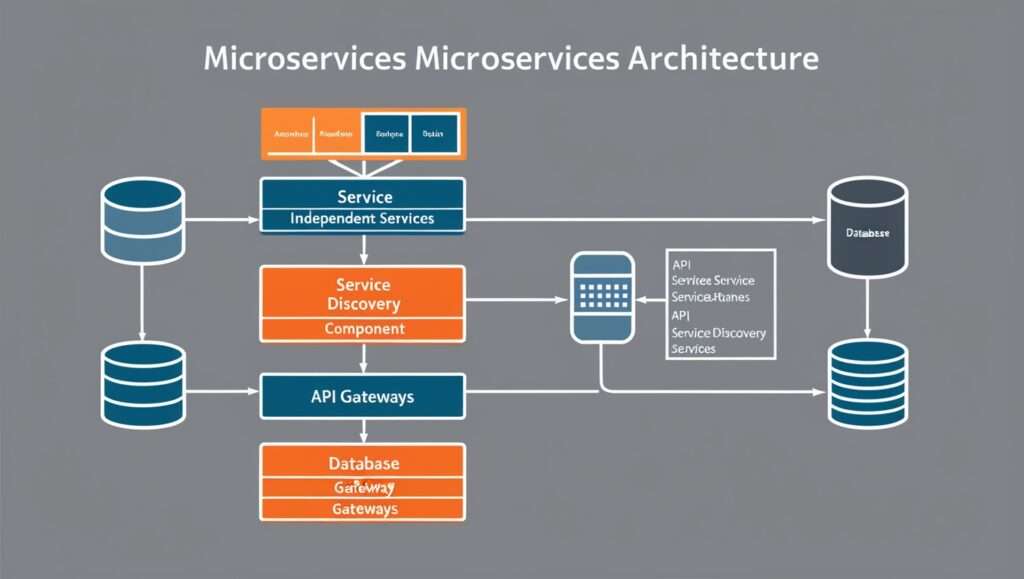
Microservices architecture is based on building small, independent services that communicate over a network. To effectively manage these services, developers can leverage several design patterns. Here are some of the most commonly used microservices patterns:

  1. Service Discovery
  2. Circuit Breaker
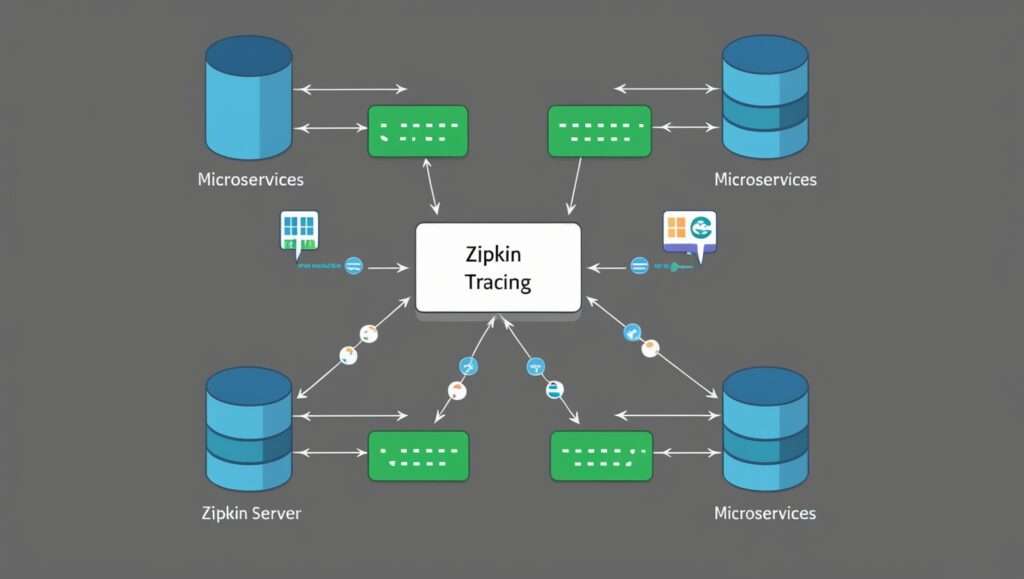
  3. Distributed Tracing

Let’s delve into each of these patterns and see how Spring Boot can facilitate their implementation.

1. Service Discovery

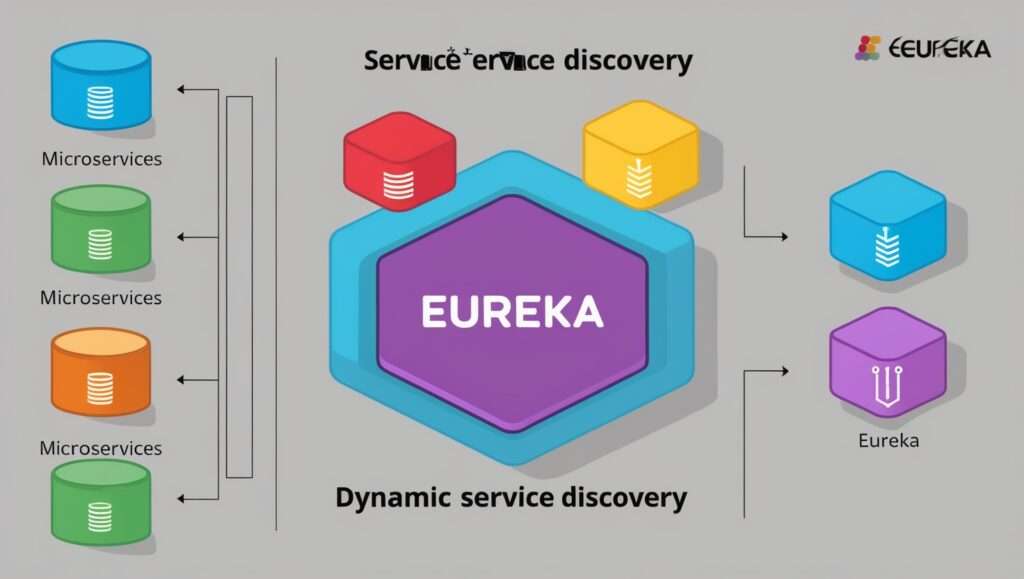
In a microservices architecture, services often need to discover each other dynamically. Hardcoding the service locations is impractical; thus, service discovery becomes essential.

Implementation with Spring Boot:

Using Spring Cloud Netflix Eureka, you can easily set up service discovery. Here’s how:

  • Step 1: Add the necessary dependencies in your pom.xml:
<dependency>
    <groupId>org.springframework.cloud</groupId>
    <artifactId>spring-cloud-starter-netflix-eureka-client</artifactId>
</dependency>

Step 2: Enable Eureka Client in your Spring Boot application:

@SpringBootApplication
@EnableEurekaClient
public class MyApplication {
    public static void main(String[] args) {
        SpringApplication.run(MyApplication.class, args);
    }
}

Step 3: Configure the application properties:

eureka:
  client:
    service-url:
      defaultZone: http://localhost:8761/eureka/
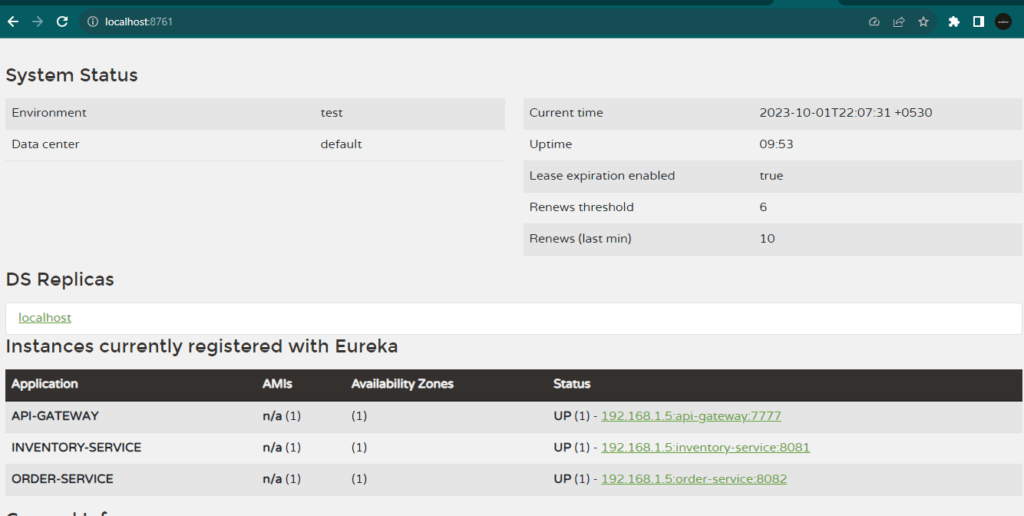
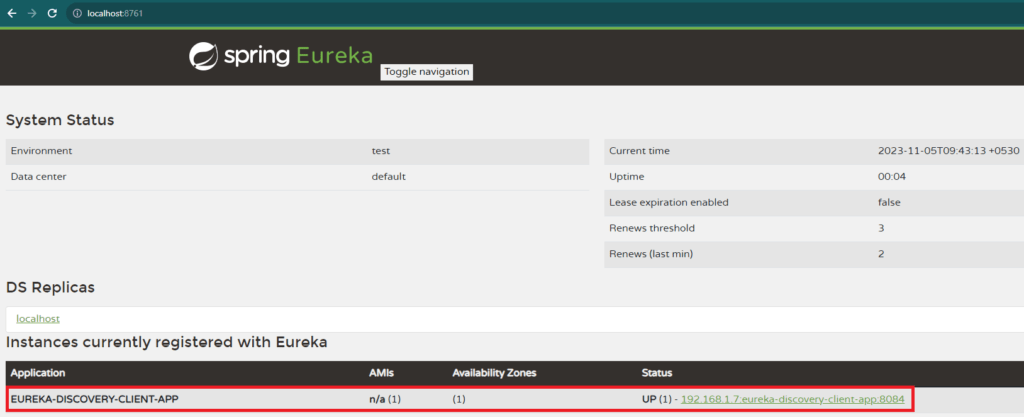
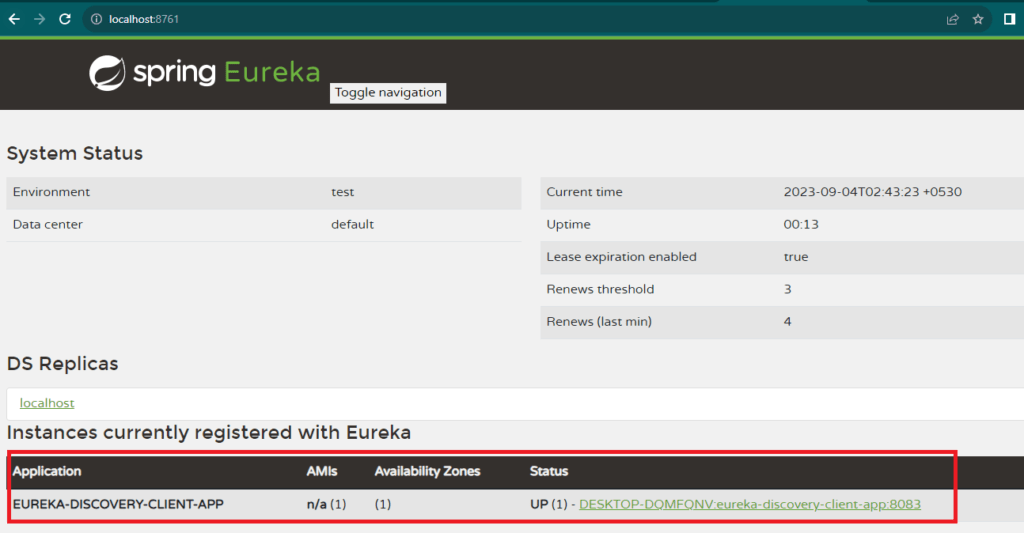
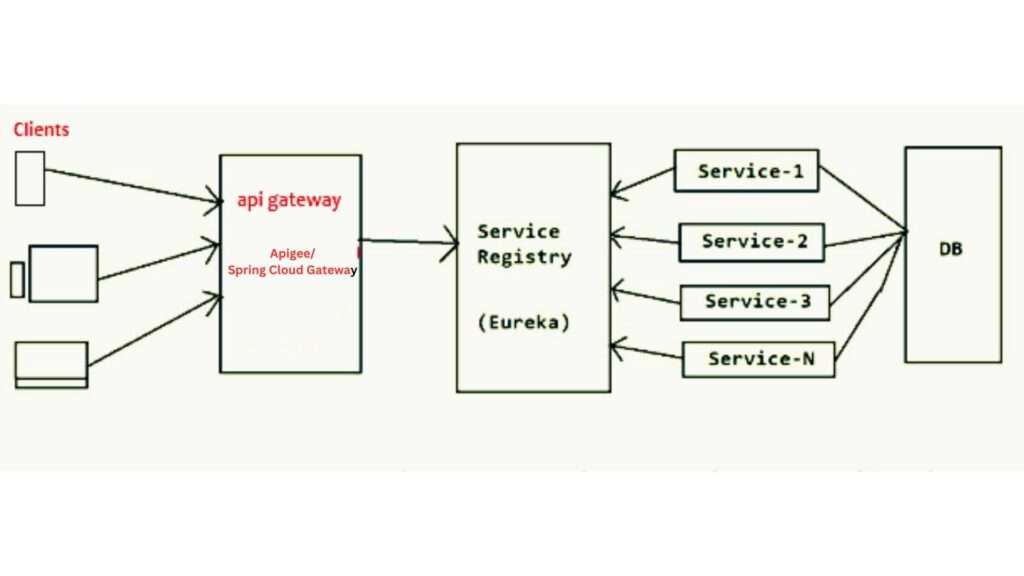
eureka service Discovery spring boot

By following these steps, your Spring Boot application will register with the Eureka server, allowing it to discover other registered services easily.

2. Circuit Breaker

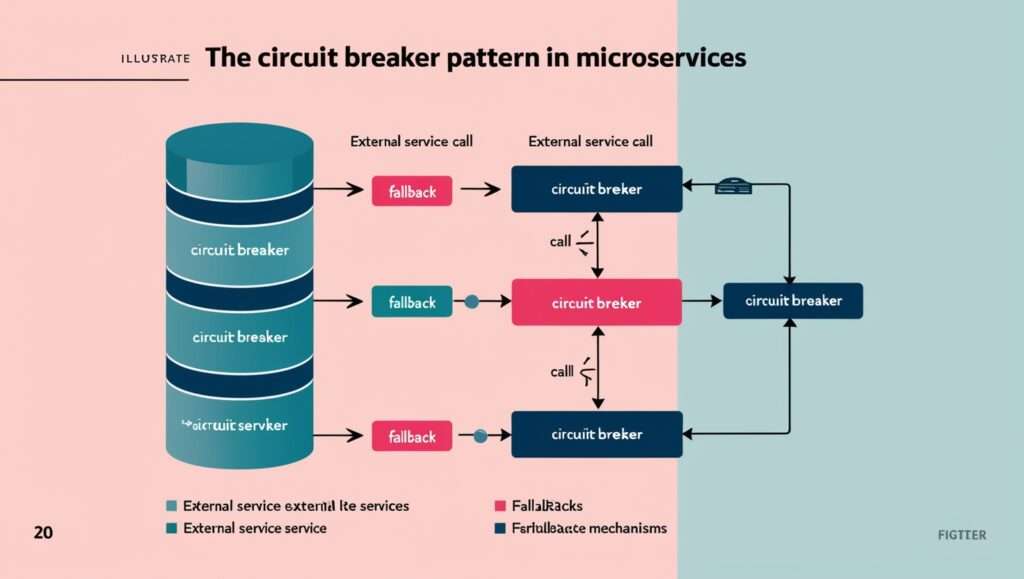
Microservices often depend on one another, which can lead to cascading failures if one service goes down. The Circuit Breaker pattern helps to manage these failures gracefully.

Implementation with Spring Boot:

Spring Cloud provides a simple way to implement the Circuit Breaker pattern using Resilience4j. Here’s a step-by-step guide:

  • Step 1: Add the dependency in your pom.xml:
<dependency>
    <groupId>io.github.resilience4j</groupId>
    <artifactId>resilience4j-spring-boot2</artifactId>
</dependency>

Step 2: Use the @CircuitBreaker annotation on your service methods:

@Service
public class MyService {

    @CircuitBreaker
    public String callExternalService() {
        // logic to call an external service
    }
}

Step 3: Configure fallback methods:

@Service
public class MyService {

    @CircuitBreaker(fallbackMethod = "fallbackMethod")
    public String callExternalService() {
        // logic to call an external service
    }

    public String fallbackMethod(Exception e) {
        return "Fallback response due to: " + e.getMessage();
    }
}

With this setup, if the external service call fails, the circuit breaker will activate, and the fallback method will provide a default response.

3. Distributed Tracing

As microservices can be spread across different systems, tracking requests across services can become challenging. Distributed tracing helps monitor and troubleshoot these complex systems.

Implementation with Spring Boot:

You can utilize Spring Cloud Sleuth along with Zipkin to achieve distributed tracing. Here’s how:

  • Step 1: Add the dependencies:
<dependency>
    <groupId>org.springframework.cloud</groupId>
    <artifactId>spring-cloud-starter-sleuth</artifactId>
</dependency>
<dependency>
    <groupId>org.springframework.cloud</groupId>
    <artifactId>spring-cloud-starter-zipkin</artifactId>
</dependency>

Step 2: Configure your application properties:

spring:
  zipkin:
    base-url: http://localhost:9411/
  sleuth:
    sampler:
      probability: 1.0
  • Step 3: Observe traces in Zipkin:

Once your application is running, you can visit the Zipkin UI at http://localhost:9411 to view the traces of requests as they flow through your microservices.

Conclusion

Microservices architecture, while powerful, comes with its own set of complexities. However, by employing key patterns like service discovery, circuit breakers, and distributed tracing, you can significantly simplify the implementation and management of your microservices. Spring Boot, with its extensive ecosystem, makes it easier to adopt these patterns effectively.

As you embark on your microservices journey, remember that clarity in design and adherence to established patterns will lead to more resilient and maintainable applications. Happy coding!

By incorporating these patterns in your Spring Boot applications, you’ll not only enhance the robustness of your microservices but also provide a smoother experience for your users. If you have any questions or need further clarification, feel free to leave a comment below!

Java Coding Best Practices You Need to Know

Java Coding Best Practices You Need to Know

As software development continues to evolve, the importance of adhering to best coding practices becomes increasingly crucial. In the realm of Java, one of the most popular programming languages, following these practices ensures that the code is not only functional but also efficient, readable, and maintainable. Here, we delve into the essential Java coding best practices that every developer should embrace to write high-quality, professional-grade code.

1. Follow the Java Naming Conventions

One of the foundational aspects of writing clean code in Java is adhering to its naming conventions. These conventions make the code more understandable and maintainable.

  • Class names should be nouns, in UpperCamelCase.
  • Method names should be verbs, in lowerCamelCase.
  • Variable names should be in lowerCamelCase.
  • Constants should be in UPPER_SNAKE_CASE.

For example:

public class EmployeeRecord {
    private int employeeId;
    private String employeeName;
    
    public void setEmployeeName(String name) {
        this.employeeName = name;
    }
}

2. Use Meaningful Names

Choosing meaningful and descriptive names for variables, methods, and classes makes the code self-documenting. This practice reduces the need for excessive comments and makes the code easier to understand.

Instead of:

int d; // number of days

Use:

int numberOfDays;

3. Keep Methods Small and Focused

Each method should perform a single task or functionality. Keeping methods small and focused enhances readability and reusability. A good rule of thumb is the Single Responsibility Principle (SRP).

Example:

public void calculateAndPrintStatistics(List<Integer> numbers) {
    int sum = calculateSum(numbers);
    double average = calculateAverage(numbers, sum);
    printStatistics(sum, average);
}

private int calculateSum(List<Integer> numbers) {
    // Implementation
}

private double calculateAverage(List<Integer> numbers, int sum) {
    // Implementation
}

private void printStatistics(int sum, double average) {
    // Implementation
}

4. Avoid Hard-Coding Values

Hard-coding values in your code can make it inflexible and difficult to maintain. Instead, use constants or configuration files.

Instead of:

int maxRetryAttempts = 5;

Use:

public static final int MAX_RETRY_ATTEMPTS = 5;

5. Comment Wisely

Comments should be used to explain the why behind your code, not the what. Well-written code should be self-explanatory. Comments should be clear, concise, and relevant.

Example:

// Calculate the average by dividing the sum by the number of elements
double average = sum / numberOfElements;

6. Use Proper Exception Handling

Proper exception handling ensures that your code is robust and can handle unexpected situations gracefully. Avoid catching generic exceptions and always clean up resources in a finally block or use try-with-resources statement.

Instead of:

try {
    // code that might throw an exception
} catch (Exception e) {
    // handle exception
}

Use:

try {
    // code that might throw an IOException
} catch (IOException e) {
    // handle IOException
} finally {
    // cleanup code
}

7. Adhere to SOLID Principles

Following the SOLID principles of object-oriented design makes your code more modular, flexible, and maintainable.

  • Single Responsibility Principle: A class should have one, and only one, reason to change.
  • Open/Closed Principle: Classes should be open for extension, but closed for modification.
  • Liskov Substitution Principle: Subtypes must be substitutable for their base types.
  • Interface Segregation Principle: No client should be forced to depend on methods it does not use.
  • Dependency Inversion Principle: Depend on abstractions, not on concretions.

8. Optimize Performance

While writing code, it’s crucial to consider its performance implications. Use appropriate data structures, avoid unnecessary computations, and be mindful of memory usage.

Example:

List<Integer> numbers = new ArrayList<>(Arrays.asList(1, 2, 3, 4, 5));

// Use a StringBuilder for concatenation in a loop
StringBuilder sb = new StringBuilder();
for (Integer number : numbers) {
    sb.append(number);
}
String result = sb.toString();

9. Write Unit Tests

Writing unit tests for your code ensures that it works as expected and helps catch bugs early. Use frameworks like JUnit to write and manage your tests.

Example:

import static org.junit.Assert.assertEquals;
import org.junit.Test;

public class CalculatorTest {

    @Test
    public void testAddition() {
        Calculator calc = new Calculator();
        assertEquals(5, calc.add(2, 3));
    }
}

10. Leverage Java’s Standard Libraries

Java provides a rich set of standard libraries. Reusing these libraries saves time and ensures that your code benefits from well-tested, efficient implementations.

Example:

import java.util.HashMap;
import java.util.Map;

public class Example {
    public static void main(String[] args) {
        Map<String, Integer> map = new HashMap<>();
        map.put("key1", 1);
        map.put("key2", 2);
    }
}

11. Use Version Control

Using a version control system (VCS) like Git helps you track changes, collaborate with others, and maintain a history of your codebase. Regular commits with clear messages are crucial.

Example commit message:

git commit -m "Refactored calculateSum method to improve readability"

12. Document Your Code

Although good code should be self-explanatory, having external documentation helps provide a higher-level understanding of the project. Tools like Javadoc can be used to generate API documentation.

Example:

/**
 * Calculates the sum of a list of integers.
 * 
 * @param numbers the list of integers
 * @return the sum of the numbers
 */
public int calculateSum(List<Integer> numbers) {
    // Implementation
}

13. Code Reviews and Pair Programming

Engaging in code reviews and pair programming promotes knowledge sharing, improves code quality, and reduces the likelihood of bugs. Regularly reviewing code with peers helps maintain coding standards.

14. Keep Learning and Stay Updated

The tech industry is constantly evolving, and so are Java and its ecosystem. Regularly update your skills by reading blogs, attending conferences, and experimenting with new tools and techniques.

15. Use Dependency Injection

Dependency Injection (DI) is a design pattern that helps in creating more decoupled and testable code. It allows an object’s dependencies to be injected at runtime rather than being hard-coded within the object.

Example using Spring Framework:

@Service
public class UserService {
    private final UserRepository userRepository;

    @Autowired
    public UserService(UserRepository userRepository) {
        this.userRepository = userRepository;
    }
}

16. Implement Logging

Effective logging is crucial for monitoring and debugging applications. Use a logging framework like Log4j, SLF4J, or java.util.logging to log important events, errors, and information.

Example:

import org.slf4j.Logger;
import org.slf4j.LoggerFactory;

public class Example {
    private static final Logger logger = LoggerFactory.getLogger(Example.class);

    public void performTask() {
        logger.info("Task started.");
        try {
            // perform task
        } catch (Exception e) {
            logger.error("An error occurred: ", e);
        }
    }
}

17. Handle Collections and Generics Properly

Using collections and generics effectively ensures type safety and reduces the risk of runtime errors. Prefer using generics over raw types.

Example:

List<String> strings = new ArrayList<>();
strings.add("Hello");

18. Manage Resources with Try-With-Resources

Java 7 introduced the try-with-resources statement, which simplifies the management of resources like file handles and database connections by ensuring they are closed automatically.

Example:

try (BufferedReader br = new BufferedReader(new FileReader("file.txt"))) {
    String line;
    while ((line = br.readLine()) != null) {
        System.out.println(line);
    }
} catch (IOException e) {
    e.printStackTrace();
}

19. Enforce Coding Standards with Static Analysis Tools

Static analysis tools like Checkstyle, PMD, and FindBugs can automatically check your code for adherence to coding standards and potential bugs. Integrating these tools into your build process helps maintain high code quality.

20. Optimize Memory Usage

Efficient memory management is crucial for application performance. Avoid memory leaks by properly managing object references and using weak references where appropriate.

Example:

Map<Key, Value> cache = new WeakHashMap<>();

21. Use Streams and Lambda Expressions

Java 8 introduced streams and lambda expressions, which provide a more functional approach to processing collections and other data sources. They make code more concise and readable.

Example:

List<String> names = Arrays.asList("Alice", "Bob", "Charlie");
names.stream()
     .filter(name -> name.startsWith("A"))
     .forEach(System.out::println);

22. Employ Design Patterns

Design patterns provide solutions to common software design problems and can improve the structure and maintainability of your code. Familiarize yourself with common patterns like Singleton, Factory, and Observer.

Example of Singleton Pattern:

public class Singleton {
    private static Singleton instance;

    private Singleton() {}

    public static Singleton getInstance() {
        if (instance == null) {
            instance = new Singleton();
        }
        return instance;
    }
}

23. Utilize Functional Interfaces and Streams

Functional interfaces and streams provide a powerful way to handle collections and other data sources with a functional programming approach.

Example:

List<String> names = Arrays.asList("John", "Jane", "Jack");
List<String> filteredNames = names.stream()
    .filter(name -> name.startsWith("J"))
    .collect(Collectors.toList());

24. Practice Code Refactoring

Regularly refactoring your code helps in improving its structure and readability without changing its functionality. Techniques like extracting methods, renaming variables, and breaking down large classes are beneficial.

25. Apply Security Best Practices

Security should be a primary concern in software development. Validate all user inputs, use prepared statements for database queries, and handle sensitive data securely.

Example:

String query = "SELECT * FROM users WHERE username = ?";
try (PreparedStatement stmt = connection.prepareStatement(query)) {
    stmt.setString(1, username);
    ResultSet rs = stmt.executeQuery();
    // process result set
}

26. Leverage Concurrency Utilities

Java provides a rich set of concurrency utilities in the java.util.concurrent package, making it easier to write concurrent programs. Use these utilities to manage threads and synchronization effectively.

Example:

ExecutorService executor = Executors.newFixedThreadPool(10);
executor.submit(() -> {
    // task implementation
});
executor.shutdown();

27. Use Optional for Null Safety

Java 8 introduced the Optional class to handle null values more gracefully, avoiding the risk of NullPointerException.

Example:

Optional<String> optional = Optional.ofNullable(getValue());
optional.ifPresent(value -> System.out.println("Value is: " + value));

28. Adopt a Consistent Code Style

Consistency in code style makes the codebase easier to read and maintain. Use tools like Prettier or Checkstyle to enforce code style rules across your project.

29. Regularly Update Dependencies

Keeping your dependencies up to date ensures you benefit from the latest features, performance improvements, and security patches. Use tools like Maven or Gradle for dependency management.

30. Write Clear and Concise Documentation

Good documentation provides a clear understanding of the system and its components. Use Markdown for README files and Javadoc for API documentation.

31. Avoid Premature Optimization

While performance is important, optimizing too early can lead to complex code that is hard to maintain. Focus first on writing clear, correct, and simple code. Profile and optimize only the bottlenecks that are proven to impact performance.

32. Use Immutable Objects

Immutable objects are objects whose state cannot be changed after they are created. They are simpler to design, implement, and use, making your code more robust and thread-safe.

Example:

public final class ImmutableClass {
    private final int value;

    public ImmutableClass(int value) {
        this.value = value;
    }

    public int getValue() {
        return value;
    }
}

33. Implement Builder Pattern for Complex Objects

For creating objects with multiple optional parameters, use the Builder pattern. It provides a clear and readable way to construct objects.

Example:

public class User {
    private final String firstName;
    private final String lastName;
    private final int age;

    private User(UserBuilder builder) {
        this.firstName = builder.firstName;
        this.lastName = builder.lastName;
        this.age = builder.age;
    }

    public static class UserBuilder {
        private String firstName;
        private String lastName;
        private int age;

        public UserBuilder setFirstName(String firstName) {
            this.firstName = firstName;
            return this;
        }

        public UserBuilder setLastName(String lastName) {
            this.lastName = lastName;
            return this;
        }

        public UserBuilder setAge(int age) {
            this.age = age;
            return this;
        }

        public User build() {
            return new User(this);
        }
    }
}

34. Prefer Composition Over Inheritance

Composition offers better flexibility and reuse compared to inheritance. It allows you to build complex functionality by composing objects with simpler, well-defined responsibilities.

Example:

public class Engine {
    public void start() {
        System.out.println("Engine started.");
    }
}

public class Car {
    private Engine engine;

    public Car(Engine engine) {
        this.engine = engine;
    }

    public void start() {
        engine.start();
        System.out.println("Car started.");
    }
}

35. Use Annotations for Metadata

Annotations provide a way to add metadata to your Java code. They are useful for various purposes such as marking methods for testing, defining constraints, or configuring dependency injection.

Example:

public class Example {
    @Deprecated
    public void oldMethod() {
        // implementation
    }

    @Override
    public String toString() {
        return "Example";
    }
}

36. Implement the DRY Principle

The DRY (Don’t Repeat Yourself) principle aims to reduce the repetition of code patterns. It promotes the use of abstractions and modular design to improve maintainability.

37. Use the Correct Data Structures

Choosing the right data structure for your use case can significantly impact the performance and readability of your code. Understand the trade-offs between different collections like lists, sets, and maps.

38. Conduct Regular Code Reviews

Regular code reviews ensure adherence to coding standards and best practices. They facilitate knowledge sharing and help catch potential issues early.

39. Integrate Continuous Integration/Continuous Deployment (CI/CD)

Using CI/CD tools like Jenkins, GitLab CI, or Travis CI helps automate the build, test, and deployment processes. This practice ensures that changes are continuously integrated and deployed without manual intervention.

40. Profile and Monitor Your Applications

Profiling tools like VisualVM, JProfiler, and YourKit can help you analyze the performance of your Java applications. Monitoring tools like Prometheus and Grafana provide insights into application metrics and health.

41. Utilize Advanced Java Features

Java provides many advanced features like modules, records, and sealed classes (introduced in newer versions). Understanding and leveraging these features can make your code more robust and expressive.

42. Handle Concurrency with Care

Concurrency issues can be subtle and difficult to debug. Use synchronization primitives like synchronized, Lock, ConcurrentHashMap, and thread-safe collections to manage concurrency effectively.

Example:

public class Counter {
    private int count = 0;

    public synchronized void increment() {
        count++;
    }

    public synchronized int getCount() {
        return count;
    }
}

43. Optimize Garbage Collection

Understanding and optimizing the garbage collection process can improve the performance of your Java applications. Use tools like GC logs and VisualVM to monitor and tune the garbage collector.

44. Practice Clean Code Principles

Follow the principles outlined by Robert C. Martin in his book Clean Code. Writing clean code involves practices like meaningful naming, small functions, minimal dependencies, and avoiding magic numbers.

45. Stay Updated with Java Ecosystem

The Java ecosystem is continuously evolving. Stay updated with the latest developments, libraries, frameworks, and tools by following blogs, attending conferences, and participating in online communities.

46. Embrace Test-Driven Development (TDD)

Test-Driven Development is a practice where you write tests before writing the actual code. This approach ensures that your code meets the requirements and is testable from the start.

Example:

import static org.junit.Assert.assertEquals;
import org.junit.Test;

public class CalculatorTest {

    @Test
    public void testAdd() {
        Calculator calculator = new Calculator();
        assertEquals(5, calculator.add(2, 3));
    }
}

47. Use Dependency Management Tools

Tools like Maven and Gradle help manage project dependencies, build automation, and project structure. They simplify the process of adding libraries and ensure that you are using compatible versions.

Example (Maven POM file):

<dependency>
    <groupId>org.springframework</groupId>
    <artifactId>spring-core</artifactId>
    <version>5.3.8</version>
</dependency>

48. Ensure Code Readability

Readable code is easier to maintain and understand. Follow conventions, keep functions small, and structure your code logically. Code should be self-explanatory, reducing the need for excessive comments.

49. Engage in Continuous Learning

The technology landscape is constantly changing. Engage in continuous learning through online courses, certifications, and hands-on projects to keep your skills up to date.

50. Build and Use Reusable Components

Creating reusable components reduces redundancy and promotes code reuse. Encapsulate common functionality in libraries or modules that can be easily integrated into different projects.

Conclusion

Adhering to best practices in Java coding is fundamental for writing clean, efficient, and maintainable code. By following the guidelines outlined above, developers can ensure that their code is not only functional but also robust and scalable. From naming conventions and meaningful names to leveraging advanced Java features and embracing continuous learning, each best practice plays a critical role in the software development lifecycle.

Writing high-quality Java code requires a commitment to excellence, a thorough understanding of the language, and a dedication to continuous improvement. By implementing these best practices, developers can build applications that are easier to understand, debug, and maintain, ultimately leading to more successful projects and happier end-users.

Top Microservices Interview Questions and Answers

Top Microservices Interview Questions and Answers

Microservices architecture has become a popular choice for building scalable and maintainable applications. If you’re preparing for an interview in this field, you’ll need to be well-versed in both theoretical concepts and practical applications. In this blog post, we’ll cover some of the most common Top Microservices Interview Questions and Answers, complete with detailed answers and examples.

Top Microservices Interview Questions and Answers:

1. What are Microservices?

Answer: Microservices are an architectural style that structures an application as a collection of small, loosely coupled, and independently deployable services. Each service corresponds to a specific business capability and communicates with other services through APIs.

Example: Consider an e-commerce application where different microservices handle user authentication, product catalog, shopping cart, and payment processing. Each of these services can be developed, deployed, and scaled independently, allowing for greater flexibility and easier maintenance.

2. What are the main benefits of using Microservices?

Answer: The main benefits of microservices include:

  • Scalability: Each service can be scaled independently based on its own load and performance requirements.
  • Flexibility: Different services can be built using different technologies and programming languages best suited to their tasks.
  • Resilience: Failure in one service doesn’t necessarily affect the entire system, improving overall system reliability.
  • Deployment: Independent deployment of services enables continuous delivery and faster release cycles.

Example: In a microservices-based e-commerce system, the payment service might experience higher load than the product catalog service. Scaling the payment service independently ensures that the entire system remains responsive and stable.

3. How do you handle communication between Microservices?

Answer: Microservices communicate through various methods, including:

  • HTTP/REST APIs: Commonly used for synchronous communication. Services expose RESTful endpoints that other services can call.
  • Message Queues: For asynchronous communication. Systems like RabbitMQ or Kafka are used to pass messages between services without direct coupling.
  • gRPC: A high-performance RPC framework that uses HTTP/2 for communication, suitable for low-latency and high-throughput scenarios.

Example: In a microservices-based application, the user service might expose a REST API to retrieve user information, while the order service might use a message queue to send order events to the inventory service for updating stock levels.

4. What are some common challenges with Microservices?

Answer: Common challenges include:

  • Complexity: Managing and orchestrating multiple services increases system complexity.
  • Data Management: Handling distributed data and ensuring consistency across services can be challenging.
  • Latency: Network communication between services can introduce latency compared to in-process calls.
  • Deployment: Coordinating the deployment of multiple services requires robust DevOps practices and tooling.

Example: In a microservices architecture, ensuring that all services remain in sync and handle eventual consistency can be difficult, especially when dealing with distributed databases and transactions.

5. How do you ensure data consistency in a Microservices architecture?

Answer: Data consistency in a microservices architecture can be managed using:

  • Eventual Consistency: Accepting that data will eventually become consistent across services. Techniques like event sourcing and CQRS (Command Query Responsibility Segregation) are used.
  • Distributed Transactions: Using tools like the Saga pattern to manage transactions across multiple services. This involves coordinating a series of local transactions and compensating for failures.
  • API Contracts: Defining clear API contracts and data validation rules to ensure consistency at the service boundaries.

Example: In an e-commerce system, when a customer places an order, the order service updates the order status, the inventory service adjusts stock levels, and the notification service sends a confirmation email. Using event-driven communication ensures that each service updates its data independently and eventually all services reflect the same state.

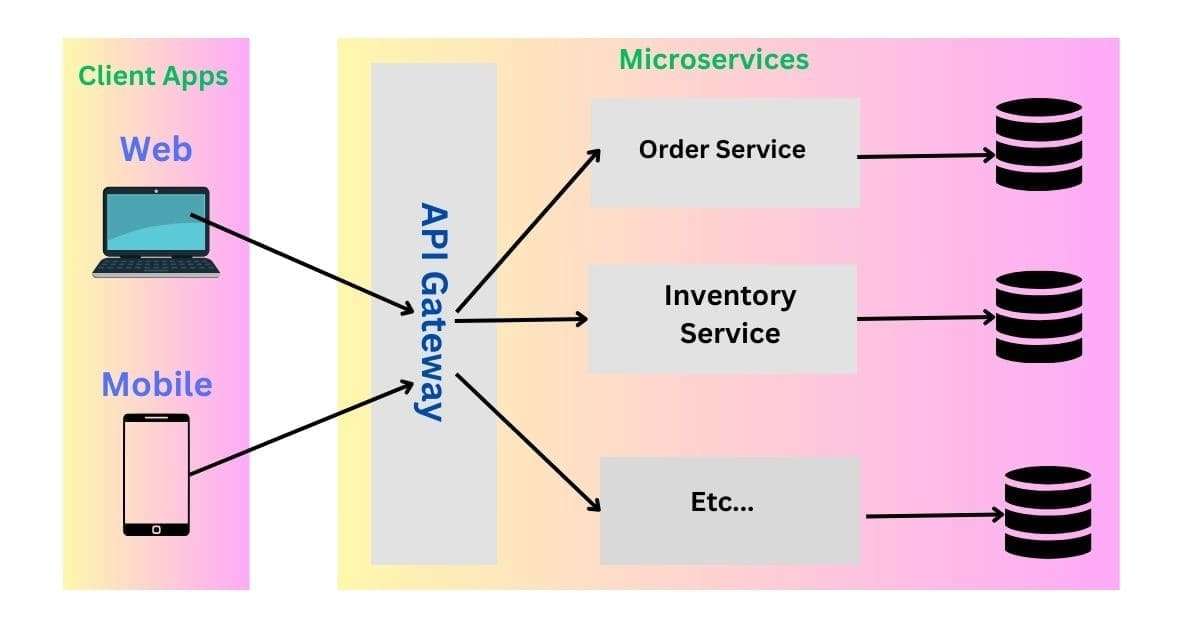
6. What is the role of API Gateway in Microservices?

Answer: An API Gateway acts as a single entry point for all client requests and manages routing to the appropriate microservice. It handles various cross-cutting concerns such as:

  • Load Balancing: Distributes incoming requests across multiple instances of services.
  • Authentication and Authorization: Centralizes security management and enforces policies.
  • Request Routing: Directs requests to the correct microservice based on the URL or other criteria.
  • Aggregation: Combines responses from multiple services into a single response for the client.

Example: In a microservices-based application, an API Gateway might route requests to different services like user management, order processing, and payment handling. It can also provide caching, rate limiting, and logging.

7. How do you handle versioning of Microservices APIs?

Answer: API versioning can be handled through several strategies:

  • URL Versioning: Including the version number in the URL (e.g., /api/v1/users).
  • Header Versioning: Using HTTP headers to specify the API version.
  • Query Parameter Versioning: Passing the version number as a query parameter (e.g., /api/users?version=1).

Example: Suppose you have a user service with a /users endpoint. To support new features without breaking existing clients, you might introduce a new version of the API as /users/v2, while the old version remains available at /users/v1.

8. What are the best practices for testing Microservices?

Answer: Best practices for testing microservices include:

  • Unit Testing: Testing individual services in isolation.
  • Integration Testing: Testing the interaction between multiple services and verifying the data flow.
  • Contract Testing: Ensuring that services adhere to defined API contracts using tools like Pact.
  • End-to-End Testing: Testing the complete system to ensure that all services work together as expected.

Example: For an e-commerce application, unit tests might cover individual services like the order service, while integration tests would check interactions between the order service and payment service. Contract tests ensure that the order service correctly implements its API contract, and end-to-end tests verify that the complete order process functions correctly.

9. How do you monitor and log Microservices?

Answer: Monitoring and logging in a microservices architecture involve:

  • Centralized Logging: Aggregating logs from all services into a central system using tools like ELK Stack (Elasticsearch, Logstash, Kibana) or Fluentd.
  • Distributed Tracing: Tracking requests as they pass through multiple services using tools like Jaeger or Zipkin.
  • Metrics Collection: Collecting performance metrics and health indicators using tools like Prometheus and Grafana.

Example: In an e-commerce system, centralized logging can help you trace an error occurring in the payment service by aggregating logs from all related services. Distributed tracing can show how a request flows from the user service through the order service to the payment service, helping identify bottlenecks or failures.

10. What is the difference between Monolithic and Microservices architectures?

Answer: The key differences are:

  • Monolithic Architecture: A single, unified application where all components are tightly coupled and run as a single process. Changes and deployments affect the entire application.
  • Microservices Architecture: An application is divided into small, independent services, each responsible for a specific functionality. Services are loosely coupled, allowing independent deployment and scaling.

Example: In a monolithic e-commerce application, all features (user management, product catalog, etc.) are part of a single codebase. In a microservices architecture, these features are separated into individual services that can be developed, deployed, and scaled independently.

11. How do you handle inter-service communication in Microservices?

Answer: Inter-service communication in microservices can be handled using several methods, each with its benefits and trade-offs:

  • HTTP/REST: This is a common choice for synchronous communication. Services expose RESTful APIs that other services call directly. It is simple and widely supported but can introduce latency and be subject to network issues.Example: The order service may use a REST API to fetch user details from the user service by sending an HTTP GET request to /users/{userId}.
  • gRPC: gRPC is a high-performance RPC framework using HTTP/2. It supports synchronous and asynchronous communication with strong typing and code generation, making it suitable for low-latency scenarios.Example: A product service might use gRPC to communicate with the inventory service to check stock levels efficiently.
  • Message Queues: For asynchronous communication, message brokers like RabbitMQ, Kafka, or ActiveMQ allow services to publish and consume messages. This decouples services and helps with load balancing and resilience.Example: The order service could publish an “order placed” event to a message queue, which the inventory service consumes to update stock levels.
  • Event Streams: Systems like Kafka allow services to publish and subscribe to event streams. This is useful for event-driven architectures where services react to changes or events.Example: The shipping service might listen to events from Kafka to start processing orders when a “payment completed” event is received.

12. How do you handle versioning of Microservices APIs?

Answer: API versioning in microservices ensures backward compatibility and smooth transitions between versions. Common strategies include:

  • URL Versioning: Including the version number in the URL path (e.g., /api/v1/users). This is straightforward and easy to understand but can lead to version proliferation.Example: /api/v1/orders vs. /api/v2/orders
  • Header Versioning: Using custom HTTP headers to specify the API version (e.g., Accept: application/vnd.myapi.v1+json). This keeps URLs clean but requires clients to handle headers correctly.Example: Clients send requests with headers like X-API-Version: 2.
  • Query Parameter Versioning: Including the version in the query parameters (e.g., /api/users?version=1). It’s less common but can be useful in some scenarios.Example: /api/orders?version=1
  • Content Negotiation: Using the Accept header to negotiate the API version based on media type.Example: Accept: application/vnd.myapi.v1+json

13. What is the role of an API Gateway in Microservices?

Answer: An API Gateway serves as a single entry point for all client requests and offers several critical functions:

  • Routing: Directs requests to the appropriate microservice based on URL or other criteria.Example: Routing /api/users requests to the user service and /api/orders requests to the order service.
  • Load Balancing: Distributes incoming requests across multiple instances of a service to ensure even load distribution.
  • Authentication and Authorization: Handles security concerns by validating tokens or credentials before forwarding requests to microservices.
  • Caching: Caches responses to reduce latency and load on backend services.
  • Logging and Monitoring: Aggregates logs and metrics from various services to provide visibility into system performance and health.

14. What are the best practices for designing Microservices?

Answer: Best practices for designing microservices include:

  • Single Responsibility Principle: Each service should focus on a single business capability or domain.Example: A payment service should only handle payment-related tasks and not include order management.
  • Decentralized Data Management: Each service manages its own data store to avoid tight coupling and facilitate scaling.
  • API Contracts: Define clear and versioned API contracts to ensure that services interact correctly.
  • Resilience: Implement retry logic, circuit breakers, and failover mechanisms to handle service failures gracefully.
  • Scalability: Design services to be stateless where possible, allowing them to scale horizontally.

15. How do you manage configuration in a Microservices environment?

Answer: Managing configuration in a microservices environment involves:

  • Centralized Configuration: Use tools like Spring Cloud Config or Consul to manage configurations centrally. This ensures consistency across services and simplifies updates.Example: Storing database connection strings, API keys, and feature flags in a central configuration server.
  • Environment-Specific Configuration: Separate configurations for different environments (development, staging, production) and load them dynamically based on the environment.Example: Using environment variables or configuration profiles to load specific settings for each environment.
  • Service Discovery Integration: Integrate configuration management with service discovery to dynamically adapt to changing service locations and instances.

16. What is the Saga pattern, and how does it work?

Answer: The Saga pattern is a pattern for managing long-running and distributed transactions across microservices. It involves:

  • Sequence of Transactions: Breaking a large transaction into a sequence of smaller, isolated transactions, each managed by different services.
  • Compensating Transactions: Implementing compensating actions to undo the effects of a transaction if subsequent transactions fail.

Example: In an e-commerce system, a saga might manage an order placement by performing payment processing, updating inventory, and sending a confirmation email. If payment fails, compensating transactions roll back the inventory update.

17. How do you handle service orchestration and choreography?

Answer:

  • Service Orchestration: A central service or orchestrator coordinates and manages the interactions between services. This can be achieved using an orchestration engine or workflow management system.Example: Using a tool like Apache Airflow to coordinate a complex workflow that involves multiple microservices.
  • Service Choreography: Each service knows how to interact with others and manages its own interactions. Services communicate through events or messages and react to changes in the system.Example: An order service emitting events to a Kafka topic, which are consumed by inventory and shipping services to perform their tasks.

18. How do you ensure data consistency in Microservices?

Answer: Ensuring data consistency in microservices involves:

  • Eventual Consistency: Accepting that data may not be immediately consistent across services but will eventually converge. Implement techniques like CQRS (Command Query Responsibility Segregation) and event sourcing.Example: Using a message broker to propagate changes and ensure that all services eventually have the same data.
  • Distributed Transactions: Using patterns like the Saga pattern or Two-Phase Commit (2PC) for managing transactions across multiple services.
  • Data Replication: Replicating data across services to maintain consistency, though this can be complex and requires careful management.

19. What are some common tools and technologies used in Microservices architecture?

Answer: Common tools and technologies in microservices architecture include:

  • Service Discovery: Consul, Eureka, Zookeeper
  • API Gateway: Kong, NGINX, AWS API Gateway
  • Message Brokers: Kafka, RabbitMQ, ActiveMQ
  • Configuration Management: Spring Cloud Config, Consul, Vault
  • Monitoring and Logging: Prometheus, Grafana, ELK Stack (Elasticsearch, Logstash, Kibana)
  • Containers and Orchestration: Docker, Kubernetes, Docker Swarm

Example: Deploying microservices in Docker containers and using Kubernetes for orchestration and management.

20. How do you handle security concerns in a Microservices architecture?

Answer: Handling security in a microservices architecture involves:

  • Authentication: Implementing centralized authentication using OAuth2 or OpenID Connect. Each service should verify tokens or credentials provided by the API Gateway.
  • Authorization: Ensuring that users or services have appropriate permissions for accessing resources.
  • Data Encryption: Encrypting data in transit and at rest to protect sensitive information. Use TLS/SSL for data in transit and encryption algorithms for data at rest.
  • API Security: Securing APIs using rate limiting, IP whitelisting, and input validation to prevent abuse and attacks.

Example: Using OAuth2 for securing APIs and TLS for encrypting communication between services.

21. What is the Circuit Breaker pattern, and why is it important?

Answer: The Circuit Breaker pattern prevents a service failure from impacting other services by stopping requests to a failing service and allowing it time to recover. It operates in three states:

  • Closed: Requests are allowed to pass through, and the circuit monitors for failures.
  • Open: Requests are blocked to avoid further strain on the failing service.
  • Half-Open: A limited number of requests are allowed to pass through to test if the service has recovered.

Example: If a payment service is down, a circuit breaker prevents further requests to this service, allowing it to recover and preventing cascading failures in the order processing and inventory services.

22. What is the Strangler Fig pattern?

Answer: The Strangler Fig pattern is a migration technique from a monolithic application to a microservices architecture. It involves incrementally replacing parts of the monolith with microservices, while keeping both systems running until the migration is complete.

Example: In transitioning from a monolithic e-commerce application, you might start by creating a separate user management microservice. Gradually, extract other functionalities like product catalog and order management, updating the monolithic application to route requests to these new services.

23. How do you handle security in a Microservices architecture?

Answer: Security in microservices involves several strategies:

  • Authentication: Use mechanisms like OAuth2 or JWT to authenticate users or services.
  • Authorization: Ensure users or services have the correct permissions to access specific resources.
  • Data Encryption: Encrypt data both in transit using TLS/SSL and at rest to protect sensitive information.
  • Service-to-Service Security: Use mutual TLS or API keys for secure communication between services.

Example: An e-commerce system might use OAuth2 for user authentication, JWT for transmitting user identity, and HTTPS for securing API calls.

24. What is the difference between synchronous and asynchronous communication in Microservices?

Answer:

  • Synchronous Communication: The calling service waits for a response from the called service before proceeding. Commonly implemented with HTTP/REST or gRPC.Example: The order service synchronously calls the payment service to process a payment and waits for confirmation before proceeding.
  • Asynchronous Communication: The calling service sends a message or event and continues without waiting for a response. Often implemented with message queues or event streams.Example: The order service publishes an event to a message queue, which the inventory and shipping services process independently.

25. What are some strategies for handling distributed transactions in Microservices?

Answer: Strategies for managing distributed transactions include:

  • Saga Pattern: A sequence of local transactions coordinated to ensure consistency. If a transaction fails, compensating transactions are triggered to undo the effects.Example: When processing an order, a saga might involve payment, inventory update, and shipping. If payment fails, compensating actions reverse the inventory and order changes.
  • Two-Phase Commit (2PC): A protocol where a coordinator ensures all participating services agree on the transaction outcome. Less commonly used due to complexity and performance issues.

26. How do you handle service discovery in Microservices?

Answer: Service discovery helps locate service instances dynamically and involves:

  • Service Registries: Tools like Consul, Eureka, or Zookeeper maintain a registry of service instances and their addresses.Example: An API Gateway might query a Consul registry to route requests to the appropriate service instance.
  • DNS-Based Discovery: Uses DNS to resolve service names to IP addresses, with updates as services scale or move.

27. How do you manage configuration in Microservices?

Answer: Configuration management involves:

  • Centralized Configuration: Tools like Spring Cloud Config or HashiCorp Consul manage configurations centrally for consistency and easier updates.Example: An application might use Spring Cloud Config to store and distribute configuration properties for different environments.
  • Environment-Specific Configuration: Maintain separate configurations for development, staging, and production environments.

28. What is API Gateway and what role does it play in Microservices?

Answer: An API Gateway provides a unified entry point for client requests and performs several functions:

  • Routing: Directs requests to the appropriate microservice.
  • Aggregation: Combines responses from multiple services into a single response.
  • Cross-Cutting Concerns: Handles security, rate limiting, caching, and logging.

Example: An API Gateway in an e-commerce platform might route requests for user, product, and order information to the respective microservices and provide a consolidated API for clients.

29. How do you ensure high availability and fault tolerance in Microservices?

Answer: Strategies for ensuring high availability and fault tolerance include:

  • Load Balancing: Distribute incoming requests across multiple service instances using tools like NGINX or HAProxy.
  • Failover: Automatically switch to backup instances or services in case of failure.
  • Redundancy: Deploy multiple instances of services across different servers or data centers.
  • Health Checks: Regularly monitor the health of services and take corrective actions if a service is unhealthy.

Example: Deploying multiple instances of each microservice behind a load balancer ensures that if one instance fails, traffic is routed to healthy instances, maintaining service availability.

Conclusion

Understanding these additional microservices interview questions and answers will further prepare you for discussions on designing, implementing, and maintaining microservices architectures. Mastering these concepts demonstrates your ability to handle complex, distributed systems and ensures you’re ready for a variety of scenarios in a microservices environment.

Good luck with your interview preparation!

Streams in Java 8 with Examples

Streams In Java 8, the Streams concept was introduced to process objects of collections efficiently. It provides a streamlined way to perform operations on collections such as filtering, mapping, and aggregating data.

Differences between java.util.streams and java.io streams

The java.util.streams are designed for processing objects from collections, representing a stream of objects. On the other hand, java.io streams are used for handling binary and character data in files, representing streams of binary or character data. Therefore, java.io streams and java.util streams serve different purposes.

Difference between Collection and Stream

A Collection is used to represent a group of individual objects as a single entity. On the other hand, a Stream is used to process a group of objects from a collection sequentially.

To convert a Collection into a Stream, you can use the stream() method introduced in Java 8:

Stream<T> stream = collection.stream();

Once you have a Stream, you can process its elements in two phases:

  1. Configuration: Configuring the Stream pipeline using operations like filtering and mapping.Filtering: Use the filter() method to filter elements based on a boolean condition:
Stream<T> filteredStream = stream.filter(element -> elementCondition);

Mapping: Use the map() method to transform elements into another form:

Stream<R> mappedStream = stream.map(element -> mapFunction);

2. Processing: Performing terminal operations to produce a result or side-effect.

  • Collecting: Use the collect() method to collect Stream elements into a Collection:
List<T> collectedList = stream.collect(Collectors.toList());

Counting: Use the count() method to count the number of elements in the Stream:

long count = stream.count();

Sorting: Use the sorted() method to sort elements in the Stream:

List<T> sortedList = stream.sorted().collect(Collectors.toList());

Min and Max: Use min() and max() methods to find the minimum and maximum values:

Optional<T> min = stream.min(comparator);
Optional<T> max = stream.max(comparator);

Iteration: Use the forEach() method to iterate over each element in the Stream:

stream.forEach(element -> System.out.println(element));

Array Conversion: Use the toArray() method to convert Stream elements into an array:

T[] array = stream.toArray(size -> new T[size]);

Stream Creation: Use the Stream.of() method to create a Stream from specific values or arrays:

Stream<Integer> intStream = Stream.of(1, 2, 3, 4, 5);

Java Stream API Example

These examples demonstrate the basic operations and benefits of using Streams in Java 8 for efficient data processing.

Example with Filtering and Mapping

Consider filtering even numbers from a list using Streams:

List<Integer> numbers = Arrays.asList(1, 2, 3, 4, 5, 6, 7, 8, 9, 10);
List<Integer> evenNumbers = numbers.stream()
                                   .filter(num -> num % 2 == 0)
                                   .collect(Collectors.toList());
System.out.println("Even numbers: " + evenNumbers);

Example with Mapping

Transforming strings to uppercase using Streams:

List<String> names = Arrays.asList("John", "Jane", "Doe", "Alice");
List<String> upperCaseNames = names.stream()
                                  .map(name -> name.toUpperCase())
                                  .collect(Collectors.toList());
System.out.println("Upper case names: " + upperCaseNames);

These examples illustrate how Streams facilitate concise and efficient data processing in Java 8.

Additional Examples

Example with collect() Method

Collecting only even numbers from a list without Streams:

import java.util.*;

public class Test {
    public static void main(String[] args) {
        ArrayList<Integer> list = new ArrayList<>();
        for (int i = 0; i <= 10; i++) {
            list.add(i);
        }
        System.out.println("Original list: " + list);
        
        ArrayList<Integer> evenNumbers = new ArrayList<>();
        for (Integer num : list) {
            if (num % 2 == 0) {
                evenNumbers.add(num);
            }
        }
        System.out.println("Even numbers without Streams: " + evenNumbers);
    }
}

Collecting even numbers using Streams:

import java.util.*;
import java.util.stream.*;

public class Test {
    public static void main(String[] args) {
        ArrayList<Integer> list = new ArrayList<>();
        for (int i = 0; i <= 10; i++) {
            list.add(i);
        }
        System.out.println("Original list: " + list);
        
        List<Integer> evenNumbers = list.stream()
                                       .filter(num -> num % 2 == 0)
                                       .collect(Collectors.toList());
        System.out.println("Even numbers with Streams: " + evenNumbers);
    }
}

These updated examples showcase both traditional and streamlined approaches to handling collections in Java, emphasizing the efficiency and readability benefits of Java 8 Streams.

Streams in Java 8: Conclusion

The Java Stream API in Java 8 offers a powerful way to process collections with functional programming techniques. By simplifying complex operations like filtering and mapping, Streams enhance code clarity and efficiency. Embracing Streams empowers developers to write cleaner, more expressive Java code, making it a valuable tool for modern application development.

Click here

Functions in Java 8

Functions in Java 8 are same as predicates but offer the flexibility to return any type of result, limited to a single value per function invocation. Oracle introduced the Function interface in Java 8, housed within the java.util.function package, to facilitate the implementation of functions in Java applications. This interface contains a single method, apply().

Difference Between Predicate and Function

Predicate in java 8
  • Purpose: Used for conditional checks.
  • Parameters: Accepts one parameter representing the input argument type (Predicate<T>).
  • Return Type: Returns a boolean value.
  • Methods: Defines the test() method and includes default methods like and(), or(), and negate().
Functions in java 8
  • Purpose: Performs operations and returns a result.
  • Parameters: Accepts two type parameters: the input argument type and the return type (Function<T, R>).
  • Return Type: Can return any type of value.
  • Methods: Defines the apply() method for computation.

Example: Finding the Square of a Number

Let’s write a function to calculate the square of a given integer:

import java.util.function.*;

class Test {
    public static void main(String[] args) {
        Function<Integer, Integer> square = x -> x * x;
        System.out.println("Square of 5: " + square.apply(5));  // Output: Square of 5: 25
        System.out.println("Square of -3: " + square.apply(-3)); // Output: Square of -3: 9
    }
}

BiFunction

BiFunction is another useful functional interface in Java 8. It represents a function that accepts two arguments and produces a result. This is particularly useful when you need to combine or process two input values.

Example: Concatenating two strings

import java.util.function.*;

public class BiFunctionExample {
    public static void main(String[] args) {
        BiFunction<String, String, String> concat = (a, b) -> a + b;
        System.out.println(concat.apply("Hello, ", "world!"));  // Output: Hello, world!
    }
}

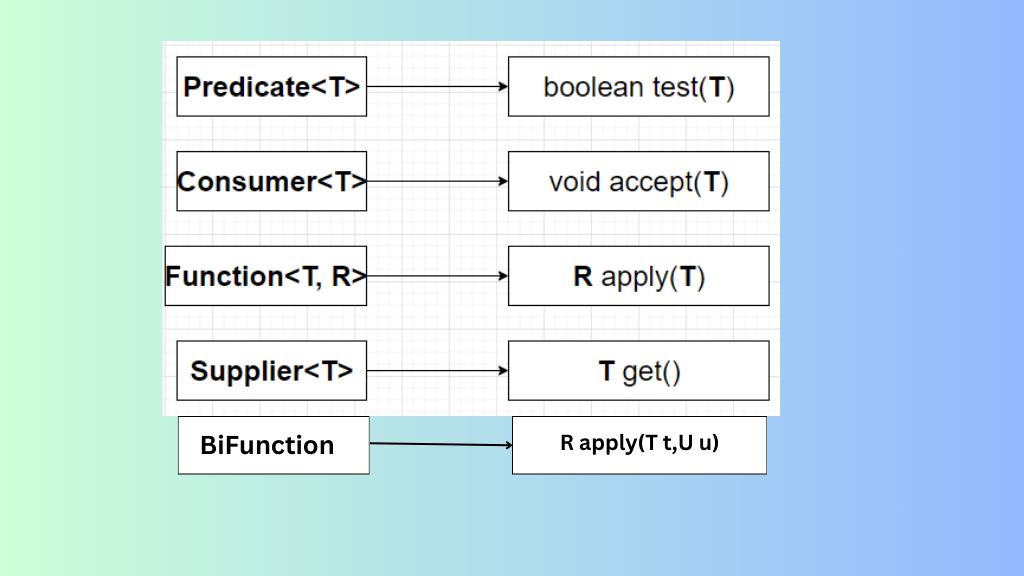
Summary of Java 8 Functional Interfaces

  1. Predicate<T>:
    • Purpose: Conditional checks.
    • Method: boolean test(T t)
    • Example: Checking if a number is positive.
  2. Function<T, R>:
    • Purpose: Transforming data.
    • Method: R apply(T t)
    • Example: Converting a string to its length.
  3. BiFunction<T, U, R>:
    • Purpose: Operations involving two inputs.
    • Method: R apply(T t, U u)
    • Example: Adding two integers.

Conclusion

Java 8 functional interfaces like Predicate, Function, and BiFunction offer powerful tools for developers to write more concise and readable code. Understanding the differences and appropriate use cases for each interface allows for better application design and implementation.

By using these interfaces, you can leverage the power of lambda expressions to create cleaner, more maintainable code. Whether you are performing simple conditional checks or more complex transformations, Java 8 has you covered.

Here is the link for the Java 8 quiz:
Click here

Related Articles:

Default Methods in Interfaces in Java 8 Examples

Default Methods in Interfaces in Java 8 with Examples

Until Java 1.7, inside an interface, we could only define public abstract methods and public static final variables. Every method present inside an interface is always public and abstract, whether we declare it or not. Similarly, every variable declared inside an interface is always public, static, and final, whether we declare it or not. With the introduction of default methods in interfaces, it is now possible to include method implementations within interfaces, providing more flexibility and enabling new design patterns.

From Java 1.8 onwards, in addition to these, we can declare default concrete methods inside interfaces, also known as defender methods.

We can declare a default method using the keyword default as follows:

default void m1() {
    System.out.println("Default Method");
}

Interface default methods are by default available to all implementation classes. Based on the requirement, an implementation class can use these default methods directly or override them.

Default Methods in Interfaces Example:

interface ExampleInterface {
    default void m1() {
        System.out.println("Default Method");
    }
}

class ExampleClass implements ExampleInterface {
    public static void main(String[] args) {
        ExampleClass example = new ExampleClass();
        example.m1();
    }
}

Default methods are also known as defender methods or virtual extension methods. The main advantage of default methods is that we can add new functionality to the interface without affecting the implementation classes (backward compatibility).

Note: We can’t override Object class methods as default methods inside an interface; otherwise, we get a compile-time error.

Example:

interface InvalidInterface {
    default int hashCode() {
        return 10;
    }
}

Compile-Time Error: The reason is that Object class methods are by default available to every Java class, so it’s not required to bring them through default methods.

Default Method vs Multiple Inheritance

Two interfaces can contain default methods with the same signature, which may cause an ambiguity problem (diamond problem) in the implementation class. To overcome this problem, we must override the default method in the implementation class; otherwise, we get a compile-time error.

Example 1:

interface Left {
    default void m1() {
        System.out.println("Left Default Method");
    }
}

interface Right {
    default void m1() {
        System.out.println("Right Default Method");
    }
}

class CombinedClass implements Left, Right {
    public void m1() {
        System.out.println("Combined Class Method");
    }

    public static void main(String[] args) {
        CombinedClass combined = new CombinedClass();
        combined.m1();
    }
}

Example 2:

class CombinedClass implements Left, Right {
    public void m1() {
        Left.super.m1();
    }

    public static void main(String[] args) {
        CombinedClass combined = new CombinedClass();
        combined.m1();
    }
}

Differences between Interface with Default Methods and Abstract Class

Even though we can add concrete methods in the form of default methods to the interface, it won’t be equal to an abstract class.

Interface with Default MethodsAbstract Class
Every variable is always public static final.May contain instance variables required by child classes.
Does not talk about the state of the object.Can talk about the state of the object.
Cannot declare constructors.Can declare constructors.
Cannot declare instance and static blocks.Can declare instance and static blocks.
Functional interface with default methods can refer to
lambda expressions.
Cannot refer to lambda expressions.
Cannot override Object class methods.Can override Object class methods.
Differences Between Interfaces with Default Methods and Abstract Classes in Java 8

Static Methods in Java 8 Inside Interface

From Java 1.8 onwards, we can write static methods inside an interface to define utility functions. Interface static methods are by default not available to the implementation classes. Therefore, we cannot call interface static methods using an implementation class reference. We should call interface static methods using the interface name.

interface UtilityInterface {
    public static void sum(int a, int b) {
        System.out.println("The Sum: " + (a + b));
    }
}

class UtilityClass implements UtilityInterface {
    public static void main(String[] args) {
        UtilityInterface.sum(10, 20);
    }
}

As interface static methods are not available to the implementation class, the concept of overriding is not applicable. We can define exactly the same method in the implementation class, but it’s not considered overriding.

Example 1:

interface StaticMethodInterface {
    public static void m1() {}
}

class StaticMethodClass implements StaticMethodInterface {
    public static void m1() {}
}

Example 2:

interface StaticMethodInterface {
    public static void m1() {}
}

class StaticMethodClass implements StaticMethodInterface {
    public void m1() {}
}

This is valid but not considered overriding.

Example 3:

class ParentClass {
    private void m1() {}
}

class ChildClass extends ParentClass {
    public void m1() {}
}

This is valid but not considered overriding.

From Java 1.8 onwards, we can write the main() method inside an interface, and hence we can run the interface directly from the command prompt.

Example:

interface MainMethodInterface {
    public static void main(String[] args) {
        System.out.println("Interface Main Method");
    }
}

At the command prompt:

javac MainMethodInterface.java
java MainMethodInterface

Differences between Interface with Default Methods and Abstract Class

In conclusion, while interfaces with default methods offer some of the functionalities of abstract classes, there are still distinct differences between the two, particularly in terms of handling state, constructors, and method overriding capabilities.

Static Methods Inside Interface

It is important to note that interface static methods cannot be overridden. Here is another example illustrating this concept:

Example:

interface CalculationInterface {
    public static void calculate(int a, int b) {
        System.out.println("Calculation: " + (a + b));
    }
}

class CalculationClass implements CalculationInterface {
    public static void calculate(int a, int b) {
        System.out.println("Calculation (class): " + (a * b));
    }

    public static void main(String[] args) {
        CalculationInterface.calculate(10, 20);  // Calls the interface static method
        CalculationClass.calculate(10, 20);      // Calls the class static method
    }
}

In this example, CalculationInterface.calculate() and CalculationClass.calculate() are two separate methods, and neither overrides the other.

Main Method in Interface

From Java 1.8 onwards, we can write a main() method inside an interface and run the interface directly from the command prompt. This feature can be useful for testing purposes.

Differences between Interface with Default Methods and Abstract Class (Continued)

In conclusion, while interfaces with default methods offer some of the functionalities of abstract classes, there are still distinct differences between the two, particularly in terms of handling state, constructors, and method overriding capabilities.

Static Methods Inside Interface (Continued)

It is important to note that interface static methods cannot be overridden. Here is another example illustrating this concept:

Example:

interface CalculationInterface {
    public static void calculate(int a, int b) {
        System.out.println("Calculation: " + (a + b));
    }
}

class CalculationClass implements CalculationInterface {
    public static void calculate(int a, int b) {
        System.out.println("Calculation (class): " + (a * b));
    }

    public static void main(String[] args) {
        CalculationInterface.calculate(10, 20);  // Calls the interface static method
        CalculationClass.calculate(10, 20);      // Calls the class static method
    }
}

In this example, CalculationInterface.calculate() and CalculationClass.calculate() are two separate methods, and neither overrides the other.

Main Method in Interface

From Java 1.8 onwards, we can write a main() method inside an interface and run the interface directly from the command prompt. This feature can be useful for testing purposes.

Example:

interface ExecutableInterface {
    public static void main(String[] args) {
        System.out.println("Interface Main Method");
    }
}

To compile and run the above code from the command prompt:

javac ExecutableInterface.java
java ExecutableInterface

Additional Points to Consider

  1. Multiple Inheritance in Interfaces:
    • Interfaces in Java support multiple inheritance, which means a class can implement multiple interfaces. This is particularly useful when you want to design a class that conforms to multiple contracts.
  2. Resolution of Default Methods:
    • If a class implements multiple interfaces with conflicting default methods, the compiler will throw an error, and the class must provide an implementation for the conflicting methods to resolve the ambiguity.

Example:

interface FirstInterface {
    default void show() {
        System.out.println("FirstInterface Default Method");
    }
}

interface SecondInterface {
    default void show() {
        System.out.println("SecondInterface Default Method");
    }
}

class ConflictResolutionClass implements FirstInterface, SecondInterface {
    @Override
    public void show() {
        System.out.println("Resolved Method");
    }

    public static void main(String[] args) {
        ConflictResolutionClass obj = new ConflictResolutionClass();
        obj.show();  // Calls the resolved method
    }
}

3. Functional Interfaces with Default Methods:

  • A functional interface is an interface with a single abstract method, but it can still have multiple default methods. This combination allows you to provide a default behavior while still adhering to the functional programming paradigm.
@FunctionalInterface
interface FunctionalExample {
    void singleAbstractMethod();

    default void defaultMethod1() {
        System.out.println("Default Method 1");
    }

    default void defaultMethod2() {
        System.out.println("Default Method 2");
    }
}

class FunctionalExampleClass implements FunctionalExample {
    @Override
    public void singleAbstractMethod() {
        System.out.println("Implemented Abstract Method");
    }

    public static void main(String[] args) {
        FunctionalExampleClass obj = new FunctionalExampleClass();
        obj.singleAbstractMethod();
        obj.defaultMethod1();
        obj.defaultMethod2();
    }
}

Summary

Java 8 introduced significant enhancements to interfaces, primarily through the addition of default and static methods. These changes allow for more flexible and backward-compatible API design. Here are the key points:

  • Default Methods: Provide concrete implementations in interfaces without affecting existing implementing classes.
  • Static Methods: Allow utility methods to be defined within interfaces.
  • Main Method in Interfaces: Enables testing and execution of interfaces directly.
  • Conflict Resolution: Requires explicit resolution of conflicting default methods from multiple interfaces.
  • Functional Interfaces: Can have default methods alongside a single abstract method, enhancing their utility in functional programming.

These features make Java interfaces more powerful and versatile, facilitating more robust and maintainable code design.

Here is the link for the Java 8 quiz:
Click here

Related Articles:

Java 21 Features

  1. Java 21 Features With Examples
  2. Java 21 Pattern Matching for Switch Example
  3. Java 21 Unnamed Patterns and Variables with Examples
  4. Java 21 Unnamed Classes and Instance Main Methods
  5. Java String Templates in Java 21: Practical Examples
  6. Sequenced Collections in Java 21

Record Classes in Java 17

Top 50 Spring Boot Interview Questions and Answers

Top 50 Spring Boot Questions and Answers

Spring Boot is a popular framework for building Java applications quickly and efficiently. Whether you’re just starting or have been working with it for a while, you might have some questions. This blog post covers the top 50 Spring Boot Interview questions and answers to help you understand Spring Boot better.

Top 50 Spring Boot Questions and Answers

1. What is Spring Boot, and why should I use it?

Spring Boot is a framework built on top of the Spring Framework. It simplifies the setup and development of new Spring applications by providing default configurations and embedded servers, reducing the need for boilerplate code.

2. How do I create a Spring Boot application?

You can create a Spring Boot application using Spring Initializr (start.spring.io), an IDE like IntelliJ IDEA, or by using Spring Boot CLI:

  1. Go to Spring Initializr.
  2. Select your project settings (e.g., Maven, Java, Spring Boot version).
  3. Add necessary dependencies.
  4. Generate the project and unzip it.
  5. Open the project in your IDE and start coding.

3. What is the main class in a Spring Boot application?

The main class in a Spring Boot application is the entry point and is annotated with @SpringBootApplication. It includes the main method which launches the application using SpringApplication.run().

@SpringBootApplication
public class MyApplication {
    public static void main(String[] args) {
        SpringApplication.run(MyApplication.class, args);
    }
}

4. What does the @SpringBootApplication annotation do?

@SpringBootApplication is a convenience annotation that combines three annotations: @Configuration (marks the class as a source of bean definitions), @EnableAutoConfiguration (enables Spring Boot’s auto-configuration mechanism), and @ComponentScan (scans the package of the annotated class for Spring components).

5. How can you configure properties in a Spring Boot application?

You can configure properties in a Spring Boot application using application.properties or application.yml files located in the src/main/resources directory.

# application.properties
server.port=8081
spring.datasource.url=jdbc:mysql://localhost:3306/mydb

6. How do you handle exceptions in Spring Boot?

You can handle exceptions in Spring Boot using @ControllerAdvice and @ExceptionHandler annotations to create a global exception handler.

@ControllerAdvice
public class GlobalExceptionHandler {
    @ExceptionHandler(ResourceNotFoundException.class)
    public ResponseEntity<ErrorResponse> handleResourceNotFoundException(ResourceNotFoundException ex) {
        ErrorResponse errorResponse = new ErrorResponse("NOT_FOUND", ex.getMessage());
        return new ResponseEntity<>(errorResponse, HttpStatus.NOT_FOUND);
    }
}

7. What is Spring Boot Actuator and what are its benefits?

Spring Boot Actuator provides production-ready features such as health checks, metrics, and monitoring for your Spring Boot application. It includes various endpoints that give insights into the application’s health and environment.

8. How can you enable and use Actuator endpoints in a Spring Boot application?

Add the Actuator dependency in your pom.xml or build.gradle file:

<dependency>
    <groupId>org.springframework.boot</groupId>
    <artifactId>spring-boot-starter-actuator</artifactId>
</dependency>

Configure the endpoints in application.properties:

management.endpoints.web.exposure.include=health,info

9. What are Spring Profiles and how do you use them?

Spring Profiles allow you to segregate parts of your application configuration and make it only available in certain environments. You can activate profiles using the spring.profiles.active property.

# application-dev.properties
spring.datasource.url=jdbc:mysql://localhost:3306/devdb
# application-prod.properties
spring.datasource.url=jdbc:mysql://localhost:3306/proddb

10. How do you test a Spring Boot application?

Spring Boot supports testing with various tools and annotations like @SpringBootTest, @WebMvcTest, and @DataJpaTest. Use MockMvc to test MVC controllers without starting a full HTTP server.

@SpringBootTest
public class MyApplicationTests {
    @Test
    void contextLoads() {
    }
}

11. How can you secure a Spring Boot application?

You can secure a Spring Boot application using Spring Security. Add the dependency and configure security settings:

<dependency>
    <groupId>org.springframework.boot</groupId>
    <artifactId>spring-boot-starter-security</artifactId>
</dependency>

12. What is a Spring Boot Starter and why is it useful?

Spring Boot Starters are a set of convenient dependency descriptors you can include in your application. They provide a one-stop-shop for all the dependencies you need for a particular feature.

<dependency>
    <groupId>org.springframework.boot</groupId>
    <artifactId>spring-boot-starter-web</artifactId>
</dependency>

13. How can you configure a DataSource in Spring Boot?

You can configure a DataSource by adding properties in the application.properties file:

spring.datasource.url=jdbc:mysql://localhost:3306/mydb
spring.datasource.username=root
spring.datasource.password=secret
spring.datasource.driver-class-name=com.mysql.cj.jdbc.Driver

14. What is Spring Boot DevTools and how does it enhance development?

Spring Boot DevTools provides features to enhance the development experience, such as automatic restarts, live reload, and configurations for faster feedback loops. Add the dependency to your project:

<dependency>
    <groupId>org.springframework.boot</groupId>
    <artifactId>spring-boot-devtools</artifactId>
    <optional>true</optional>
</dependency>

15. How can you handle different environments in a Spring Boot application?

You can handle different environments using Spring Profiles. Define environment-specific properties files like application-dev.properties, application-prod.properties, and activate a profile using spring.profiles.active.

16. What are the differences between @Component, @Service, @Repository, and @Controller annotations?

These annotations are specializations of @Component:

  • @Component: Generic stereotype for any Spring-managed component.
  • @Service: Specialization for service layer classes.
  • @Repository: Specialization for persistence layer classes.
  • @Controller: Specialization for presentation layer (MVC controllers).

17. How can you create a RESTful web service using Spring Boot?

Use @RestController and @RequestMapping annotations to create REST endpoints.

@RestController
@RequestMapping("/api")
public class MyController {

    @GetMapping("/greeting")
    public String greeting() {
        return "Hello, World!";
    }
}

18. What is Spring Boot CLI and how is it used?

Spring Boot CLI is a command-line tool that allows you to quickly prototype with Spring. It supports Groovy scripts to write Spring applications.

$ spring init --dependencies=web my-app
$ cd my-app
$ spring run MyApp.groovy

19. How can you connect to a database using Spring Data JPA?

Add the necessary dependencies and create a repository interface extending JpaRepository.

<dependency>
    <groupId>org.springframework.boot</groupId>
    <artifactId>spring-boot-starter-data-jpa</artifactId>
</dependency>

public interface UserRepository extends JpaRepository<User, Long> {
}

20. How can you use the H2 Database for development and testing in Spring Boot?

Add the H2 dependency and configure the database settings in application.properties:

<dependency>
    <groupId>com.h2database</groupId>
    <artifactId>h2</artifactId>
    <scope>runtime</scope>
</dependency>
spring.datasource.url=jdbc:h2:mem:testdb
spring.datasource.driverClassName=org.h2.Driver
spring.datasource.username=sa
spring.datasource.password=password
spring.h2.console.enabled=true

21. What is the purpose of @Autowired?

@Autowired is used to inject beans (dependencies) automatically by Spring’s dependency injection mechanism. It can be used on constructors, fields, or setter methods.

22. How can you customize the Spring Boot banner?

You can customize the Spring Boot startup banner by placing a banner.txt file in the src/main/resources directory. You can also disable it entirely using spring.main.banner-mode=off in the application.properties file.

23. How can you create a custom starter in Spring Boot?

To create a custom starter, you need to create a new project with the necessary dependencies and configuration, then package it as a JAR. Include this JAR as a dependency in your Spring Boot application.

24. How do you run a Spring Boot application as a standalone jar?

Spring Boot applications can be packaged as executable JAR files with an embedded server. You can run the JAR using the command java -jar myapp.jar.

25. What are the best practices for logging in Spring Boot?

Use SLF4J with Logback as the default logging framework. Configure logging levels in application.properties and use appropriate logging levels (DEBUG, INFO, WARN, ERROR) in your code.

logging.level.org.springframework=INFO
logging.level.com.example=DEBUG

26. How do you externalize configuration in Spring Boot?

Externalize configuration using application.properties or application.yml files, environment variables, or command-line arguments. This allows you to manage application settings without changing the code.

27. How can you monitor Spring Boot applications?

Use Spring Boot Actuator to monitor applications. It provides endpoints for health checks, metrics, and more. Integrate with monitoring tools like Prometheus, Grafana, or ELK stack for enhanced monitoring.

28. How do you handle file uploads in Spring Boot?

Handle file uploads using MultipartFile in a controller method. Ensure you configure the spring.servlet.multipart properties in application.properties.

@PostMapping("/upload")
public String handleFileUpload(@RequestParam("file") MultipartFile file) {
    // handle the file
    return "File uploaded successfully!";
}

29. What is the purpose of @ConfigurationProperties?

@ConfigurationProperties is used to bind external configuration properties to a Java object. It’s useful for type-safe configuration.

@ConfigurationProperties(prefix = "app")
public class AppProperties {
    private String name;
    private String description;

    // getters and setters
}

30. How do you schedule tasks in Spring Boot?

Schedule tasks using @EnableScheduling and @Scheduled annotations. Define a method with the @Scheduled annotation to run tasks at specified intervals.

@EnableScheduling
public class SchedulingConfig {
}

@Component
public class ScheduledTasks {
    @Scheduled(fixedRate = 5000)
    public void reportCurrentTime() {
        System.out.println("Current time is " + new Date());
    }
}

31. How can you use Spring Boot with Kotlin?

Spring Boot supports Kotlin. Create a Spring Boot application using Kotlin by adding the necessary dependencies and configuring the project. Kotlin’s concise syntax can make the code more readable and maintainable.

32. What is Spring WebFlux?

Spring WebFlux is a reactive web framework in the Spring ecosystem, designed for building reactive and non-blocking web applications. It uses the Reactor project for its reactive support.

33. How do you enable CORS in Spring Boot?

Enable CORS (Cross-Origin Resource Sharing) using the @CrossOrigin annotation on controller methods or globally using a CorsConfiguration bean.

@RestController
@CrossOrigin(origins = "http://example.com")
public class MyController {
    @GetMapping("/greeting")
    public String greeting() {
        return "Hello, World!";
    }
}

34. How do you use Redis with Spring Boot?

Use Redis with Spring Boot by adding the spring-boot-starter-data-redis dependency and configuring Redis properties in application.properties.

spring.redis.host=localhost
spring.redis.port=6379

35. What is Spring Cloud and how is it related to Spring Boot?

Spring Cloud provides tools for building microservices and distributed systems on top of Spring Boot. It offers features like configuration management, service discovery, and circuit breakers.

36. How do you implement caching in Spring Boot?

Implement caching using the @EnableCaching annotation and a caching library like EhCache, Hazelcast, or Redis. Annotate methods with @Cacheable, @CachePut, and @CacheEvict for caching behavior.

@EnableCaching
public class CacheConfig {
}

@Service
public class UserService {
    @Cacheable("users")
    public User getUserById(Long id) {
        return userRepository.findById(id).orElse(null);
    }
}

37. How can you send emails with Spring Boot?

Send emails using Spring Boot by adding the spring-boot-starter-mail dependency and configuring email properties in application.properties. Use JavaMailSender to send emails.

spring.mail.host=smtp.example.com
spring.mail.port=587
spring.mail.username=user@example.com
spring.mail.password=secret
@Service
public class EmailService {
    @Autowired
    private JavaMailSender mailSender;

    public void sendSimpleMessage(String to, String subject, String text) {
        SimpleMailMessage message = new SimpleMailMessage();
        message.setTo(to);
        message.setSubject(subject);
        message.setText(text);
        mailSender.send(message);
    }
}

38. What is @SpringBootTest?

@SpringBootTest is an annotation that loads the full application context for integration tests. It is used to write tests that require Spring Boot’s features, like dependency injection and embedded servers.

39. How do you integrate Spring Boot with a front-end framework like Angular or React?

Integrate Spring Boot with front-end frameworks by building the front-end project and placing the static files in the src/main/resources/static directory of your Spring Boot project. Configure Spring Boot to serve these files.

40. How do you configure Thymeleaf in Spring Boot?

Thymeleaf is a templating engine supported by Spring Boot. Add the spring-boot-starter-thymeleaf dependency and place your templates in the src/main/resources/templates directory.

<dependency>
    <groupId>org.springframework.boot</groupId>
    <artifactId>spring-boot-starter-thymeleaf</artifactId>
</dependency>

41. What is the purpose of @SpringBootApplication?

@SpringBootApplication is a convenience annotation that combines @Configuration, @EnableAutoConfiguration, and @ComponentScan. It marks the main class of a Spring Boot application.

42. How do you use CommandLineRunner in Spring Boot?

CommandLineRunner is an interface used to execute code after the Spring Boot application starts. Implement the run method to perform actions on startup.

@Component
public class MyCommandLineRunner implements CommandLineRunner {
    @Override
    public void run(String... args) throws Exception {
        System.out.println("Hello, World!");
    }
}

43. How do you connect to an external REST API using Spring Boot?

Connect to an external REST API using RestTemplate or WebClient. RestTemplate is synchronous, while WebClient is asynchronous and non-blocking.

@RestController
@RequestMapping("/api")
public class ApiController {
    @Autowired
    private RestTemplate restTemplate;

    @GetMapping("/data")
    public String getData() {
        return restTemplate.getForObject("https://api.example.com/data", String.class);
    }
}

44. How do you implement pagination in Spring Boot?

Implement pagination using Spring Data JPA’s Pageable interface. Define repository methods that accept Pageable parameters.

public interface UserRepository extends JpaRepository<User, Long> {
    Page<User> findByLastName(String lastName, Pageable pageable);
}

45. How do you document a Spring Boot REST API?

Document a Spring Boot REST API using Swagger. Add the springfox-swagger2 and springfox-swagger-ui dependencies and configure Swagger.

<dependency>
    <groupId>io.springfox</groupId>
    <artifactId>springfox-swagger2</artifactId>
    <version>2.9.2</version>
</dependency>
<dependency>
    <groupId>io.springfox</groupId>
    <artifactId>springfox-swagger-ui</artifactId>
    <version>2.9.2</version>
</dependency>

46. How do you handle validation in Spring Boot?

Handle validation using the javax.validation package. Use annotations like @NotNull, @Size, and @Email in your model classes, and @Valid in your controller methods.

public class User {
    @NotNull
    private String name;
    @Email
    private String email;
}

47. How do you set up Spring Boot with Docker?

Set up Spring Boot with Docker by creating a Dockerfile that specifies the base image and instructions to build and run the application.

FROM openjdk:11-jre-slim
COPY target/myapp.jar myapp.jar
ENTRYPOINT ["java", "-jar", "/myapp.jar"]

48. How do you deploy a Spring Boot application to AWS?

Deploy a Spring Boot application to AWS by using services like Elastic Beanstalk, ECS, or Lambda. Package your application as a JAR or Docker image and upload it to the chosen service.

49. What is the difference between Spring Boot and Spring MVC?

Spring Boot is a framework for quickly building Spring-based applications with minimal configuration. Spring MVC is a framework for building web applications using the Model-View-Controller design pattern. Spring Boot often uses Spring MVC as part of its web starter.

50. How do you migrate a legacy application to Spring Boot?

Migrate a legacy application to Spring Boot by incrementally introducing Spring Boot dependencies and configurations. Replace legacy configurations with Spring Boot’s auto-configuration and starters, and gradually refactor the application to use Spring Boot features.

Spring Boot Interview Questions: Conclusion

Spring Boot is widely liked by developers because it’s easy to use and powerful. Learning from these top 50 questions and answers helps you understand Spring Boot better. You can solve many problems like setting up applications, connecting to databases, adding security, and putting your app on the cloud. Spring Boot makes these tasks simpler, helping you build better applications faster. Keep learning and enjoy coding with Spring Boot!

Related Articles:

  1. What is Spring Boot and Its Features
  2. Spring Boot Starter
  3. Spring Boot Packaging
  4. Spring Boot Custom Banner
  5. 5 Ways to Run Spring Boot Application
  6. @ConfigurationProperties Example: 5 Proven Steps to Optimize
  7. Mastering Spring Boot Events: 5 Best Practices
  8. Spring Boot Profiles Mastery: 5 Proven Tips
  9. CommandLineRunners vs ApplicationRunners
  10. Spring Boot Actuator: 5 Performance Boost Tips
  11. Spring Boot API Gateway Tutorial
  12. Apache Kafka Tutorial
  13. Spring Boot MongoDB CRUD Application Example
  14. ChatGPT Integration with Spring Boot
  15. RestClient in Spring 6.1 with Examples
  16. Spring Boot Annotations Best Practices

Java 8 Functional Interfaces: Features and Benefits

Java 8 Functional Interfaces: Features and Benefits

Java 8 functional interfaces, which are interfaces containing only one abstract method. The method itself is known as the functional method or Single Abstract Method (SAM). Examples include:

Predicate: Represents a predicate (boolean-valued function) of one argument. Contains only the test() method, which evaluates the predicate on the given argument.

Supplier: Represents a supplier of results. Contains only the get() method, which returns a result.

Consumer: Represents an operation that accepts a single input argument and returns no result. Contains only the accept() method, which performs the operation on the given argument.

Function: Represents a function that accepts one argument and produces a result. Contains only the apply() method, which applies the function to the given argument.

BiFunction: Represents a function that accepts two arguments and produces a result. Contains only the apply() method, which applies the function to the given arguments.

Runnable: Represents a task that can be executed. Contains only the run() method, which is where the task logic is defined.

Comparable: Represents objects that can be ordered. Contains only the compareTo() method, which compares this object with the specified object for order.

ActionListener: Represents an action event listener. Contains only the actionPerformed() method, which is invoked when an action occurs.

Callable: Represents a task that returns a result and may throw an exception. Contains only the call() method, which executes the task and returns the result.

Java 8 Functional Interfaces

Benefits of @FunctionalInterface Annotation

The @FunctionalInterface annotation was introduced to explicitly mark an interface as a functional interface. It ensures that the interface has only one abstract method and allows additional default and static methods.

In a functional interface, besides the single abstract method (SAM), any number of default and static methods can also be defined. For instance:

interface ExampleInterface {
    void method1(); // Abstract method

    default void method2() {
        System.out.println("Hello"); // Default method
    }
}

Java 8 introduced the @FunctionalInterface annotation to explicitly mark an interface as a functional interface:

@FunctionalInterface
interface ExampleInterface {
    void method1();
}

It’s important to note that a functional interface can have only one abstract method. If there are more than one abstract methods, a compilation error occurs.

Functional Interface in java

Inheritance in Functional Interfaces

If an interface extends a functional interface and does not contain any abstract methods itself, it remains a functional interface. For example:

@FunctionalInterface
interface A {
    void methodOne();
}

@FunctionalInterface
interface B extends A {
    // Valid to extend and not add more abstract methods
}

However, if the child interface introduces any new abstract methods, it ceases to be a functional interface and using @FunctionalInterface will result in a compilation error.

Lambda Expressions and Functional Interfaces:

Lambda expressions are used to invoke the functionality defined in functional interfaces. They provide a concise way to implement functional interfaces. For example:

Without Lambda Expression:

interface ExampleInterface {
    void methodOne();
}

class Demo implements ExampleInterface {
    public void methodOne() {
        System.out.println("Method one execution");
    }

    public class Test {
        public static void main(String[] args) {
            ExampleInterface obj = new Demo();
            obj.methodOne();
        }
    }
}

With Lambda Expression:

interface ExampleInterface {
    void methodOne();
}

class Test {
    public static void main(String[] args) {
        ExampleInterface obj = () -> System.out.println("Method one execution");
        obj.methodOne();
    }
}

Advantages of Lambda Expressions:

  1. They reduce code length, improving readability.
  2. They simplify complex implementations of anonymous inner classes.
  3. They can be used wherever functional interfaces are applicable.

Anonymous Inner Classes vs Lambda Expressions:

Lambda expressions are often used to replace anonymous inner classes, reducing code length and complexity. For example:

With Anonymous Inner Class:

class Test {
    public static void main(String[] args) {
        Thread t = new Thread(new Runnable() {
            public void run() {
                for (int i = 0; i < 10; i++) {
                    System.out.println("Child Thread");
                }
            }
        });
        t.start();
        for (int i = 0; i < 10; i++) {
            System.out.println("Main Thread");
        }
    }
}

With Lambda Expression:

class Test {
    public static void main(String[] args) {
        Thread t = new Thread(() -> {
            for (int i = 0; i < 10; i++) {
                System.out.println("Child Thread");
            }
        });
        t.start();
        for (int i = 0; i < 10; i++) {
            System.out.println("Main Thread");
        }
    }
}

Differences between Anonymous Inner Classes and Lambda Expressions

Anonymous Inner ClassLambda Expression
A class without a nameA method without a name (anonymous function)
Can extend concrete and abstract classesCannot extend concrete or abstract classes
Can implement interfaces with any number of methodsCan only implement interfaces with a single abstract method
Can declare instance variablesCannot declare instance variables; variables are treated as final
Has separate .class file generated at compilationNo separate .class file; converts into a private method
In summary, lambda expressions offer a concise and effective way to implement functional interfaces, enhancing code readability and reducing complexity compared to traditional anonymous inner classes.
Click here

Related Articles:

Java 8 Lambda Expressions with Examples

Java 8 Lambda Expressions with Examples

Lambda expressions in Java 8 are essentially unnamed functions without return types or access modifiers. They’re also known as anonymous functions or closures. Let’s explore Java 8 lambda expressions with examples.

Example 1:

public void m() {
    System.out.println("Hello world");
}

Can be express as:

Java 8 Lambda Expressions with Examples

() -> {
    System.out.println("Hello world");   
}

//or

() ->  System.out.println("Hello world");

Example 2:

public void m1(int i, int j) {
    System.out.println(i + j);
}

Can be expressed as:

(int i, int j) -> {
    System.out.println(i + j);
}

If the type of the parameters can be inferred by the compiler based on the context, we can omit the types. The above lambda expression can be rewritten as:

(i, j) ->  System.out.println(i+j);

Example 3:

Consider the following transformation:

public String str(String s) {
    return s;
}

can be expressed as:

(String s) -> return s;

or

(String s) -> s;

Conclusion:

  1. A lambda expression can have zero or more arguments (parameters).
  • Example:
() -> System.out.println("Hello world");
(int i) -> System.out.println(i);
(int i, int j) -> System.out.println(i + j);

2. We can specify the type of the parameter. If the compiler can infer the type based on the context, then we can omit the type.

Example:

(int a, int b) -> System.out.println(a + b);
(a, b) -> System.out.println(a + b);

3. If multiple parameters are present, they should be separated by a comma (,).

4. If no parameters are present, we use empty parentheses [ like () ].

Example:

() -> System.out.println("hello");

5. If only one parameter is present and if the compiler can infer the type, then we can omit the type and parentheses.

  • Example:
Java 8 Lambda Expressions with Examples

6. Similar to a method body, a lambda expression body can contain multiple statements. If there are multiple statements, they should be enclosed in curly braces {}. If there is only one statement, curly braces are optional.

7. Once we write a lambda expression, we can call that expression just like a method. To do this, functional interfaces are required.

This covers the basics of lambda expressions using in java 8 with relevant examples.

For more information, follow this link: Oracle’s guide on lambda expressions.

Here is the link for the Java 8 quiz:
Click here

Related Articles:

Java Interview Questions and Answers

Java Interview Questions and Answers

Prepare for your Java job interview with confidence! Explore a comprehensive collection of Java interview questions and answers covering essential topics such as object-oriented programming, data structures, concurrency, exception handling, and more.

Detailed Java Interview Questions and Answers

  1. What are the main features of Java?
    • Answer: Java features include simplicity, object-oriented nature, portability, robustness, security, multithreading capability, and high performance through Just-In-Time compilation.
  2. Explain the concept of OOP and its principles in Java.
    • Answer: OOP principles in Java include:
      • Encapsulation: Bundling data and methods that operate on the data within a single unit (class).
public class Person {
    private String name;  // Encapsulated field
    
    public String getName() {  // Public method to access the field
        return name;
    }
    
    public void setName(String name) {
        this.name = name;
    }
}

Abstraction: Hiding complex implementation details and showing only necessary features.

abstract class Animal {
    abstract void makeSound();  // Abstract method
}

class Dog extends Animal {
    void makeSound() {
        System.out.println("Bark");
    }
}

Inheritance: A new class inherits properties and behavior from an existing class.

class Animal {
    void eat() {
        System.out.println("This animal eats food");
    }
}

class Dog extends Animal {
    void bark() {
        System.out.println("Bark");
    }
}

Polymorphism: Methods do different things based on the object it is acting upon.

Animal myDog = new Dog();
myDog.makeSound();  // Outputs: Bark

3. What is the difference between JDK, JRE, and JVM?

  • JDK (Java Development Kit): Contains tools for developing Java applications (JRE, compiler, debugger).
  • JRE (Java Runtime Environment): Runs Java applications, includes JVM and standard libraries.
  • JVM (Java Virtual Machine): Executes Java bytecode and provides a runtime environment.

4. Describe the memory management in Java.

Java uses automatic memory management with garbage collection. Memory is divided into heap (for objects) and stack (for method calls and local variables).

5. What is the Java Memory Model?

The Java Memory Model defines how threads interact through memory, ensuring visibility, ordering, and atomicity of shared variables.

6. How does garbage collection work in Java?

Garbage collection automatically frees memory by removing objects that are no longer referenced. Algorithms include mark-and-sweep and generational collection.

7. What are the different types of references in Java?

  • Strong: Default type, prevents garbage collection.
  • Soft: Used for caches, collected before OutOfMemoryError.
  • Weak: Used for canonicalizing mappings, collected eagerly.
  • Phantom: Used for cleanup actions, collected after finalization.

8. Explain the finalize() method.

The finalize() method is called by the garbage collector before an object is collected. It’s used to clean up resources but is deprecated due to unpredictability.

9. What is the difference between == and equals() in Java?

  • == compares reference identity.
  • equals() compares object content.
String a = new String("hello");
String b = new String("hello");
System.out.println(a == b);  // false
System.out.println(a.equals(b));  // true

10. What is the hashCode() method? How is it related to equals()?

The hashCode() method returns an integer hash code for the object. If two objects are equal (equals() returns true), they must have the same hash code to ensure correct functioning in hash-based collections.

public class Person {
    private String name;

    @Override
    public boolean equals(Object obj) {
        if (this == obj) return true;
        if (obj == null || getClass() != obj.getClass()) return false;
        Person person = (Person) obj;
        return name.equals(person.name);
    }

    @Override
    public int hashCode() {
        return name.hashCode();
    }
}

11. Explain the use of the volatile keyword.

The volatile keyword ensures that the value of a variable is always read from main memory, not from a thread’s local cache. It guarantees visibility of changes to variables across threads.

private volatile boolean flag = true;

12. What are the differences between wait() and sleep()?

  • wait(): Causes the current thread to release the monitor lock and wait until another thread invokes notify() or notifyAll() on the same object.
  • sleep(): Causes the current thread to pause execution for a specified time without releasing the monitor lock.
synchronized (obj) {
    obj.wait();  // releases the lock on obj
}

Thread.sleep(1000);  // pauses the current thread for 1 second

13. What is the difference between notify() and notifyAll()?

  • notify(): Wakes up a single thread that is waiting on the object’s monitor.
  • notifyAll(): Wakes up all threads that are waiting on the object’s monitor.
synchronized (obj) {
    obj.notify();  // wakes up one waiting thread
}

synchronized (obj) {
    obj.notifyAll();  // wakes up all waiting threads
}

14. What is a deadlock? How can it be avoided?

A deadlock occurs when two or more threads are blocked forever, each waiting for the other to release a resource. It can be avoided by acquiring locks in a consistent order and using timeout for lock acquisition.

// Avoiding deadlock by acquiring locks in the same order
synchronized (lock1) {
    synchronized (lock2) {
        // critical section
    }
}

15. What are the different types of thread pools in Java?

  • FixedThreadPool: A fixed number of threads.
  • CachedThreadPool: Creates new threads as needed and reuses existing ones.
  • SingleThreadExecutor: A single worker thread.
  • ScheduledThreadPool: A pool that can schedule commands to run after a delay or periodically.
ExecutorService fixedPool = Executors.newFixedThreadPool(10);
ExecutorService cachedPool = Executors.newCachedThreadPool();
ExecutorService singleThreadExecutor = Executors.newSingleThreadExecutor();
ScheduledExecutorService scheduledPool = Executors.newScheduledThreadPool(5);

16. Explain the use of the Callable and Future interfaces.

Callable is similar to Runnable but can return a result and throw a checked exception. Future represents the result of an asynchronous computation, allowing us to retrieve the result once the computation is complete.

Callable<Integer> task = () -> {
    return 123;
};

ExecutorService executor = Executors.newFixedThreadPool(1);
Future<Integer> future = executor.submit(task);

Integer result = future.get();  // returns 123

Collections Framework

17. What is the Java Collections Framework?

The Java Collections Framework provides a set of interfaces (List, Set, Map) and implementations (ArrayList, HashSet, HashMap) for managing groups of objects.

18. Explain the difference between ArrayList and LinkedList.

  • ArrayList: Uses a dynamic array, fast random access, slow insertions/deletions.
  • LinkedList: Uses a doubly-linked list, slower access, fast insertions/deletions.
List<String> arrayList = new ArrayList<>();
List<String> linkedList = new LinkedList<>();

19. How does HashMap work internally?

HashMap uses an array of buckets, each bucket containing a linked list or a tree. The key’s hash code determines the bucket index. Collisions are resolved by chaining (linked list) or tree (if many elements).

Map<String, Integer> map = new HashMap<>();
map.put("key", 1);

20. What is the difference between HashSet and TreeSet?

  • HashSet: Uses HashMap, no order, constant-time performance.
  • TreeSet: Uses TreeMap, maintains sorted order, log-time performance.
Set<String> hashSet = new HashSet<>();
Set<String> treeSet = new TreeSet<>();

21. What is the difference between Comparable and Comparator?

  • Comparable: Defines natural ordering within the class by implementing compareTo().
  • Comparator: Defines custom ordering outside the class by implementing compare().
class Person implements Comparable<Person> {
    private String name;

    @Override
    public int compareTo(Person other) {
        return this.name.compareTo(other.name);
    }
}

class PersonNameComparator implements Comparator<Person> {
    @Override
    public int compare(Person p1, Person p2) {
        return p1.name.compareTo(p2.name);
    }
}

22. What is the use of the Collections utility class?

The Collections class provides static methods for manipulating collections, such as sorting, searching, and shuffling.

List<String> list = new ArrayList<>(Arrays.asList("b", "c", "a"));
Collections.sort(list);  // sorts the list

23. Explain the Iterator interface.

The Iterator interface provides methods to iterate over a collection (hasNext(), next(), remove()).

List<String> list = new ArrayList<>(Arrays.asList("a", "b", "c"));
Iterator<String> iterator = list.iterator();
while (iterator.hasNext()) {
    System.out.println(iterator.next());
}

24. What is the difference between Iterator and ListIterator?

  • Iterator allows traversing elements in one direction.
  • ListIterator extends Iterator and allows bi-directional traversal and modification of elements.
List<String> list = new ArrayList<>();
ListIterator<String> listIterator = list.listIterator();

25. What is the LinkedHashMap class?

LinkedHashMap maintains a doubly-linked list of its entries, preserving insertion order or access order. It extends HashMap.

LinkedHashMap<String, Integer> linkedHashMap = new LinkedHashMap<>();
linkedHashMap.put("one", 1);

26. What is the PriorityQueue class?

PriorityQueue is a queue that orders its elements according to their natural ordering or by a specified comparator. The head of the queue is the least element.

PriorityQueue<Integer> priorityQueue = new PriorityQueue<>();
priorityQueue.add(3);
priorityQueue.add(1);
priorityQueue.add(2);
System.out.println(priorityQueue.poll());  // Outputs: 1

27. How does the ConcurrentHashMap class work?

ConcurrentHashMap allows concurrent read and write operations by dividing the map into segments and locking only the affected segment during updates.

ConcurrentHashMap<String, Integer> concurrentMap = new ConcurrentHashMap<>();
concurrentMap.put("key", 1);

28. What is the TreeMap class?

TreeMap is a NavigableMap implementation that uses a Red-Black tree. It orders its elements based on their natural ordering or by a specified comparator.

TreeMap<String, Integer> treeMap = new TreeMap<>();
treeMap.put("b", 2);
treeMap.put("a", 1);

29. What is the difference between HashMap and TreeMap?

HashMap provides constant-time performance for basic operations but does not maintain any order. TreeMap provides log-time performance and maintains its elements in sorted order.

HashMap<String, Integer> hashMap = new HashMap<>();
TreeMap<String, Integer> treeMap = new TreeMap<>();

30. How does the WeakHashMap class work?

WeakHashMap uses weak references for its keys, allowing them to be garbage-collected if there are no strong references. It is useful for implementing canonicalizing mappings.

WeakHashMap<String, Integer> weakHashMap = new WeakHashMap<>();

31. Explain the CopyOnWriteArrayList class.

CopyOnWriteArrayList is a thread-safe variant of ArrayList where all mutative operations (add, set, etc.) are implemented by making a fresh copy of the underlying array.

CopyOnWriteArrayList<String> cowList = new CopyOnWriteArrayList<>();

32. What is the Deque interface?

Deque (Double Ended Queue) is an interface that extends Queue and allows elements to be added or removed from both ends.

Deque<String> deque = new ArrayDeque<>();
deque.addFirst("first");
deque.addLast("last");

33. Explain the BlockingQueue interface.

BlockingQueue is a queue that supports operations that wait for the queue to become non-empty when retrieving and waiting for space to become available when storing. It’s useful in producer-consumer scenarios.

BlockingQueue<String> blockingQueue = new ArrayBlockingQueue<>(10);

34. What is the difference between Iterator and ListIterator?

  • Iterator allows traversing elements in one direction.
  • ListIterator extends Iterator and allows bi-directional traversal and modification of elements.
List<String> list = new ArrayList<>();
ListIterator<String> listIterator = list.listIterator();

Concurrency and Multithreading

35. What is a Thread in Java?

A Thread is a lightweight process that can execute code concurrently with other threads within the same application.

Thread thread = new Thread(() -> System.out.println("Hello from a thread"));
thread.start();

36. What is the Runnable interface?

Runnable represents a task that can be executed by a thread. It has a single method run().

Runnable task = () -> System.out.println("Task is running");
Thread thread = new Thread(task);
thread.start();

37. What is the Callable interface?

Callable is similar to Runnable but can return a result and throw a checked exception.

Callable<Integer> task = () -> 123;

38. Explain synchronized methods and blocks.

Synchronization ensures that only one thread can execute a block of code at a time, preventing data inconsistency.

public synchronized void synchronizedMethod() {
    // synchronized code
}

public void method() {
    synchronized(this) {
        // synchronized block
    }
}

39. What are thread states in Java?

A thread can be in one of several states: NEW, RUNNABLE, BLOCKED, WAITING, TIMED_WAITING, and TERMINATED

40. What is the ExecutorService?

ExecutorService is a high-level replacement for working with threads directly. It manages a pool of worker threads, allowing you to submit tasks for execution.

ExecutorService executor = Executors.newFixedThreadPool(10);
executor.submit(() -> System.out.println("Task executed"));
executor.shutdown();

41. What is the difference between submit() and execute() methods in ExecutorService?

  • execute(): Executes a Runnable task but does not return a result.
  • submit(): Submits a Runnable or Callable task and returns a Future representing the task’s result.
ExecutorService executor = Executors.newFixedThreadPool(1);
executor.execute(() -> System.out.println("Runnable executed"));
Future<Integer> future = executor.submit(() -> 123);

42. What is a CountDownLatch?

CountDownLatch is a synchronization aid that allows one or more threads to wait until a set of operations in other threads completes.

CountDownLatch latch = new CountDownLatch(3);

Runnable task = () -> {
    System.out.println("Task completed");
    latch.countDown();
};

new Thread(task).start();
latch.await();  // Main thread waits until the count reaches zero

43. What is a CyclicBarrier?

CyclicBarrier is a synchronization aid that allows a set of threads to all wait for each other to reach a common barrier point.

CyclicBarrier barrier = new CyclicBarrier(3, () -> System.out.println("All tasks completed"));

Runnable task = () -> {
    System.out.println("Task executed");
    barrier.await();
};

new Thread(task).start();

44. Explain ReentrantLock and its usage.

ReentrantLock is a mutual exclusion lock with the same basic behavior as the implicit monitors accessed using synchronized blocks but with extended capabilities. It allows for more flexible locking operations and is useful in advanced concurrency scenarios.

ReentrantLock lock = new ReentrantLock();
lock.lock();  // Acquires the lock
try {
    // Critical section
} finally {
    lock.unlock();  // Releases the lock
}

45. What is a Semaphore?

Semaphore is a synchronization primitive that restricts the number of threads that can access a resource concurrently. It maintains a set of permits to control access.

Java Interview Questions and Answers

46. What is a BlockingQueue?

BlockingQueue is a queue that supports operations that wait for the queue to become non-empty when retrieving and wait for space to become available when storing. It’s useful in producer-consumer scenario

BlockingQueue<String> blockingQueue = new ArrayBlockingQueue<>(10);

47. Explain the ThreadLocal class.

ThreadLocal provides thread-local variables, allowing each thread to have its own independently initialized instance of the variable. It’s typically used to store per-thread context or avoid synchronization.

private static final ThreadLocal<Integer> threadId = ThreadLocal.withInitial(() -> Thread.currentThread().getId());

public static int getThreadId() {
    return threadId.get();
}

48. What is the difference between start() and run() methods of the Thread class?

  • start(): Creates a new thread and starts its execution. It calls the run() method internally.
  • run(): Entry point for the thread’s execution. It should be overridden to define the task to be performed by the thread.
Thread thread = new Thread(() -> System.out.println("Hello from a thread"));
thread.start();  // Calls run() internally

49. What is a Future in Java concurrency?

Future represents the result of an asynchronous computation. It provides methods to check if the computation is complete, retrieve the result, or cancel the task.

ExecutorService executor = Executors.newFixedThreadPool(1);
Future<Integer> future = executor.submit(() -> 123);
Integer result = future.get();  // Waits for the computation to complete and retrieves the result

50. What is the CompletableFuture class?

CompletableFuture is a Future that may be explicitly completed (setting its value and status), enabling further control over the asynchronous computation.

CompletableFuture<String> future = CompletableFuture.supplyAsync(() -> "Hello");
future.thenApply(s -> s + " World").thenAccept(System.out::println);

What are Microservices?

Microservices are a contemporary method for developing software applications. They involve breaking down the application into smaller, independent, deployable, loosely connected, and collaborative services. This approach simplifies application comprehension and facilitates application delivery. It’s important to first understand monolithic architecture before transitioning to microservices.

Topics Covered in Microservices

1. What are Microservices?

2. Spring Cloud Config Server Without Git

3. Spring Cloud Config Client

4. Reload Application Properties in Spring Boot

5. Eureka Server using Spring Boot

6. Spring Boot Eureka Discovery Client

Spring Boot and Microservices Patterns

Top 20 Microservices Interview Questions and Answers

Top 20 Microservices Interview Questions and Answers

Top 20 Microservices Interview Questions and Answers

Getting ready for a job interview that’s all about microservices? Well, you’re in the right place. We’ve gathered the top 20 microservices interview questions and paired them with detailed answers to help you shine in that interview room. Whether you’re a seasoned pro in the world of microservices or just starting out, these questions and answers are here to boost your confidence and knowledge. Let’s dive in and get you all set to impress your potential employers with your microservices expertise.

Top 20 Microservices Interview Questions

Q1) What are Microservices?

Microservices, also known as Microservices Architecture, is a software development approach that involves constructing complex applications by assembling smaller, independent functional modules. Think of it as building a large, intricate system from smaller, self-contained building blocks.

For instance, imagine a modern e-commerce platform. Instead of creating one monolithic application to handle everything from product listings to payments, you can use microservices. Each function, like product catalog, shopping cart, user authentication, and payment processing, becomes a separate microservice. They work together as a cohesive unit, with each microservice responsible for its specific task.

This approach offers benefits such as flexibility, scalability, and ease of maintenance. If one microservice needs an update or experiences issues, it can be modified or fixed without affecting the entire system. It’s like having a toolkit of specialized tools that can be swapped in or out as needed, making software development more efficient and adaptable.

Q2) What are the main features of Microservices?

Decoupling: Modules are independent and do not rely on each other.

Componentization: Applications are divided into small, manageable components.

Business Capabilities: Modules correspond to specific business functions.

Autonomy: Each module can function independently.

Continuous Delivery(CI/CD): Frequent updates and releases are possible.

Responsibility: Each module is responsible for its functionality.

Decentralized Governance: Decision-making is distributed across modules.

Agility: Adaptability and responsiveness to changes are key attributes.

Q3) What are the key parts of Microservices?

Microservices rely on various elements to work effectively. Some of the main components include:

Containers, Clustering, and Orchestration: These tools help manage and organize microservices within a software environment.

Infrastructure as Code (IaC): IaC involves using code to automate and control infrastructure setup and configuration.

Cloud Infrastructure: Many microservices are hosted on cloud platforms, which provide the necessary computing resources.

API Gateway: An API Gateway acts as a central entry point for various microservices, making it easier for them to communicate with each other.

Enterprise Service Bus: This component facilitates efficient communication and integration between different microservices and applications.

Service Delivery: Ensuring that microservices are delivered effectively to end-users and seamlessly integrated into the software system.

These components work together to support the operation of microservices and enhance the scalability and flexibility of a software system.

Q4) Explain the working of microservices?

Microservices Architecture:

Top 20 Microservices Interview Questions and Answers

Client Request: The process begins when a client, such as a web browser or mobile app, sends a request to the application. This request could be anything from fetching data to performing specific tasks.

API Gateway: The client’s request is initially intercepted by the API Gateway, acting as the application’s point of entry. Think of it as the first stop for incoming requests.

Service Discovery (Eureka Server): To find the right microservice to fulfill the request, the API Gateway checks in with the Eureka Server. This server plays a crucial role by maintaining a directory of where different microservices are located.

Routing: With information from the Eureka Server in hand, the API Gateway directs the request to the specific microservice that’s best suited to handle it. This ensures that each request goes to the right place.

Circuit Breaker: Inside the microservice, a Circuit Breaker is at work, keeping an eye on the request and the microservice’s performance. If the microservice faces issues or becomes unresponsive, the Circuit Breaker can temporarily halt additional requests to prevent further problems.

Microservice Handling: The designated microservice takes the reins, processing the client’s request, and interacting with databases or other services as needed.

Response Generation: After processing the request, the microservice generates a response. This response might include requested data, an acknowledgment, or the results of the task requested by the client.

Ribbon Load Balancing: On the client’s side, Ribbon comes into play. It’s responsible for balancing the load when multiple instances of the microservice are available. Ribbon ensures that the client connects to the most responsive instance, enhancing performance and providing redundancy.

API Gateway Response: The response generated by the microservice is sent back to the API Gateway.

Client Response: Finally, the API Gateway returns the response to the client. The client then receives and displays this response. It could be the requested information or the outcome of a task, allowing the user to interact with the application seamlessly.

Q5) What are the differences between Monolithic, SOA and Microservices Architecture?

Architecture TypeDescription
Monolithic ArchitectureA massive container where all software components are tightly bundled, creating one large system with a single code base.
Service-Oriented Architecture (SOA)A group of services that interact and communicate with each other. Communication can range from simple data exchange to multiple services coordinating activities.
Microservices ArchitectureAn application structured as a cluster of small, autonomous services focused on specific business domains. These services can be deployed independently, are scalable, and communicate using standard protocols.
Comparison of Architectural Approaches

Q6: What is  Service Orchestration and Service Choreography in Microservices?

Service orchestration and service choreography are two different approaches for managing the dance of microservices. Here’s how they groove:

  • Service Orchestration: This is like having a conductor in an orchestra. There’s a central component that’s the boss, controlling and coordinating the movements of all microservices. It’s a tightly organized performance with everything in sync.
  • Service Choreography: Think of this as a group of dancers who know the steps and dance together without a choreographer. In service choreography, microservices collaborate directly with each other, no central controller in sight. It’s a bit more like a jam session, where each service has its own rhythm.
  • Comparison: Service orchestration offers a more controlled and well-coordinated dance, where every step is planned. Service choreography, on the other hand, is like a dance-off where individual services have the freedom to show their moves. It’s more flexible, but it can get a bit wild.

Q7) What is the role of an actuator in Spring Boot?

In Spring Boot, an actuator is a project that offers RESTful web services to access the real-time status and information about an application running in a production environment. It allows you to monitor and manage the usage of the application without the need for extensive coding or manual configuration. Actuators provide valuable insights into the application’s health, metrics, and various operational aspects, making it easier to maintain and troubleshoot applications in a production environment.

Q8) How to Customize Default Properties in Spring Boot Projects?

Customizing default properties in a Spring Boot project, including database properties, is achieved by specifying these settings in the application.properties file. Here’s an example that explains this concept without plagiarism:

Example: Database Configuration

Imagine you have a Spring Boot application that connects to a database. To tailor the database connection to your needs, you can define the following properties in the application.properties file:

Bash
spring.datasource.url = jdbc:mysql://localhost:3306/bd-name
spring.datasource.username = user-name
spring.datasource.password = password

By setting these properties in the application.properties file, you can easily adjust the database configuration of your Spring Boot application. This flexibility allows you to adapt your project to different database environments or specific requirements without the need for extensive code modifications

Q9) What is Cohesion and Coupling in Software Design?

Cohesion refers to the relationship between the parts or elements within a module. It measures how well these elements work together to serve a common purpose. When a module exhibits high cohesion, its elements collaborate efficiently to perform a specific function, and they do so without requiring constant communication with other modules. In essence, high cohesion signifies that a module is finely tuned for a specific task, which, in turn, enhances the overall functionality of that module.

For example, consider a module in a word-processing application that handles text formatting. It exhibits high cohesion by focusing solely on tasks like font styling, paragraph alignment, and spacing adjustments without being entangled in unrelated tasks.

Coupling signifies the relationship between different software modules, like Modules A and B. It assesses how much one module relies on or interacts with another. Coupling can be categorized into three main types: highly coupled (high dependency), loosely coupled, and uncoupled. The most favorable form of coupling is loose coupling, which is often achieved through well-defined interfaces. In a loosely coupled system, modules maintain a degree of independence and can be modified or replaced with minimal disruption to other modules.

For instance, think of an e-commerce application where the product catalog module and the shopping cart module are loosely coupled. They communicate through a clear interface, allowing each to function independently. This facilitates future changes or upgrades to either module without causing significant disturbances in the overall system.

In summary, cohesion and coupling are fundamental principles in software design that influence how modules are organized and interact within a software system. High cohesion and loose coupling are typically sought after because they lead to more efficient, maintainable, and adaptable software systems.

Q10) What Defines Microservice Design?

Microservice design is guided by a set of core principles that distinguish it from traditional monolithic architectures:

  • Business-Centric Approach: Microservices are organized around specific business capabilities or functions. Each microservice is responsible for a well-defined task, ensuring alignment with the organization’s core business objectives.
  • Product-Oriented Perspective: Unlike traditional projects, microservices are treated as ongoing products. They undergo continuous development, maintenance, and improvement to remain adaptable to evolving business needs.
  • Effective Messaging Frameworks: Microservices rely on robust messaging frameworks to facilitate seamless communication. These frameworks enable microservices to exchange data and coordinate tasks efficiently.
  • Decentralized Governance: Microservices advocate decentralized governance, granting autonomy to each microservice team. This decentralization accelerates development and decision-making processes.
  • Distributed Data Management: Data management in microservices is typically decentralized, with each microservice managing its data store. This approach fosters data isolation, scalability, and independence.
  • Automation-Driven Infrastructure: Automation plays a pivotal role in microservices. Infrastructure provisioning, scaling, and maintenance are automated, reducing manual effort and minimizing downtime.
  • Resilience as a Design Principle: Microservices are designed with the expectation of failures. Consequently, they prioritize resilience. When one microservice encounters issues, it should not disrupt the entire system, ensuring uninterrupted service availability.

These principles collectively contribute to the agility, scalability, and fault tolerance that make microservices a popular choice in modern software development. They reflect a strategic shift towards building software systems that are more responsive to the dynamic demands of today’s businesses.

Q11: What’s the Purpose of Spring Cloud Config and How Does It Work?

let’s simplify this for a clear understanding:

Purpose: Spring Cloud Config is like the command center for configuration properties in microservices. Its main job is to make sure all the configurations are well-organized, consistent, and easy to access.

How It Works:

  • Version-Controlled Repository: All your configuration info is stored in a special place that keeps a history of changes. Think of it as a well-organized filing cabinet for configurations.
  • Configuration Server: Inside Spring Cloud Config, there’s a designated server that takes care of your configuration data. It’s like the trustworthy guard of your valuable information.
  • Dynamic and Centralized: The cool part is that microservices can request their configuration details from this server on the spot, while they’re running. This means any changes or updates to the configurations are instantly shared with all the microservices. It’s like having a super-efficient communication channel for all your configurations.

Q12) How Do Independent Microservices Communicate?

Picture a world of microservices, each minding its own business. Yet, they need to talk to each other, and they do it quite ingeniously:

  • HTTP/REST with JSON or Binary Protocols: It’s like sending letters or emails. Microservices make requests to others, and they respond. They speak a common language, often in formats like JSON or more compact binary codes. This works well when one service needs specific information or tasks from another.
  • Websockets for Streaming: For those real-time conversations, microservices use Websockets. Think of it as talking on the phone, but not just in words – they can share data continuously. It’s ideal for things like live chats, streaming updates, or interactive applications.
  • Message Brokers: These are like message relay stations. Services send messages to a central point (the broker), and it ensures messages get to the right recipients. There are different types of brokers, each specialized for specific communication scenarios. Apache Kafka, for instance, is like the express courier for high-throughput data.
  • Backend as a Service (BaaS): This is the “hands-free” option. Microservices can use platforms like Space Cloud, which handle a bunch of behind-the-scenes tasks. It’s like hiring someone to take care of your chores. BaaS platforms can manage databases, handle authentication, and even run serverless functions.

In this interconnected world, microservices pick the best way to chat based on what they need to say. It’s all about keeping them independent yet harmoniously communicating in the vast landscape of microservices.

Q13) What is Domain-Driven Design (DDD)?

Domain-Driven Design, often abbreviated as DDD, is an approach to software development that centers on a few key principles:

  • Focus on the Core Domain and Domain Logic: DDD places a strong emphasis on understanding and honing in on the most critical and valuable aspects of a project, which is often referred to as the “core domain.” This is where the primary business or problem-solving logic resides. DDD aims to ensure that the software accurately represents and serves this core domain.
  • Analyze Domain Models for Complex Designs: DDD involves in-depth analysis of the domain models. By doing so, it seeks to uncover intricate designs and structures within the domain that may not be immediately apparent. This analysis helps in creating a software design that faithfully mirrors the complexity and nuances of the real-world domain.
  • Continuous Collaboration with Domain Experts: DDD encourages regular and close collaboration between software development teams and domain experts. These domain experts are individuals who possess in-depth knowledge of the problem domain (the industry or field in which the software will be used). By working together, they refine the application model, ensuring it effectively addresses emerging issues and aligns with the evolving domain requirements.

In essence, Domain-Driven Design is a holistic approach that promotes a deep understanding of the problem domain, leading to software solutions that are more accurate, relevant, and adaptable to the ever-changing needs of the domain they serve.

Q14). What is OAuth?

Think of OAuth as the key to the world of one-click logins. It’s what allows you to use your Facebook or Google account to access various websites and apps without creating new usernames and passwords.

Here’s the magic:

  • No More New Accounts: Imagine you stumble upon a cool new app, and it asks you to sign up. With OAuth, you can skip that part. Instead, you click “Log in with Facebook” or another platform you trust.
  • Sharing Just What’s Needed: You don’t have to share your Facebook password with the app. Instead, the app asks Facebook, “Is this person who they claim to be?” Facebook says, “Yep, it’s them!” and you’re in.
  • Secure and Convenient: OAuth makes logging in more secure because you’re not giving out your password to every app you use. It’s like showing your ID card to get into a party without revealing all your personal info.

So, next time you see the option to log in with Google or some other platform, you’ll know that OAuth is working behind the scenes to make your life simpler and safer on the internet.

 Q15) Why Reports and Dashboards Matter in Microservices?

Reports and dashboards play a pivotal role in the world of microservices for several key reasons:

  • Resource Roadmap: Imagine reports and dashboards as your detailed map of the microservices landscape. They show you which microservices handle specific tasks and resources. It’s like having a GPS for your system’s functionality.
  • Change Confidence: When changes happen (and they do in software), reports and dashboards step in as your security net. They tell you exactly which services might be impacted. Think of it as a warning system that prevents surprises.
  • Instant Documentation: Forget digging through files or searching for the latest documents. Reports and dashboards are your instant, always-up-to-date documentation. Need info on a specific service? It’s just a click away.
  • Version Control: In the microservices world, keeping tabs on different component versions is a bit like tracking your app updates. Reports and dashboards help you stay on top of what’s running where and if any part needs an upgrade.
  • Quality Check: They’re your quality control inspectors. They help you assess how mature and compliant your services are. It’s like checking the quality of ingredients before cooking a meal – you want everything to be up to the mark.

So, reports and dashboards are your trustworthy companions, helping you navigate the intricacies of microservices, ensuring you’re in control and making informed decisions in this dynamic software world.

Q16) What are Reactive Extensions in Microservices?

Reactive Extensions, or Rx, is a design approach within microservices that coordinates multiple service calls and combines their results into a single response. These calls can be blocking or non-blocking, synchronous or asynchronous. In the context of distributed systems, Rx operates in a manner distinct from traditional workflows.

Q17) Types of Tests Commonly Used in Microservices?

Testing in the world of microservices can be quite intricate due to the interplay of multiple services. To manage this complexity, tests are categorized based on their level of focus:

  • Unit Tests: These tests zoom in on the smallest building blocks of microservices – individual functions or methods. They validate that each function performs as expected in isolation.
  • Component Tests: At this level, multiple functions or components within a single microservice are tested together. Component tests ensure that the internal workings of a microservice function harmoniously.
  • Integration Tests: Integration tests go further by examining how different microservices collaborate. They validate that when multiple microservices interact, the system behaves as anticipated.
  • Contract Tests: These tests check the agreements or contracts between microservices. They ensure that the communication between services adheres to predefined standards, preventing unintended disruptions.
  • End-to-End (E2E) Tests: E2E tests assess the entire application’s functionality, simulating user journeys. They validate that all microservices work cohesively to provide the desired user experience.
  • Load and Performance Tests: These tests evaluate how microservices perform under varying loads. They help identify bottlenecks and performance issues to ensure the system can handle real-world demands.
  • Security Tests: Security tests scrutinize the microservices for vulnerabilities and ensure data protection measures are effective.
  • Usability Tests: Usability tests assess the user-friendliness and accessibility of the microservices. They focus on the overall user experience.

Q18) What are Containers in Microservices?

Containers are a powerful solution for managing microservices. They excel in efficiently allocating and sharing resources, making them the preferred choice for developing and deploying microservice-based applications. Here’s the essence of containers in the world of microservices:

  • Resource Allocation: Containers excel in efficiently distributing computing resources. They ensure each microservice has the right amount of CPU, memory, and storage to function optimally.
  • Isolation: Containers create a secure boundary for each microservice. They operate independently, preventing conflicts or interference between services, which is crucial in microservices architecture.
  • Portability: Containers package microservices and their dependencies into a single, portable unit. This means you can develop a microservice on your local machine and deploy it in various environments, ensuring consistency.
  • Efficient Scaling: Containers make scaling microservices a breeze. You can replicate and deploy containers as needed, responding quickly to changing workloads.
  • Simplified Management: Container orchestration platforms like Kubernetes provide centralized management for deploying, scaling, and monitoring microservices in a containerized environment.

Q19) The Core Role of Docker in Microservices?

  • Containerizing Applications: Docker acts as a container environment where you can place your microservices. It not only packages the microservice itself but also all the necessary components it relies on to function seamlessly. These bundled packages are aptly called “Docker containers.”
  • Streamlined Management: With Docker containers, managing microservices becomes straightforward. You can effortlessly start, stop, or move them around, akin to organizing neatly labeled boxes for easy transport.
  • Resource Efficiency: Docker ensures that each microservice receives the appropriate amount of computing resources, like CPU and memory. This ensures that they operate efficiently without monopolizing or underutilizing system resources.
  • Consistency: Docker fosters uniformity across different stages, such as development, testing, and production. No longer will you hear the excuse, “It worked on my machine.” Docker guarantees consistency, a valuable asset in the world of microservices.

Q20): What are tools used to aggregate microservices log files?

In the world of microservices, managing log files can be a bit of a juggling act. To simplify this essential task, here are some reliable tools at your disposal:

  • ELK Stack (Elasticsearch, Logstash, Kibana): The ELK Stack is like a well-coordinated trio of tools designed to handle your log data.
    • Logstash: Think of Logstash as your personal data curator. It’s responsible for collecting and organizing log information.
    • Elasticsearch: Elasticsearch acts as your dedicated log archive. It meticulously organizes and stores all your log entries.
    • Kibana: Kibana takes on the role of your trusted detective, armed with a magnifying glass. It allows you to visualize and thoroughly inspect your logs. Whether you’re searching for trends, anomalies, or patterns, Kibana has got you covered.
  • Splunk: Splunk is the heavyweight champion in the world of log management.
    • This commercial tool comes packed with a wide range of features. It not only excels at log aggregation but also offers powerful searching, monitoring, and analysis capabilities.
    • It provides real-time alerts, dynamic dashboards, and even harnesses the might of machine learning for in-depth log data analysis.

Spring Boot Apache Kafka Tutorial: Practical Example

Spring-boot-apache-kafka

Introduction:

When we need to reuse the logic of one application in another application, we often turn to web services or RESTful services. However, if we want to asynchronously share data from one application to another, message queues, and in particular, Spring Boot Apache Kafka, come to the rescue.

Spring Boot Apache Kafka

Message queues operate on a publish-subscribe (pub-sub) model, where one application acts as a publisher (sending data to the message queue), and another acts as a subscriber (receiving data from the message queue). Several message queue options are available, including JMS, IBM MQ, RabbitMQ, and Apache Kafka.

Apache Kafka is an open-source distributed streaming platform designed to handle such scenarios.

Kafka Cluster As Kafka is a distributed system, it functions as a cluster consisting of multiple brokers. A Kafka cluster should have a minimum of three brokers. The diagram below illustrates a Kafka cluster with three brokers:

Apache Kafka Architecture

Spring Boot Kafka Architecture

Kafka Broker A Kafka broker is essentially a Kafka server. It serves as an intermediary, facilitating communication between producers (data senders) and consumers (data receivers). The following diagram depicts a Kafka broker in action:

Kafka Broker Architecture

Kafka Broker Architecture

Main APIs in Spring Boot Apache Kafka

  1. Producer API: Responsible for publishing data to the message queue.
  2. Consumer API: Deals with consuming messages from the Kafka queue.
  3. Streams API: Manages continuous streams of data.
  4. Connect API: Handles connections with Kafka (used by both producers and subscribers).
  5. Admin API: Manages Kafka topics, brokers, and related configurations.

Steps:

Step 1: Download and Extract Kafka

Begin by downloading Kafka from this link and extracting it to your desired location.

Step 2: Start the ZooKeeper Server

The ZooKeeper server provides the environment for running the Kafka server. Depending on your operating system:

For Windows, open a command prompt, navigate to the Kafka folder, and run:

Bash
bin\windows\zookeeper-server-start.bat config\zookeeper.properties

For Linux/Mac, use the following command:

Bash
bin/zookeeper-server-start.sh config/zookeeper.properties

ZooKeeper runs on port 2181.

Step 3: Start the Kafka Server

After starting ZooKeeper, run the Kafka server with the following command for Windows:

Bash
bin\windows\kafka-server-start.bat config\server.properties

For Linux/Mac, use the following command:

Bash
bin/kafka-server-start.sh config/server.properties

Kafka runs on port 9092.

Step 4: Create a Kafka Topic

You can create a Kafka topic using two methods:

4.1. Using Command Line:

Open a command prompt or terminal and run the following command for Windows:

Bash
bin\windows\kafka-topics.bat --create --topic student-enrollments --bootstrap-server localhost:9092

Replace “student-enrollments” with your desired topic name.

For Linux/Mac:

Bash
bin/kafka-topics.sh --create --topic student-enrollments --bootstrap-server localhost:9092

4.2. From the Spring Boot Application (Kafka Producer):

For this, we’ll create a Kafka producer application that will programmatically create a topic.

Step 5: Setting Up a Spring Boot Kafka Producer

Step 5.1: Add Dependencies

In your Spring Boot project, add the following dependencies to your pom.xml or equivalent configuration:

XML
<dependency>
    <groupId>org.springframework.boot</groupId>
    <artifactId>spring-boot-starter-web</artifactId>
</dependency>
<dependency>
    <groupId>org.springframework.kafka</groupId>
    <artifactId>spring-kafka</artifactId>
</dependency>
<dependency>
    <groupId>org.springframework.boot</groupId>
    <artifactId>spring-boot-starter-aop</artifactId>
</dependency>
<dependency>
    <groupId>org.springframework.retry</groupId>
    <artifactId>spring-retry</artifactId>
</dependency>

Step 5.2: Configure Kafka Producer Properties

Add the following Kafka producer properties to your application.properties or application.yml:

Java
# Producer Configurations
spring.kafka.producer.bootstrap-servers=localhost:9092
spring.kafka.producer.key-serializer=org.apache.kafka.common.serialization.StringSerializer
spring.kafka.producer.value-serializer=org.apache.kafka.common.serialization.StringSerializer

Step 5.3: Enable Retry

Add the @EnableRetry annotation to your application class to enable event retrying:

Java
@EnableRetry
@SpringBootApplication
public class KafkaProducerApplication {
    public static void main(String[] args) {
        SpringApplication.run(KafkaProducerApplication.class, args);
    }
}

Step 5.4: Create Kafka Topics

Configure Kafka topics in a KafkaConfig.java class:

Java
@Configuration
public class KafkaConfig {
    public static final String FIRST_TOPIC = "student-enrollments";
    public static final String SECOND_TOPIC = "student-grades";
    public static final String THIRD_TOPIC = "student-achievements";
    
    @Bean
    List<NewTopic> topics() {
        List<String> topicNames = Arrays.asList(FIRST_TOPIC, SECOND_TOPIC, THIRD_TOPIC);
        return topicNames.stream()
            .map(topicName -> TopicBuilder.name(topicName).build())
            .collect(Collectors.toList());
    }
}

Step 5.5: Create a Producer Service:

Implement a ProducerService.java to send messages:

Java
@Service
public class ProducerService {

    @Autowired
    private KafkaTemplate<String, String> kafkaTemplate;

    @Retryable(maxAttempts = 3)
    public CompletableFuture<SendResult<String, String>> sendMessage(String topicName, String message) {
        return this.kafkaTemplate.send(topicName, message);
    }
}

Step 5.6: Create a Student Bean Define a Student class with appropriate getters, setters, and a constructor.

Java
public class Student {
	private String name;
	private String email;
	
	//accessors
}

Step 5.7: Create a Kafka Controller Create a controller to produce messages:

Java
@RestController
public class KafkaController {
    @Autowired
    private ProducerService producerService;
    
    @PostMapping("/produce")
    public ResponseEntity<String> produce(@RequestParam String topicName, @RequestBody Student student)
            throws InterruptedException, ExecutionException {
        String successMessage = null;
        producerService.sendMessage(topicName, "Producing Student Details: " + student);
        successMessage = String.format(
                "Successfully produced student information to the '%s' topic. Please check the consumer.", topicName);
        return ResponseEntity.status(HttpStatus.OK).body(successMessage);
    }
}

Step 6: Spring Boot Consumer Application

You can consume Kafka events/topics in two ways:

Step 6.1: Using Command Line

To consume messages using the command line for Windows, use the following command:

Bash
bin\windows\kafka-console-consumer.bat --topic student-enrollments --from-beginning --bootstrap-server localhost:9092

Step 6.2: Building a Consumer Application

To build a consumer application, follow these steps:

Step 6.2.1: Create a Spring Boot Project Create a Spring Boot project with an application class.

Java
@SpringBootApplication
public class KafkaConsumerApplication {
    public static void main(String[] args) {
        SpringApplication.run(KafkaConsumerApplication.class, args);
    }
}

Step 6.2.2: Create a Kafka Consumer

Implement a Kafka consumer class to consume messages:

Java
@Service
public class KafkaConsumer {
    @KafkaListener(topics = {"student-enrollments", "student-grades", "student-achievements"}, groupId = "group-1")
    public void consume(String value) {
        System.out.println("Consumed: " + value);
    }
}

Step 6.2.3: Configure Kafka Consumer Properties

Configure Kafka consumer properties in application.properties or application.yml:

Java
server.port=8089
spring.kafka.consumer.bootstrap-servers=localhost:9092
spring.kafka.consumer.group-id=group-1
spring.kafka.consumer.auto-offset-reset=earliest
spring.kafka.consumer.key-deserializer=org.apache.kafka.common.serialization.StringDeserializer
spring.kafka.consumer.value-deserializer=org.apache.kafka.common.serialization.StringDeserializer

Step 6.2.4: Run Your Kafka Consumer Application

Make sure to follow each step carefully, and don’t miss any instructions. This guide should help beginners set up and use Apache Kafka with Spring Boot effectively

Now that you’ve set up your Kafka producer and Kafka consumer applications, it’s time to run them.

Execute both the Producer and Consumer applications. In the Producer application, make a request to the following endpoint: http://localhost:8080/produce?topicName=student-enrollments. You will observe the corresponding output in the Consumer application and in the console when you are subscribed to the same “student-enrollments” topic.

Spring Boot Kafka Producer

To monitor the topic from the console, use the following command:

Bash
bin\windows\kafka-console-consumer.bat --topic student-enrollments --from-beginning --bootstrap-server localhost:9092
Spring Boot kafka Consumer Output

You can follow the same process to produce messages for the remaining topics, “student-enrollments” and “student-achievements,” and then check the corresponding output.

Conclusion

To recap, when you need to asynchronously share data between applications, consider using Apache Kafka, a message queue system. Kafka functions in a cluster of brokers, and this guide is aimed at helping beginners set up Kafka with Spring Boot. After setup, run both producer and consumer applications to facilitate data exchange through Kafka.

For more detailed information on the Kafka producer application, you can clone the repository from this link: Kafka Producer Application Repository.

Similarly, for insights into the Kafka consumer application, you can clone the repository from this link: Kafka Consumer Application Repository.

These repositories provide additional resources and code examples to help you better understand and implement Kafka integration with Spring Boot.

Spring Boot API Gateway Tutorial

Spring-Boot-API-Gateway

1. Introduction to Spring Boot API Gateway

In this tutorial, we’ll explore the concept of a Spring Boot API Gateway, which serves as a centralized entry point for managing multiple APIs in a microservices-based architecture. The API Gateway plays a crucial role in handling incoming requests, directing them to the appropriate microservices, and ensuring security and scalability. By the end of this tutorial, you’ll have a clear understanding of how to set up a Spring Boot API Gateway to streamline your API management.

2. Why Use an API Gateway?

In a microservices-based architecture, your project typically involves numerous APIs. The API Gateway simplifies the management of all these APIs within your application. It acts as the primary entry point for accessing any API provided by your application.

Spring Boot API Gateway

3. Setting Up the Spring Boot API Gateway

To get started, you’ll need to create a Spring Boot application for your API Gateway. Here’s the main class for your API Gateway application:

Java
package com.javadzone.api.gateway;

import org.springframework.boot.SpringApplication;
import org.springframework.boot.autoconfigure.SpringBootApplication;
import org.springframework.cloud.client.discovery.EnableDiscoveryClient;

@EnableDiscoveryClient
@SpringBootApplication
public class SpringApiGatewayApplication {
	
	public static void main(String[] args) {
		SpringApplication.run(SpringApiGatewayApplication.class, args);
	}
	
}

In this class, we use the @SpringBootApplication annotation to mark it as a Spring Boot application. Additionally, we enable service discovery by using @EnableDiscoveryClient, which allows your API Gateway to discover other services registered in the service registry.

3.1 Configuring Routes

To configure routes for your API Gateway, you can use the following configuration in your application.yml or application.properties file:

YAML
server:
  port: 7777
  
spring:
  application:
    name: api-gateway
  cloud:
    gateway:
      routes:
        - id: product-service-route
          uri: http://localhost:8081
          predicates:
            - Path=/products/**
        - id: order-service-route  
          uri: http://localhost:8082 
          predicates:
            - Path=/orders/**

In this configuration:

  • We specify that our API Gateway will run on port 7777.
  • We give our API Gateway application the name “api-gateway” to identify it in the service registry.
  • We define two routes: one for the “inventory-service” and another for the “order-service.” These routes determine how requests to specific paths are forwarded to the respective microservices.

3.2 Spring Boot API Gateway Dependencies

To build your API Gateway, make sure you include the necessary dependencies in your pom.xml file:

XML
<dependencies>
    <dependency>
        <groupId>org.springframework.boot</groupId>
        <artifactId>spring-boot-starter-webflux</artifactId>
    </dependency>
    <dependency>
        <groupId>org.springframework.cloud</groupId>
        <artifactId>spring-cloud-starter-bootstrap</artifactId>
    </dependency>
    <dependency>
        <groupId>org.springframework.cloud</groupId>
        <artifactId>spring-cloud-starter-netflix-eureka-client</artifactId>
    </dependency>
    <dependency>
        <groupId>org.springframework.cloud</groupId>
        <artifactId>spring-cloud-starter-gateway</artifactId>
    </dependency>
</dependencies>

4. Running the Microservices

To complete the setup and fully experience the functionality of the Spring Boot API Gateway, you should also run the following components:

4.1. Clone the Repositories:

Clone the repositories for the services by using the following GitHub links:

If you’ve already created the API Gateway using the provided code above, there’s no need to clone it again. You can move forward with starting the services and testing the API Gateway as previously described. if not create api gateway you clone from this repo Spring Boot API Gateway Repository.

You can use Git to clone these repositories to your local machine. For example:

Bash
git clone https://github.com/askPavan/inventory-service.git
git clone https://github.com/askPavan/order-service.git
git clone https://github.com/askPavan/spring-api-gateway.git
git clone https://javadzone.com/eureka-server/

4.2. Build and Run the Services:

For each of the services (Inventory Service, Order Service, Eureka Server) and the API Gateway, navigate to their respective project directories in your terminal.

  • Navigate to the “Services/apis” directory.
  • Build the application using Maven:
Bash
mvn clean install

You can begin running the services by executing the following command:

Bash
java -jar app-name.jar

Please replace “app-name” with the actual name of your API or service. Alternatively, if you prefer, you can also start the services directly from your integrated development environment (IDE).

4.3. Start Eureka Server:

You can run the Eureka Server using the following command:

Bash
java -jar eureka-server.jar

Make sure that you’ve configured the Eureka Server according to your application properties, as mentioned earlier.

When you access the Eureka server using the URL http://localhost:8761, you will be able to view the services that are registered in Eureka. Below is a snapshot of what you will see.

Spring Boot API Gateway

4.4. Test the API Gateway and Microservices:

Once all the services are up and running, you can test the API Gateway by sending requests to it. The API Gateway should route these requests to the respective microservices (e.g., Inventory Service and Order Service) based on the defined routes.

Get All Products:

When you hit the endpoint http://localhost:7777/products using a GET request, you will receive a JSON response containing a list of products:

JSON
[
    {
        "id": 1,
        "name": "Iphone 15",
        "price": 150000.55
    },
    {
        "id": 2,
        "name": "Samsung Ultra",
        "price": 16000.56
    },
    {
        "id": 3,
        "name": "Oneplus",
        "price": 6000.99
    },
    {
        "id": 4,
        "name": "Oppo Reno",
        "price": 200000.99
    },
    {
        "id": 5,
        "name": "Oneplus 10R",
        "price": 55000.99
    }
]

Get a Product by ID:

When you hit an endpoint like http://localhost:7777/products/{id} (replace {id} with a product number) using a GET request, you will receive a JSON response containing details of the specific product:

JSON
{
    "id": 2,
    "name": "Samsung Ultra",
    "price": 16000.56
}

Create a Product Order:

You can create a product order by sending a POST request to http://localhost:7777/orders/create. Include the necessary data in the request body. For example:

JSON
{
    "productId": 1234,
    "userId": "B101",
    "quantity": 2,
    "price": 1000.6
}

You will receive a JSON response with the order details.

JSON
{
    "id": 1,
    "productId": 1234,
    "userId": "B101",
    "quantity": 2,
    "price": 1000.6
}

Fetch Orders:

To fetch orders, send a GET request to http://localhost:8082/orders. You will receive a JSON response with order details similar to the one created earlier.

JSON
{
    "id": 1,
    "productId": 1234,
    "userId": "B101",
    "quantity": 2,
    "price": 1000.6
}

By following these steps and using the provided endpoints, you can interact with the services and API Gateway, allowing you to understand how they function in your microservices architecture.

For more detailed information about the Spring Boot API Gateway, please refer to this repository: Spring Boot API Gateway Repository.

FAQs

Q1. What is an API Gateway? An API Gateway serves as a centralized entry point for efficiently managing and directing requests to microservices within a distributed architecture.

Q2. How does load balancing work in an API Gateway? Load balancing within an API Gateway involves the even distribution of incoming requests among multiple microservices instances, ensuring optimal performance and reliability.

Q3. Can I implement custom authentication methods in my API Gateway? Absolutely, you have the flexibility to implement custom authentication methods within your API Gateway to address specific security requirements.

Q4. What is the role of error handling in an API Gateway? Error handling within an API Gateway plays a crucial role in ensuring that error responses are clear and informative. This simplifies the process of diagnosing and resolving issues as they arise.

Q5. How can I monitor the performance of my API Gateway in a production environment? To monitor the performance of your API Gateway in a production setting, you can leverage monitoring tools and metrics designed to provide insights into its operational efficiency.

Feel free to reach out if you encounter any issues or have any questions along the way. Happy coding!
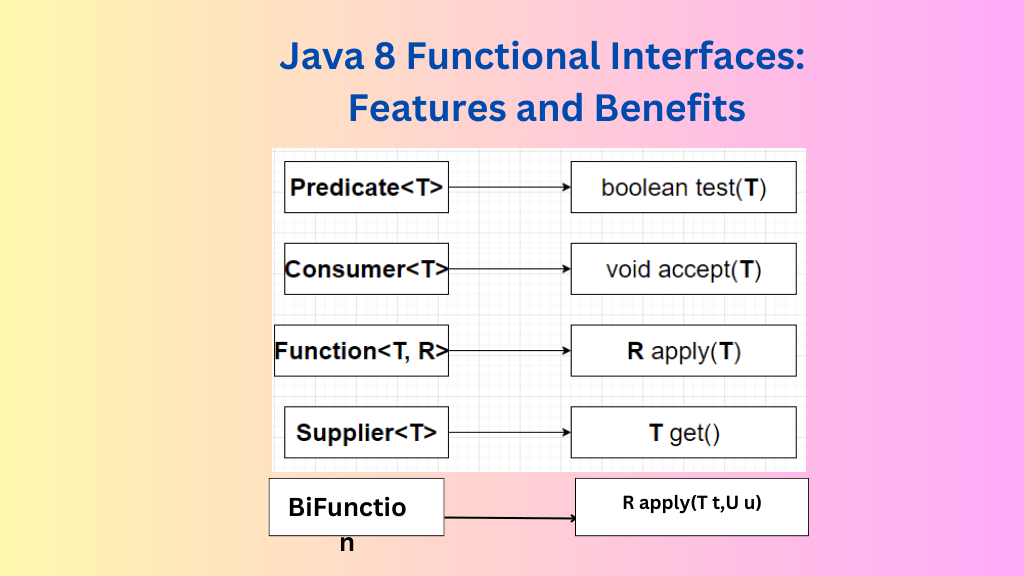
Spring Cloud Config Server Without Git

Spring Cloud Config Server

The Spring Cloud Config Server: Decentralized Configuration Management

The Spring Cloud Config Server empowers us to extract our microservice application’s configuration to an external repository and distribute it across the network in a decentralized manner. This decentralization facilitates convenient accessibility.

Advantages of spring cloud config server

Utilizing the Spring Cloud Config Server offers a significant advantage: the ability to modify service configurations externally, without necessitating changes to the application source code. This circumvents the need to rebuild, repackage, and redeploy the microservice application across various cluster nodes.

Embedding application configuration within the application itself can lead to several complications:

  1. Rebuilding for Configuration Changes: Each configuration change requires rebuilding the application, yielding a new artifact version (jar).
  2. Containerized Environments: In containerized environments, producing and publishing new versions of containerized images (e.g., Docker images) becomes necessary.
  3. Complex Redeployment Process: Identifying running service instances, stopping, redeploying the new service version, and restarting it becomes a complex and time-consuming endeavor, involving multiple teams.
  4. Real-Time Configuration Updates: The Spring Cloud Config Server enables configurations to be updated in real time without service interruption, enhancing agility in response to changing requirements.
  5. Centralized Management: All configurations can be centrally managed and versioned, ensuring consistency and streamlined change tracking.
  6. Decoupling Configurations: By externalizing configurations, services are detached from their configuration sources, simplifying the independent management of configurations.
  7. Consistency Across Environments: The Config Server guarantees uniform configurations across various environments (development, testing, production), reducing discrepancies and errors.
  8. Rollback and Auditing: With version control and historical tracking, reverting configurations and auditing changes becomes seamless.
  9. Enhanced Security and Access Control: The Config Server incorporates security features for controlling access to and modification of configurations, reinforcing data protection.

Spring Cloud: A Solution for Easier Configuration Management

To address these challenges, Spring introduces the Spring Cloud module, encompassing the Config Server and Config Client tools. These tools aid in externalizing application configuration in a distributed manner, streamlining configuration management. This approach delivers the following benefits:

  • The ConfigServer/ConfigClient tools facilitate the externalization of application configuration in a distributed fashion.
  • Configuration can reside in a Git repository location, obviating the need to embed it within the application.
  • This approach expedites configuration management and simplifies the process of deploying and maintaining the application.

By adopting the ConfigServer and ConfigClient tools, Spring Cloud simplifies the management of application configuration, enhancing efficiency and minimizing the time and effort required for deployment and maintenance.

Building Spring Cloud Config Server Example

To build the Spring Cloud Config Server, you can use Maven/gradle as your build tool. Below is the pom.xml file containing the necessary dependencies and configuration for building the config server:

Spring Cloud Config Server Dependency
<dependency>
		<groupId>org.springframework.boot</groupId>
			<artifactId>spring-boot-starter-web</artifactId>
			<exclusions>
				<exclusion>
					<groupId>org.springframework.boot</groupId>
					<artifactId>spring-boot-starter-tomcat</artifactId>
				</exclusion>
			</exclusions>
		</dependency>
		<dependency>
			<groupId>org.springframework.cloud</groupId>
			<artifactId>spring-cloud-config-server</artifactId>
		</dependency>
</dependency>
Activating Spring Cloud Config Server Within Your Spring Boot App
@EnableConfigServer
@SpringBootApplication
public class CloudConfigServerApplication {
    public static void main(String[] args) {
        SpringApplication.run(CloudConfigServerApplication.class, args);
    }
}

By adding the @EnableConfigServer annotation, you activate the Spring Cloud Config Server features within your application.

Include the following configurations in the properties

To configure your Spring Cloud Config Server, you can make use of the application.properties file. For instance:

server.port=8888
spring.application.name=cloud-config-server
server.servlet.context-path=/api/v1
Customizing Configuration Search Locations with application-native.properties

Furthermore, you can include configurations specific to the application-native.properties file. If your configuration client searches for configurations in the classpath’s /configs folder, you can specify this in the properties:

  1. Create an application-native.properties file in the resources folder.
  2. Include the following configuration in the file to define the search locations:
spring.cloud.config.server.native.searchLocations=classpath:/configs,classpath:/configs/{application}

With these configurations in place, your Spring Cloud Config Server will be primed to handle configuration management effectively.

Generate a configuration file using the exact name as the config client application, and craft properties files corresponding to different environments. For instance:

Spring cloud config server

Include the following properties within the cloud-config-client-dev.properties file. You can adjust the properties according to the specific profiles:

spring.application.name=cloud-config-client
server.port=8080
student.name=Sachin
student.rollNo=1234
student.email=sachin@gmail.com
student.phone=123456789

To initiate the application, provide the subsequent VM argument:

-Dspring.profiles.active=local,native

For further reference, you can access the source code on GitHub at: https://github.com/askPavan/cloud-config-server

Spring Cloud Config Client

Spring Cloud Config Client Example

During the boot-up of the service, the Spring Cloud Config Client connects to the config server and fetches the service-specific configuration over the network. This configuration is then injected into the Environment object of the IOC (Inversion of Control) container, which is used to start the application.

Create the Spring Boot Project

Let’s kick off by creating a Spring Boot Maven project named “spring-cloud-config-client.” To achieve this, there are two paths you can take: either visit the Spring Initializer website Spring Initializer or leverage your trusted Integrated Development Environment (IDE). The resulting project structure is as follows.

Spring cloud config client

Spring Cloud Config Client Example

To understand the implementation of Spring Cloud Config Client, let’s walk through a hands-on example.

Begin by creating a Spring Boot project and adding the following dependencies to your pom.xml:

<dependency>
  <groupId>org.springframework.cloud</groupId>
  <artifactId>spring-cloud-starter-config</artifactId>
</dependency>
<dependency>
  <groupId>org.springframework.cloud</groupId>
  <artifactId>spring-cloud-starter-bootstrap</artifactId>
</dependency>

Implementing Spring Cloud Config Client in Microservices: A Step-by-Step Guide

In your main application class, the heart of your Spring Boot application, bring in essential packages and annotations. Introduce the @RefreshScope annotation, a key enabler for configuration refreshing. Here’s a snippet to illustrate:

Java
@SpringBootApplication
@RefreshScope
public class CloudConfigClientApplication implements ApplicationRunner{

	@Autowired
	private StudentsController studentsController;
	
	@Value("${author}")
	private String author;
	
	public static void main(String[] args) {
		SpringApplication.run(CloudConfigClientApplication.class, args);
	}

	@Override
	public void run(ApplicationArguments args) throws Exception {
		System.out.println(studentsController.getStudentDetails().getBody());
		System.out.println("Author ** "+author);
	}

}

Include the following configurations in your application.properties or application.yml file to set up Spring Cloud Config

management:
  endpoint:
    refresh:
      enabled: true
  endpoints:
    web:
      exposure:
        include:
        - refresh
      
spring:
  application:
    name: cloud-config-client
  config:
    import: configserver:http://localhost:8888/api/v1
  profiles:
    active: dev
  main:
    allow-circular-references: true

In your main class, import necessary packages and annotations. Add the @RefreshScope annotation to enable configuration refresh. Here’s an example:

@SpringBootApplication
@RefreshScope
public class CloudConfigClientApplication implements ApplicationRunner{

	@Autowired
	private StudentsController studentsController;
		
	public static void main(String[] args) {
		SpringApplication.run(CloudConfigClientApplication.class, args);
	}
	
	//printing student details from config server.
	@Override
	public void run(ApplicationArguments args) throws Exception {
		System.out.println(studentsController.getStudentDetails().getBody());
	}

}

Here’s an example of a simple Student bean class

public class Student {

	private String studentName;
	private String studentRollNo;
	private String studentEmail;
	private String phone;
	//Generate getters and setters
}

Create a student REST controller

@RestController
@RequestMapping("/api/v1")
public class StudentsController {

	@Autowired
	private Environment env;
		
	@GetMapping("/students")
	public ResponseEntity<Student> getStudentDetails(){
		Student student = new Student();
		student.setStudentName(env.getProperty("student.name"));
		student.setStudentRollNo(env.getProperty("student.rollNo"));
		student.setStudentEmail(env.getProperty("student.email"));
		student.setPhone(env.getProperty("student.phone"));
		return new ResponseEntity<Student>(student, HttpStatus.OK);
	}
}
  1. Start the Spring Cloud Config Server: Before setting up the Spring Cloud Config Client, ensure the Spring Cloud Config Server is up and running.
  2. Start the Spring Cloud Config Client: Next, initiate the Spring Cloud Config Client by starting your application with the desired profile and Spring Cloud Config settings using the command below:
Bash
java  -Dspring.profiles.active=dev  -jar target/your-application.jar

Replace:

  • dev with the desired profile (dev, sit, uat, etc.).
  • http://config-server-url:8888 with the actual URL of your Spring Cloud Config Server.
  • your-application.jar with the name of your application’s JAR file.

After starting the application with the specified Spring Cloud Config settings, you can access the following local URL: http://localhost:8081/api/v1/students. The output looks like below when you hit this endpoint:

{
    "studentName": "Sachin",
    "studentRollNo": "1234",
    "studentEmail": "sachin1@gmail.com",
    "phone": "123456781"
}

For more information on setting up and using Spring Cloud Config Server, you can refer Spring Config Server blog post at https://javadzone.com/spring-cloud-config-server/.

In a nutshell, Spring Cloud Config Client enables seamless integration of dynamic configurations into your Spring Boot application, contributing to a more adaptive and easily maintainable system. Dive into the provided example and experience firsthand the benefits of efficient configuration management. If you’d like to explore the source code, it’s available on my GitHub Repository: GitHub Repository Link. Happy configuring!

Spring Boot Eureka Discovery Client

Spring Boot Eureka Discovery Client

In today’s software landscape, microservices are the building blocks of robust and scalable applications. The Spring Boot Eureka Discovery Client stands as a key enabler, simplifying the intricate web of microservices. Discover how it streamlines service discovery and collaboration.

Spring Boot Eureka Client Unveiled

Diving Deeper into Spring Boot Eureka Client’s Vital Role

The Spring Boot Eureka Client plays an indispensable role within the Eureka service framework. It serves as the linchpin in the process of discovering services, especially in the context of modern software setups. This tool makes the task of finding and working with services in microservices exceptionally smooth.

Your Guide to Effortless Microservices Communication

Navigating Microservices with the Spring Boot Eureka Client

Picture the Eureka Discovery Client as an invaluable guide in the world of Eureka. It simplifies the intricate process of connecting microservices, ensuring seamless communication between different parts of your system.

Spring Boot Eureka Discovery Client as Your Service Discovery Library

Delving Deeper into the Technical Aspects

From a technical standpoint, think of the Eureka Discovery Client as a library. When you integrate it into your microservices, it harmonizes their operation with a central Eureka Server, acting as a hub that keeps real-time tabs on all available services across the network.

Empowering Microservices with Spring Boot Eureka Client

Discovering and Collaborating with Ease

Thanks to the Eureka Discovery Client, microservices can effortlessly join the network and discover other services whenever they need to. This capability proves invaluable, particularly when dealing with a multitude of services that require quick and efficient collaboration.

Simplifying Setup, Strengthening Microservices

Streamlining Setup Procedures with the Spring Boot Eureka Client

One of the standout advantages of the Eureka Discovery Client is its ability to simplify the often complex setup procedures. It ensures that services can connect seamlessly, freeing you to focus on enhancing the resilience and functionality of your microservices.

Getting Started with Spring Boot Eureka Client

Your Journey Begins Here

If you’re contemplating the use of the Spring Boot Eureka Client, here’s a step-by-step guide to set you on the right path:

Setting Up Eureka Server

Establishing Your Eureka Server as the Central Registry

Before integrating the Eureka Discovery Client, you must have a fully operational Eureka Server. This server serves as the central registry where microservices register themselves and discover other services. For detailed instructions, refer to the Eureka Server Setup Guide.

Adding Dependencies for Spring Boot Eureka Discovery Client

Integrating Essential Dependencies into Your Microservice Project

In your microservice project, including the required dependencies is essential. If you’re leveraging Spring Boot, add the spring-cloud-starter-netflix-eureka-client dependency to your project’s build file. For instance, in a Maven project’s pom.xml or a Gradle project’s build.gradle:

Eureka Discovery Client Maven Dependency

XML
<dependency>
    <groupId>org.springframework.cloud</groupId>
    <artifactId>spring-cloud-starter-netflix-eureka-client</artifactId>
</dependency>

Eureka Client Gradle Dependency

Integrating the Eureka Client Dependency in Your Gradle Project

To include the Spring Boot Eureka Client in your Gradle project, add the following dependency to your build.gradle file:

Java
dependencies {
    implementation 'org.springframework.cloud:spring-cloud-starter-netflix-eureka-client'
}

Configuring Application Properties

Optimizing the Spring Boot Eureka Client Configuration

Tailoring your microservice’s properties and Eureka client settings in the application.properties file is crucial for optimal usage of the Spring Boot Eureka Client. Below is a sample configuration:

Java
spring:
  application:
    name: eureka-discovery-client-app
server:
  port: 8089
eureka:
  client:
    register-with-eureka: true
    fetch-registry: false
    service-url:
      defaultZone: http://localhost:8761/eureka/,http://localhost:8762/eureka/
  instance:
     preferIpAddress: true

Enabling Spring Boot Eureka Discovery Client

Activating the Power of Spring Boot Eureka Client

To enable the Spring Boot Eureka Client functionality in your Java code, annotate your main application class as shown below:

Java
@EnableDiscoveryClient
@SpringBootApplication
public class EurekaClientApplication {

	public static void main(String[] args) {
		SpringApplication.run(EurekaClientApplication.class, args);
	}
}
Service Registration and Discovery

Automated Service Registration and Effortless Discovery

Once your microservice initializes, it will autonomously register itself with the Eureka Server, becoming a part of the network. You can confirm this registration by examining the Eureka Server’s dashboard. Simply visit your Eureka Server’s URL, e.g., http://localhost:8761/

Spring Boot Eureka Discovery Client
Seamlessly Discovering Services

Locating Services in Your Microservices Architecture

To locate other services seamlessly within your microservices architecture, leverage the methods provided by the Eureka Discovery Client. These methods simplify the retrieval of information regarding registered services. Programmatically, you can acquire service instances and their corresponding endpoints directly from the Eureka Server.

For further reference and to explore practical examples, check out the source code illustrating this process on our GitHub repository.

Reload Application Properties in Spring Boot: 5 Powerful Steps to Optimize

Refresh Configs without restart

In the world of Microservices architecture, efficiently managing configurations across multiple services is crucial. “Reload Application Properties in Spring Boot” becomes even more significant when it comes to updating configurations and ensuring synchronization, as well as refreshing config changes. However, with the right tools and practices, like Spring Cloud Config and Spring Boot Actuator, this process can be streamlined. In this guide, we’ll delve into how to effectively propagate updated configurations to all Config Clients (Microservices) while maintaining synchronization.

Spring Cloud Config Server Auto-Reload

When you make changes to a configuration file in your config repository and commit those changes, the Spring Cloud Config Server, configured to automatically reload the updated configurations, becomes incredibly useful for keeping your microservices up to date.

To set up auto-reloading, you need to configure the refresh rate in the Config Server’s configuration file, typically located in application.yml or application.properties. The “Reload Application Properties in Spring Boot” guide will walk you through this process, with a focus on the refresh-rate property, specifying how often the Config Server checks for updates and reloads configurations.

spring:
  cloud:
    config:
      server:
        git:
          refresh-rate: 3000 # Set the refresh rate in milliseconds

Refresh Config Clients with Spring Boot Actuator

To get started, add the Spring Boot Actuator dependency to your microservice’s project. You can do this by adding the following lines to your pom.xml:

<dependency>
    <groupId>org.springframework.boot</groupId>
    <artifactId>spring-boot-starter-actuator</artifactId>
</dependency>

While the Config Server reloads configurations automatically, the updated settings are not automatically pushed to the Config Clients (microservices). To make sure these changes are reflected in the Config Clients, you must trigger a refresh.

This is where the “Reload Application Properties in Spring Boot” guide becomes crucial. Spring Boot Actuator provides various management endpoints, including the refresh endpoint, which is essential for updating configurations in Config Clients.

Reload Application Properties in Spring Boot: Exposing the Refresh Endpoint

Next, you need to configure Actuator to expose the refresh endpoint. This can be done in your microservice’s application.yml or .properties file:

management:
  endpoint:
    refresh:
      enabled: true
  endpoints:
    web:
      exposure:
        include: refresh

Java Code Example

Below is a Java code example that demonstrates how to trigger configuration refresh in a Config Client microservice using Spring Boot:

import org.springframework.beans.factory.annotation.Value;
import org.springframework.boot.SpringApplication;
import org.springframework.boot.autoconfigure.SpringBootApplication;
import org.springframework.cloud.context.config.annotation.RefreshScope;
import org.springframework.web.bind.annotation.GetMapping;
import org.springframework.web.bind.annotation.RestController;
import org.springframework.cloud.context.refresh.ContextRefresher;

@SpringBootApplication
public class ConfigClientApplication {

    public static void main(String[] args) {
        SpringApplication.run(ConfigClientApplication.class, args);
    }
}

@RestController
@RefreshScope
public class MyController {

    @Value("${example.property}")
    private String exampleProperty;

    private final ContextRefresher contextRefresher;

    public MyController(ContextRefresher contextRefresher) {
        this.contextRefresher = contextRefresher;
    }

    @GetMapping("/example")
    public String getExampleProperty() {
        return exampleProperty;
    }

    @GetMapping("/refresh")
    public String refresh() {
        contextRefresher.refresh();
        return "Configuration Refreshed!";
    }
}
  1. Reload Application Properties:
  • To trigger a refresh in a Config Client microservice, initiate a POST request to the refresh endpoint. For example: http://localhost:8080/actuator/refresh.
  • This request will generate a refresh event within the microservice.

Send a POST Request with Postman Now, open Postman and create a POST request to your microservice’s refresh endpoint. The URL should look something like this:

Reload Application Properties in Spring Boot

2. Bean Reloading:

  • Configurations injected via @Value annotations in bean definitions adorned with @RefreshScope will be reloaded when a refresh is triggered.
  • If values are injected through @ConfigurationProperties, the IOC container will automatically reload the configuration.

By following these steps and incorporating the provided Java code example, you can effectively ensure that updated configurations are propagated to your Config Clients, and their synchronization is managed seamlessly using Spring Cloud Config and Spring Boot Actuator. This approach streamlines configuration management in your microservices architecture, allowing you to keep your services up to date efficiently and hassle-free.

“In this guide, we’ve explored the intricacies of Spring Cloud Config and Spring Boot Actuator in efficiently managing and refreshing configuration changes in your microservices architecture. To delve deeper into these tools and practices, you can learn more about Spring Cloud Config and its capabilities. By leveraging these technologies, you can enhance your configuration management and synchronization, ensuring seamless operations across your microservices.”

Related Articles:

Spring Boot Eureka Server Tutorial

In the ever-evolving realm of microservices architecture, services like Netflix Eureka Server are spread across various nodes within a cluster. Unlike monolithic applications, where services are tightly integrated, microservices often run on specific cluster nodes, presenting a challenge for client applications striving to connect with them.

Introduction: Simplifying Microservices with Eureka Server

Microservices are a powerful architectural approach for building scalable and maintainable systems. However, in a distributed microservices environment, locating and connecting with individual services can be complex. This is where the Netflix Eureka Server comes to the rescue. Eureka Server simplifies service discovery, enabling microservices to effortlessly locate and communicate with each other within a cluster.

Understanding Eureka Server

Eureka Server, often referred to as Netflix Eureka Server, acts as a centralized service registry within a microservices cluster. During initialization, each microservice registers its information with the Eureka Server. This typically includes the service’s name, network location, and other pertinent details.

Real-World Example: Eureka Server in Action

To better understand the practical utility of Eureka Server, let’s delve into a real-world example. Imagine you’re responsible for building a large-scale e-commerce platform composed of various microservices. These microservices include the product catalog, user authentication, payment processing, order management, and more.

In a microservices-based architecture, these services may be distributed across different servers or containers within a cloud-based environment. Each service needs to communicate with others efficiently to provide a seamless shopping experience for customers.

This is where Eureka Server comes into play. By integrating Eureka Server into your architecture, you create a centralized service registry that keeps track of all available microservices. Let’s break down how it works:

  1. Service Registration: Each microservice, such as the product catalog or payment processing, registers itself with the Eureka Server upon startup. It provides essential information like its name and network location.
  2. Heartbeats: Microservices send regular heartbeats to Eureka Server to indicate that they are operational. If a service stops sending heartbeats (e.g., due to a failure), Eureka Server can mark it as unavailable.
  3. Service Discovery: When one microservice needs to communicate with another, it queries the Eureka Server to discover the service’s location. This eliminates the need for hardcoding IP addresses or endpoints, making the system more dynamic and adaptable.
  4. Load Balancing: Eureka Server can also help with load balancing. If multiple instances of a service are registered, Eureka can distribute requests evenly, improving system reliability and performance.

In our e-commerce example, the product catalog service can easily locate and interact with the payment processing service using Eureka Server. As traffic fluctuates, Eureka Server ensures that requests are distributed optimally, preventing overloading on any single instance.

By employing Eureka Server, you streamline the development, deployment, and scaling of your microservices-based e-commerce platform. It simplifies service discovery and enhances the overall reliability of your system.

This real-world example demonstrates how Eureka Server can be a game-changer in managing and scaling microservices, making it a valuable tool in modern software development.

Eureka Server Spring Boot Integration

One of the strengths of Eureka Server is its seamless integration with the Spring Boot framework through Spring Cloud. By incorporating the spring-cloud-starter-eureka-server dependency into your project, configuring the server becomes straightforward. This simplification expedites the setup process, allowing microservices, especially those built with Spring Boot, to quickly join the Eureka ecosystem.

Initiating the Project Spring cloud config client project

Let’s kick off by creating a Spring Boot Maven project named “eureka-server” To achieve this, there are two paths you can take: either visit the Spring Initializer website Spring Initializer or leverage your trusted Integrated Development Environment (IDE). The resulting project structure is as follows.

eureka server

Implementing Eureka Server

Maven Dependency for Eureka Server

For projects managed with Maven, you’ll often search for the following dependency to include in your pom.xml file:

XML
<dependency>
    <groupId>org.springframework.cloud</groupId>
    <artifactId>spring-cloud-starter-netflix-eureka-server</artifactId>
</dependency>

Gradle Dependency for Eureka Server

If you prefer Gradle for your project, many search for this dependency to add to your build.gradle file:

XML
dependencies {
    implementation 'org.springframework.cloud:spring-cloud-starter-netflix-eureka-server'
}

Eureka Server Configuration

To configure Eureka Server, create an application.yml or application.properties file. Below is an example configuration in YAML format:

Java
spring:
  application:
    name: eureka-server

server:
  port: 8761
eureka:
  client:
    register-with-eureka: false
    fetch-registry: false
    healthcheck:
      enabled: true

Eureka Server Configuration

Java
@EnableEurekaServer
@SpringBootApplication
public class EurekaServerApplication {
    public static void main(String[] args) {
        SpringApplication.run(EurekaServerApplication.class, args);
    }
}

Running the Eureka Server Application

To begin using Eureka Server, follow these steps to run the application on your local machine without any plagiarism:

  1. Clone the Repository:
  • Launch your terminal and navigate to the desired directory where you intend to clone the Eureka Server repository.
  • Execute the following command to clone the repository without any copied content:
Bash
git clone https://github.com/askPavan/eureka-server

2. Build the Application:

  • Go to the directory where you have cloned the Eureka Server repository.
  • Utilize the following command to build the Eureka Server application:

3. Run the application.

4. Access the Eureka Server Dashboard:

  • Once the server is up and running, open your web browser.
  • Enter the following URL to access the Eureka Server dashboard:
Java
http://localhost:8761/

For the Eureka Client application, you can use the following URL: Eureka Client App URL

4. View the Eureka Server Output:

  • You will now see the Eureka Server dashboard, which displays information about the registered services and their status.
  • Explore the dashboard to see the services that have registered with Eureka Server.

Example Output

Here is an example of what the Eureka Server dashboard might look like once the server is running:

what is eureka server

By running both the Eureka Server and Eureka Client applications, you can observe how services are registered and discovered in the Eureka ecosystem. This hands-on experience will help you better understand the functionality of Eureka Server and its interaction with client applications. For the source code of the Eureka Client, you can refer to this GitHub repository.

Exploring Practical Examples

For hands-on experience and practical illustrations, you can explore our GitHub repository. This repository contains real-world implementations of Eureka Server using Spring Boot.

Conclusion: Simplifying Microservices with Eureka Server

In conclusion, Eureka Server is a potent tool for simplifying microservices in a distributed architecture. Its seamless integration with Spring Boot streamlines the setup process, enabling you to efficiently implement Eureka Server in your microservices ecosystem.

Eureka Server facilitates effortless service discovery, allowing microservices to seamlessly identify and communicate with one another. This capability is indispensable for constructing robust and efficient distributed systems.

What are Microservices?

What are Microservices

Spring Boot Microservices, an innovative approach to developing software applications, involve decomposing the software application into

  • Smaller
  • Independent
  • Deployable
  • Loosely coupled
  • Collaborative Services

Services through which we can bring down the complexity in understanding the application and ease the delivery of the application.

Before Moving to Microservices We need to understand Monolithic Architecture.

Microservices vs Monolith

What is Monolithic Application Architecture?

Monolithic application has several modules as part of it, all of these modules are built as one single system and delivered as a single deployable artifact, which is nothing but monolithic application development architecture.

Microservices Architecture:

What are microservices

What are the reasons for choosing monolithic architecture

1. Easy to scale the applications.

2. You won’t to adopt continuous integration and delivery for your application

3. Developers will be able to quickly understand the application and be productive in development and delivery

Advantages of Monolithic Architecture

1. Achieving scalability is very easy :

if the load on the system is high, then we can copy the single deployable artifact of our application across multiple servers across the cluster.

2. Easy to understand

The entire software system has been built out of one single code base, the entire team of developers knows everything about the system they are working on. understanding such a software system out of a single code base is very easily and developers can be productive in building and delivery the application

3. As the entire system is build as a single deployable artifact we can easily achieve continuous integration and delivery(CI/CD) without any module dependency complexities

4. Monolithic architecture-based application development is better suited for applications that are less/moderate in size but if the application grows bigger in size, managing the development and delivery aspects of the system through monolithic architecture brings lot of problems.

Disadvantage of Monolithic Architecture

1. The entire system is built out of single codebase:

Many of the developers will be afraid to understand such a big system and feel very complicated in understanding and developing it.

Many of the developers don’t know how to achieve modularity in writing the code due to which they quickly exploit the code base.

A change impact is going to be very high and difficult to handle.

2. Overloaded (IDE)

Due to the huge code base, the ide’s cannot handle in managing the code.

To develop the code sophisticatedly by the developer he should ensure the code is loaded and in clean state in ide, he can write compilable code.

3. overloaded web containers

Deploying a huge application, makes the container take more time in starting up, and during debugging the application repeated deployment of the application for verifying code changes takes lot of time and kills the developer’s productivity.

4. Scalability

In monolithic architecture scalability is achieved in one dimension only which means horizontal scaling. If the application receives more volumes of request, even though the traffic comes to one or few modules of the system, we can only scale the system as a whole by deploying on multiple servers due to which

  i). The cost of achieving the scalability is going to be very high, as the whole system is scaled up we need to buy big servers with huge computing capacity

  ii). different parts of the system as different computing requirements, like few modules are memory intensive, few modules are CPU intensive, during scaleup we cannot consider such requirements in scaling up the system

5. Scaling up the Team is difficult

The more/bigger the application grows, we need more resources in the team to work on, but handling such a huge team is going to be pain point, as people cannot independently work on separate functional modules due to dependencies. resource handling becomes much complex in distributing the work.

6. Long-Term commitment to technology stack

While building application with monolithic architecture, we need to be committed to an technical stack in building the application for a long-term. because adopting new technologies requires the entire system to be migrated as it exists as a single code base.

7. CI/CD is going to be very difficult

When and ever a module has been finished its development, we cannot release it independently as other modules code changes are also part of the same code base due to long term release planning and deployments are required.

Microservices Architecture:

Microservices using Spring Boot

Microservices is an architectural style of developing software applications. In microservices based architecture we decompose the software application into

  • Smaller
  • Independent
  • Deployable
  • Loosely coupled
  • Collaborative Services

We develop the application by breaking down the entire application in independent smaller services that can be developed and delivered by individual team of developers

We identify the business responsibilities and break them into independent services/projects which are built on REST architectural principles by independent teams and are deployable separately

Benefits of developing application on microservices architecture

1. They can be different team of developers can independently develop, test and delivery the system

2. Each service we develop has a separate source code which can be understood easily by the developer and can maintain it

  •     – achieving modularity becomes easy
  •     – change impact will be very minimal
  •     – debugging the code becomes very easy

3. Every team has their independent separate source code, they can get the code up quickly in an ide and can proceed for development

4. The more the services/functionality we can broke down into multiple independent services can choose more teams to develop parallelly

5. scalability

  In microservices based application as each services/module is being deployed separately we can achieve vertical scaling

  •   depends on the traffic patterns we can scale a specific module or service quickly rather than the entire system where the cost of scalability is very less as we are scaling a piece of the system
  •   we can customize the machine capacity based on the nature of the service like cpu oriented/memory-oriented services

6. Adopting the new technologies can be really faster, either we can choose one of the services to be migrated out of the current system or we can build new services on the latest technology easily

7. Easy to achieve ci/cd as every service is independent of the others, we can deliver a service without bothering about the others.

Advantages of using microservices architecture?

  • 1. as the smaller codebase it is easy to manage within the ide.
  • 2. application servers are not overloaded and the application quickly gets started and debugging the application will not takes more time because of smaller code base
  • 3. scalability we can achieve vertical scalability in microservices
  •   – a specific module can be scaled up independent of the whole system based on the traffic/load
  •   – we can customize the computing aspects in scaling the service like cpu bounded and memory bounded
  • 4. we can adopt new technologies quickly, as services are development independently, we can migrate a service or develop new services are latest technologies
  • 5. easy to understand and develop the application as each service is built out of its independent code base developer often feel very easy in understanding the system. modularity can be achieved very easily. impact of a  change request is minimal and easy to manage. less complex and easy to maintain. debugging the application is going to be very easy.
  • 6. ci/cd can be adopted easily
  • 7. we can have multiple teams developing the system parallelly

Conclusion:

In the realm of software development, Spring Boot Microservices have emerged as a game-changer, offering agility, scalability, and modularity. We’ve explored the fundamental concepts behind microservices-based architecture and how they can reduce the complexity of software applications while enhancing delivery.

However, it’s essential to remember that successfully implementing microservices goes beyond theoretical knowledge. To master this architectural style and unlock its full potential, you’ll need to dive into practical implementations and real-world examples.

For More Practical Information:

Fortunately, all the practical tutorials and hands-on guidance you need to embark on your microservices journey are right here on our blog. Explore our comprehensive tutorials, case studies, and examples to gain not only a theoretical understanding but also the practical skills to apply microservices effectively in your software projects.

So, roll up your sleeves, venture into the world of microservices, and discover the transformative power they can bring to your software development endeavors—available exclusively on our blog!

When it comes to implementing microservices architecture, it’s crucial to have a solid understanding of the key principles and best practices. For more in-depth insights and resources, I recommend visiting Microservices.io.